7
Battery
Charger
LED
Battery
Charger
Fully charge the battery before rst use.
We recommend that the Orion3 knee should be fully
charged every night. It should take up to 8 hours to
charge fully. We also recommend battery charging
whenever convenient. Beware; misalignment while
plugging in may cause damage to the connector.
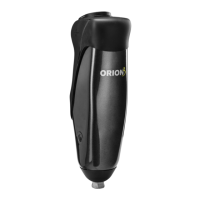
Step by Step Guide:
1. Lay the knee on a at surface.
2. Switch the Battery On/O switch to ON.
3. Connect the charger plug to the charging socket on
the posterior part of the knee module.
4. Check the Battery Charger LED is ashing green to
conrm the battery is charging.
5. Refer to table below to ensure the knee is charging.
6. Disconnect from the charger when charged
suciently.
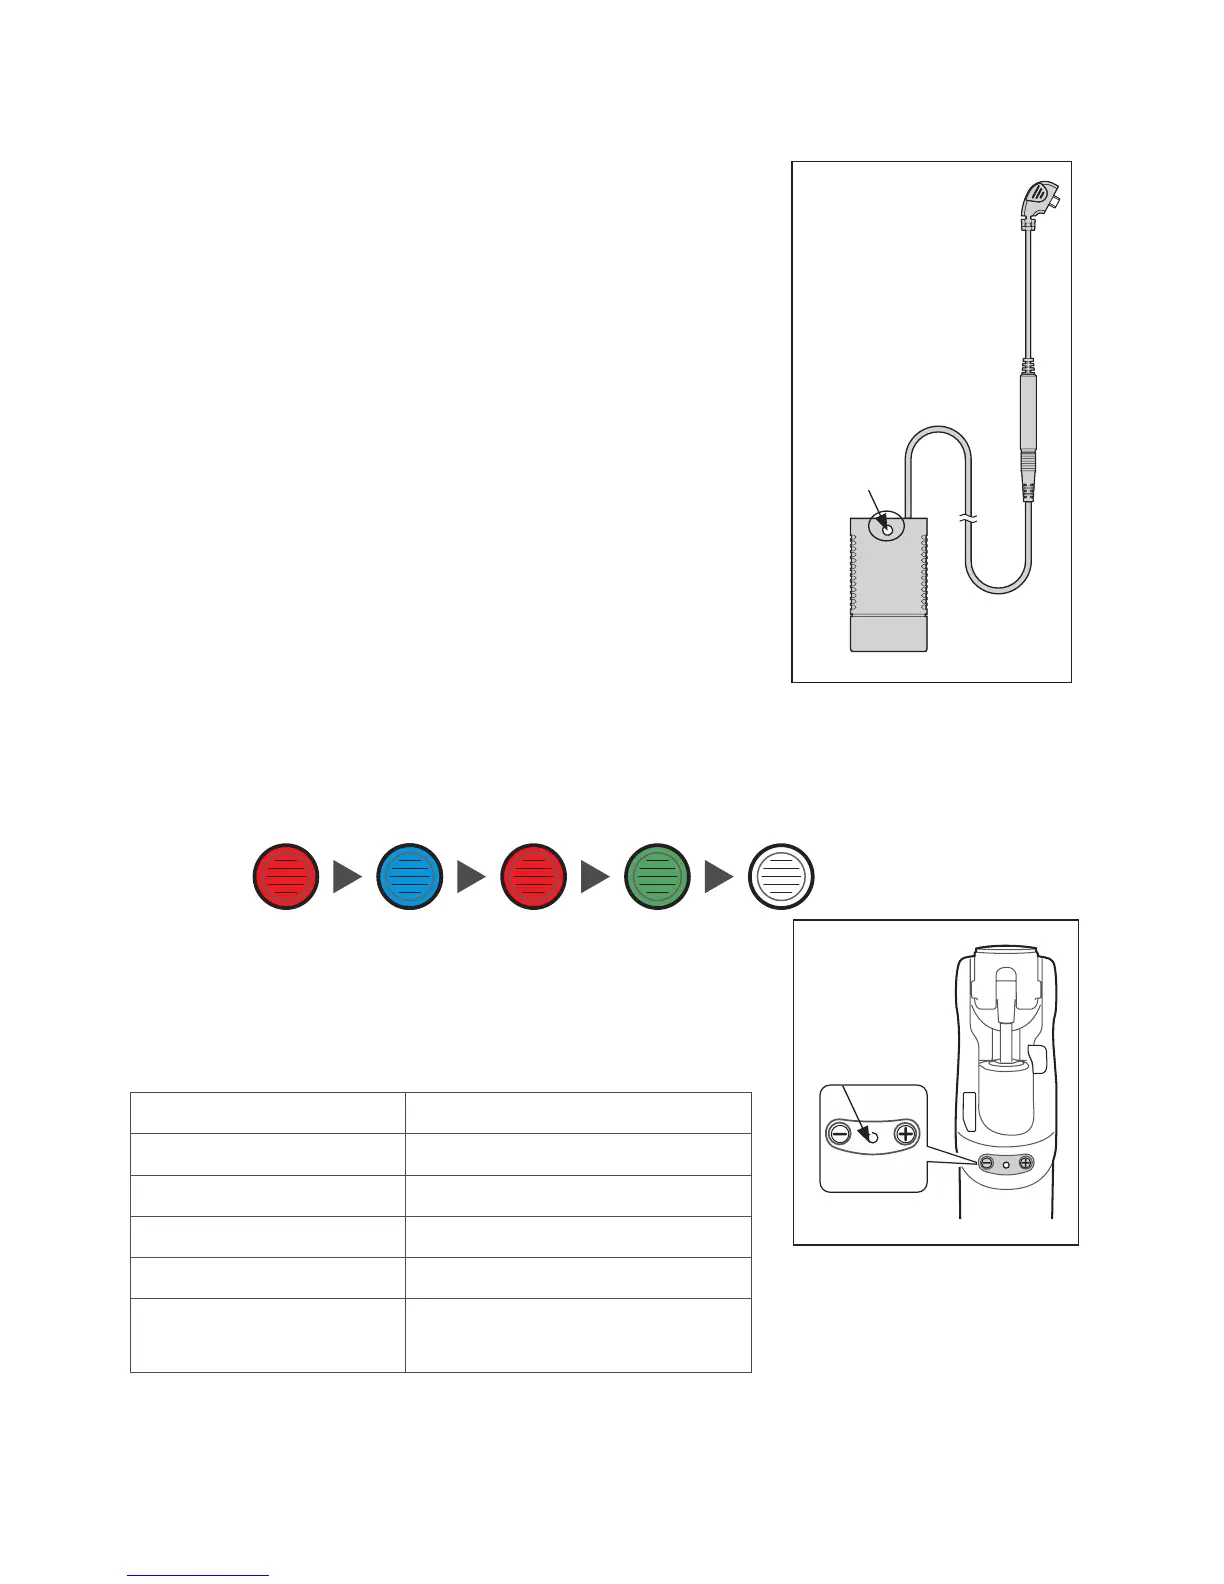
7. Wait for 30 seconds while observing the Orion3 LED
changing color as indicated:
8. After a successful reset sequence 2 short beeps will
be heard.
9. If the reset sequence is unsuccessful or the LED
remains Red switch the battery O then On and
repeat from step 7.
Battery Charging (continued)
Battery Charger LED Charging state
Yellow Standby
Green > fast ashing Fast charging
Green > slow ashing Close to full charge
Green Maintain (trickle charge)
Yellow > fast ashing Error (Ensure Battery Switch
is ON)
NOTE:
If the battery charger LED is yellow and the knee
is making a clicking noise check that the Battery
switch is in the ON position.
Orion3
LED
Red Blue Red Green O
LED
The user can enable/
disable the audible reset
conrmation by pressing
and holding the [+] and
[-] buttons simultaneously
for 2 seconds. The change
will be conrmed by 2
short beeps.
 Loading...