Do you have a question about the Endura PanoLock and is the answer not in the manual?
Ensure the lock mortise in the panel edge is clear of dust and debris before installation.
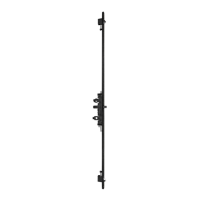
Orient the lock assembly as shown in the provided diagrams for correct installation.
Place the lock assembly into the designated mortise pocket on the panel edge.
Confirm lock face plate is flush with panel edge and drive hubs align with bores.
Secure the lock using the specified installation screws in the designated open holes.
Ensure the angled surface of the latch faces the strike plate for correct lock handing.
Loosen the latch screw with a 9/64" allen wrench to adjust the lock's handing.
Rotate the latch 180 degrees, ensuring slots align with ribs, and note component placement.
Tighten the screw to firmly secure the rehanded latch in its position.
Test lock functionality by retracting and extending latches using a screwdriver and pin button.
The PanoLock™ Multi-Point Lock is a sophisticated door locking system designed for enhanced security and ease of use, featuring multiple locking points along the door's edge. This system is engineered to provide a robust and secure closure, distributing the locking force across several points rather than relying on a single latch. The multi-point design significantly increases resistance against forced entry, making it a reliable choice for securing exterior doors.
The primary function of the PanoLock™ system is to secure a door panel at multiple points simultaneously, offering superior security compared to conventional single-lpoint locks. When engaged, the system extends several latches or bolts into the door frame, creating a strong, continuous seal. This multi-point engagement not only enhances security but also contributes to better weather sealing and reduced door warping over time by holding the door panel firmly in place. The system incorporates a central latch, along with upper and lower latches, which are all controlled by a single mechanism. This integrated control allows for quick and efficient locking and unlocking of all points. The design also includes a spring adjuster screw, which likely allows for fine-tuning of the latch tension or engagement, ensuring a snug fit and smooth operation. The lock's handing can be adjusted, meaning it can be configured for both left-hand and right-hand opening doors, providing versatility in installation. The system is designed to be installed within the mortise pocket of the door panel, maintaining a clean and flush appearance on the door's edge.
The PanoLock™ system is designed for straightforward installation and user-friendly operation. The installation process begins by ensuring the door panel's mortise pocket is clean and free of debris, which is crucial for proper lock placement and function. The lock assembly is then oriented correctly and placed into the mortise pocket, with careful attention to aligning the lock drive hubs with the panel face bores. This alignment is critical for the subsequent attachment of door hardware, such as handles and cylinders, which will operate the lock. Once the lock is properly seated, it is secured with a series of screws of varying lengths. Specifically, two #8 x 3" screws are used just above the latch and below the spring adjuster screw, while four #8 x 1-5/8" screws secure the remaining open holes. These screws ensure the lock face plate sits flush with the door's edge, preventing any protrusion that could hinder door operation or compromise security.
A key usage feature is the ability to rehand the lock, adapting it for different door swing directions. This is achieved by loosening a latch screw with a 9/64" allen wrench, lifting the latch away from the lock, rotating it 180 degrees, and then placing it back into the lock. It's essential that the slots on the back of the latch align with the ribs at the bottom of the latch hole for correct rehanding. Once rehanded, the latch screw is tightened to secure it in place. This flexibility makes the PanoLock™ suitable for a wide range of door installations without requiring different lock models for left-hand or right-hand doors.
After installation and rehanding, the lock's function is checked to ensure all latches operate correctly. This involves using a flat head screwdriver to push a pin, which should cause the central latch to fully retract. Additionally, the upper, lower, and center latches are tested to ensure they remain extended when not actively retracted. The pin button can then be moved back to its starting position to disengage the latches, confirming proper operation. The multi-point latches are designed to engage automatically when the door is closed, providing immediate security. The angled surface of the latch is designed to face the strike plate, facilitating smooth engagement and disengagement with the door frame.
Maintenance of the PanoLock™ system primarily involves ensuring the mortise pocket remains clear of debris and periodically checking the alignment and function of the latches. Before installation, a thorough check of the mortise pocket for dust, debris, or contamination is essential. If the lock does not sit flush with the edge of the panel, it indicates a potential issue with debris in the pocket or incorrect mortise dimensions, requiring removal and inspection. This proactive approach during installation minimizes future operational problems.
The design of the lock, with its robust construction and secure screw-in installation, suggests a low-maintenance profile once properly installed. The ability to rehand the lock is not just an installation feature but also a maintenance-friendly aspect, as it allows for adjustments if the door's swing direction needs to be changed in the future, or if the latch mechanism needs to be serviced. The clear instructions for rehanding, including the specific tool required (9/64" allen wrench) and the alignment steps for the latch, make this a manageable task for users or technicians.
Regular checks of the lock's function, as described in the "Check lock function" step, can help identify any potential issues early. This includes verifying that the central latch retracts fully and that the multi-point latches extend and remain extended as expected. If any latch operation feels stiff or inconsistent, it may indicate a need for lubrication or further inspection for obstructions. The design of the system, with its visible components during installation and rehanding, allows for visual inspection of critical parts like the roller sleeve, latch, and screw, which can aid in troubleshooting and maintenance. By following the installation and function check guidelines, users can ensure the longevity and reliable performance of their PanoLock™ Multi-Point Lock system.
| Application | Residential |
|---|---|
| Material | Zinc Alloy |
| Backset | Adjustable 2-3/8" or 2-3/4" |
| Power Source | 4 AA Batteries |
| Battery Life | Up to 1 year |
| Lock Mechanism | Motorized Deadbolt |
| Auto-Lock | Yes |
| Key Override | Yes |
| Connectivity | Bluetooth |
| Compatibility | iOS, Android |
| Weather Resistance | Yes |
| Installation | DIY |