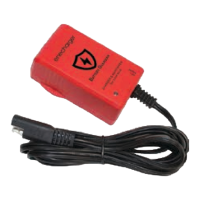
GUARDIAN
BAT TERY
6. CONNECTING TO THE BATTERY.
Identify the correct polarity of the battery terminals on the battery. The positive battery terminal is
typically marked by these letters or symbol (POS, P, +). The negative battery terminal is typically marked
by these letters or symbol (NEG, N, -). If polarities are incorrect, a FAST BLINKING RED will illuminate. Do
not make any connections to the carburetor, fuel lines, or thin sheet metal parts. The below instructions
are for a negative ground system (most common). If your vehicle is a positive ground system (very
uncommon), follow the below instructions in reverse order.
1.) Connect the positive (red) battery clamp or eyelet terminal connector to the positive (POS, P, +) battery
terminal.
2.) Connect the negative (black) battery clamp or eyelet terminal connector to the negative (NEG, N, -)
battery terminal or vehicle chassis.
3.) When disconnecting the battery charger, disconnect in the reverse sequence, removing the negative
rst (or positive rst for positive ground systems).
7. BEGIN CHARGING.
1.) Verify the voltage and chemistry of the battery.
2.) Plug in AC power and the charger will begin in Standby mode. In Standby, the charger is not providing
any power.
3.) Connect the battery clamps or eyelet terminal connectors properly to the battery terminal.
4.) The voltage (6V/12V) will be determined automatically.
5.) Either slow blinking BLUE (6V) or GREEN (12V) will be illuminated.
6.) The charger can now be left connected to the battery at all times to provide maintenance charging.
7.) Once charging is completed or maintenance mode started, the solid BLUE (6V) or GREEN (12V) will be
illuminated.
8. ICS1 CHARGER OPERATING MANUAL.
1.) First, plug in and LED will light up in solid RED.
2.) At anytime, there is no power at the clamps. This is a safety interlock feature.
3.) This charger is suitable and safe for all SLA and AGM type batteries.
4.) The charging rate is xed at 1A for both 6V and 12V respectively.
5.) Attach the RED (+) and BLACK (-) clamps to the correct polarity of your vehicle battery
6.) a) If you incorrectly attach to the wrong polarity, the LED will rapid ash RED and stop operation.
b) 6V and 12V is automatically detect and select.
7.) a)If the polarity is attached correctly, the LED will slow ash in GREEN for 12V.
b) If your vehicle battery is a 6V, it will automatically detect and select the correct charging voltage. The
LED will slow ash in BLUE for 6V.
8.) a) The charger will now go through the pre-programmed 7 STEPS(6V), 6 STEPS(12V) and slow charge
your vehicle battery .
b) Once the charger has completed the charging cycle, and conrmed battery is in good operation, the
LED will shows solid GREEN (12V) or solid BLUE (6V) and it will continue to trickle charge your vehicle
battery continuously as needed.
ICS1 Manual
2
 Loading...