EasyManua.ls Logo

Enecharger ICS1 User Manual

Enecharger ICS1
5 pages
To Next Page IconTo Next Page
Page #1 background imageLoading...
Page #1 background image
Welcome. Thank you for buying the ICS1. Read and understand the PRODUCT INSTRUCTION before
operating the charger.
1. WHAT’S IN THE BOX.
ICS1 Charger
Charge Connect Cable/s
Product Instruction
Information Guide
2. ABOUT ICS1.
The ICS1 represents most advanced technology and eciency in the market, making each charge a simple
process. The ICS1 is designed for charging all types of 6V&12V lead-acid batteries, including Wet, Gel, MF,
and VRLA, AGM batteries. It is suitable for charging battery capacities from 4 to 20Ah and maintaining all
battery sizes.
3. GETTING STARTED.
Before using the charger, carefully read the battery manufacturers specic precautions and
recommended rates of charge for the battery. Make sure to determine the voltage and chemistry of the
battery by referring to your battery owner’s manual prior to charging.
6V
Mode
Explanation
In Standby mode, the charger is not charging and
providing no power to the battery. Energy save is
activated during this mode, drawing microscopic
power from the electrical outlet. Solid RED LED will
illuminate.
No Power
SOLID RED
12V
For charging 12-volt Wet Cell, Gel Cell, AGM,
EFB and Maintenance-Free batteries. Slow
blinking GREEN LED will illuminate.
For charging 6-volt Wet Cell, Gel Cell, AGM, EFB
and Maintenance-Free batteries. Slow blinking
BLUE LED will illuminate.
Wrong polarities +/-
14.7V | 1.0A | 4-20Ah Batteries
7.3V | 1.0A | 4-20Ah Batteries
No Power
12V
SLOW BLINK
GREEN
6V
SLOW BLINK
BLUE
FAST BLINK
RED
4. CHARGING MODES.
The ICS1 has multiple modes: The ICS1 has multiple colors LED to indicate various charging mode: SOLID,
FAST BLINK, SLOW BLINK IN (RED/GREEN/BLUE) It is important to understand the dierences and purpose
of each charge mode. Do not operate the charger until you conrm the appropriate charge mode for your
battery. Below is a brief description:
GUARDIAN
BAT TERY
5. AUTO SELECT 6V/12V MODE.
6V charge mode is designed for 6-volt lead-acid batteries only, like Wet Cell, Gel Cell, AGM, EFB and
Maintenance-Free batteries. It is automatically determines the correct voltage for your target battery.
ICS1 Manual
1
Question and Answer IconNeed help?

Do you have a question about the Enecharger ICS1 and is the answer not in the manual?

Enecharger ICS1 Specifications

General IconGeneral
Input Frequency50/60Hz
Charging Current (AA)500mA
Battery CompatibilityNi-MH, Ni-Cd
Battery SizesAA, AAA
Number of Charging Slots4
Charging IndicationLED indicators
Output Current (USB)1A
Input Voltage100-240V
Safety FeaturesOvercharge protection, short circuit protection
Output Voltage (USB)5V DC
Charging PortUSB-A
Compatibility (USB)Smartphones, tablets

Summary

Getting Started and Charging Modes

Charging Modes Overview

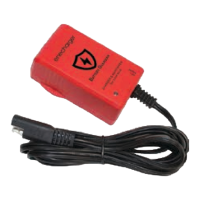
Explains multiple charging modes indicated by LED colors (SOLID, FAST BLINK, SLOW BLINK).

Incorrect Polarity Indicator

FAST BLINK RED LED indicates wrong polarities (+/-).

12V Charging Indicator

SLOW BLINK GREEN LED is for charging 12V Wet Cell, Gel Cell, AGM, EFB batteries.

6V Charging Indicator

SLOW BLINK BLUE LED is for charging 6V Wet Cell, Gel Cell, AGM, EFB batteries.

Connecting and Beginning Charging

Connecting to the Battery

Instructions for identifying polarity and connecting clamps/connectors correctly for negative/positive ground systems.

Begin Charging Steps

Steps include verifying battery, plugging in, connecting clamps, and leaving connected for maintenance.

Charging Rate and Detection

Fixed 1A charging rate; rapid flash RED for incorrect polarity; auto-detects 6V/12V.

Charging Programs, Curves, and Specifications

Technical Specifications

Details input voltage, efficiency, power, charging current, battery types, capacity, dimensions, and more.