Do you have a question about the Energenie ENER007 and is the answer not in the manual?
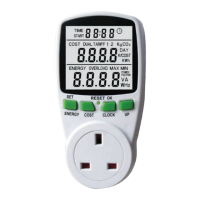
Details the information shown in each of the three display rows: time/accumulated time, energy/cost, and instantaneous readings.
Toggles the display between current time of day and accumulated energy usage time.
Cycles through accumulated energy, cost, and tariff price settings.
Cycles through instantaneous values like power, voltage, and current.
Used to change digit values during the setup process.
Resets the unit to factory settings, clearing all accumulated data.
Configures the currency symbol and the price per kWh for cost calculations.
Allows the user to set the current time of day on the device.
Optionally configures the tracking of accumulated carbon dioxide emissions.
Optionally sets the threshold for overload power detection.
Clears the accumulated time records from the device.
Clears total power readings and recorded maximum/minimum power values.
Clears all accumulated cost records from the device.
Details voltage, current, power, frequency, and overload thresholds.
Covers accumulated usage, carbon footprint, price settings, and currency options.
Specifies the recommended temperature and humidity ranges for operation and storage.
Information regarding the disposal and recycling of electrical equipment according to EU directives.
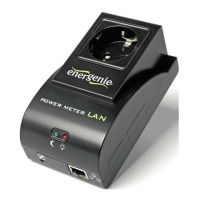
Explains the adapter's role in monitoring appliance electricity usage via the Mi Home App.
Lists product code, load limits, voltage, frequency, protocol, and usage location.
Describes how the Mi Home App displays energy data over time and as a cost.
| AC outlet types | Type G (BS 1363) |
|---|---|
| Audible alarm(s) | Yes |
| AC outlets quantity | 1 AC outlet(s) |
| Currencies available | EUR, GBP, USD |
| Displayed energy consumption units | kWh |
| Maximum power | 3120 W |
| Maximum current | 13 A |
| Power source type | AC, Battery |
| Battery type | AG13/LR44 |
| Battery voltage | 1.5 V |
| Number of batteries supported | 2 |
| Storage temperature (T-T) | -10 - 50 °C |
| Operating temperature (T-T) | 0 - 50 °C |
| Weight | 200 g |
|---|