OPTION 2: Wall Mount
Optional Step
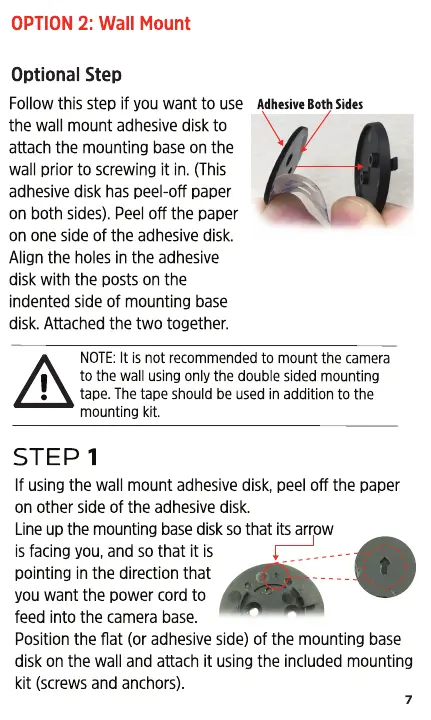
Follow this step if you want to use
the wall mount adhesive disk to
attach the mounting base on the
wall prior to screwing it in. (This
adhesive disk has peel-off paper
on both sides). Peel off the paper
on one side of the adhesive disk.
Align the holes in the adhesive
disk with the posts on the
indented side of mounting base
disk. Attached the two together.
Adhesive Both Sides
NOTE: It is not recommended to mount the camera
to the wall using only the double sided mounting
tape. The tape should be used in addition to the
mounting kit.
STEP 1
If using the wall mount adhesive disk, peel off the paper
on other side of the adhesive disk.
Line up the mounting base disk so that its arrow
is facing you, and so that it is
pointing in the direction that
you want the power cord to
feed into the camera base.
Position the flat (or adhesive side) of the mounting base
disk on the wall and attach it using the included mounting
kit (screws and anchors).
7