PROGRAMMING
•
During the Inclusion/ Exclusion process, the ON/OFF switch is used for including/ excluding
the device.
•
It is best to perform an Exclusion of the device prior to performing an Inclusion.
Step 1. From the Control Panel, go the the device Exclusion page.
o Select "Exclude Device".
o When prompted, press and hold the "ON" or "OFF" paddle on the switch for 3 seconds.
o Once the exclusion is finished, the blue LED indicator will start blinking.
Step 2. Go to the "Add Device" page.
o Select "Include Device".
o When prompted, press and hold the "ON" or "OFF" paddle on the switch for 3 seconds.
OPERATING THE ZW15SM-PLUS
You're now ready for basic operation of the ZW15SM-PLUS. The switch turns the Load (Lights)
ON/OFF when the ON/OFF rocker switch is pushed. It can also be operated from your desktop or
a smart device such as the iPhone, iPad or any Android device. In the event of a power outage, the
ZW15SM-Plus will default to the OFF state.
- Push button will respond to ALL-ON and the ALL-OFF command (default).
- Push button will not respond to ALL-ON or ALL-OFF commands.
- Push button will respond to the ALL-OFF command but will not respond to the ALL-ON command.
- Push button will respond to the ALL-ON command but will not respond to the ALL-OFF command.
Configuration details
ZW15SM-PLUS
DEVICE INCLUSION/ EXCLUSION
The process of "Inclusion/ Exclusion" is to Add or Remove the device from the Hub. All Z-Wave devices must be "Included" on
the Controller (Hub) before it can be controlled from a smart device. The Hub should be brought physically closer to the device
just for the "Inclusion" process (recommended within 10ft). When finished, the Hub and device can be moved back to final
installation location. Download the App or log onto the website associated with the Hub you are using and follow their
Inclusion/ Exclusion instructions as each Hub's programming and features are different.
ADVANCED PROGRAMMING
WARNING: Advanced programming is recommended ONLY for experienced programmers. The ZW15SM-PLUS has customizable
features/ functions that require writing codes. Changes to code may cause device to function improperly or to not function at all.
The following parameters require that you have an advanced controller. Basic remotes do not have this capability.
All-ON and All-OFF
Depending upon your primary controller, the ZW15SM-PLUS switch can be set to respond to ALL-ON and ALL-OFF commands in four
different ways. Some controllers may not be able to change the response from its default setting. Please refer to your controller’s
instructions or technical support for information on whether or not it supports the configuration function and if so, how to change this
setting. The four possible responses for each button (top or bottom button on switch) are:
The primary controller should indicate that the action was successful. If the controller
indicates the action was unsuccessful, please repeat from Step 1.
Once the switch is part of the network, the same basic procedure is used to add the switch
to groups & scenes or change advanced functions. Refer to the primary controller’s
instructions for details.
Step 3. Follow the On-Screen instructions in the Control Panel on adding or
removing rooms, scenes, other devices, and other functions and features.
Step
4
. To reset the ZW15SM-Plus manually, simply press and hold the "ON" or "OFF"
paddle on the switch for 10 seconds.
ASSOCIATION
Grouping ID Max number of nodes
Description
Default
Value
1
Default=0
Synchronization of load
power and LED indicator
0: Power on, LED off
1: Power on, LED on
Description
Valid Value
1 Byte
Parameter
Number
Size
1
1 Lifeline: Send device reset locally notification
2 5 StatusReport: Send basic report
4 5
AssignGroupSet: Send Basic set command
3 5 PowerReport: Send meter power report
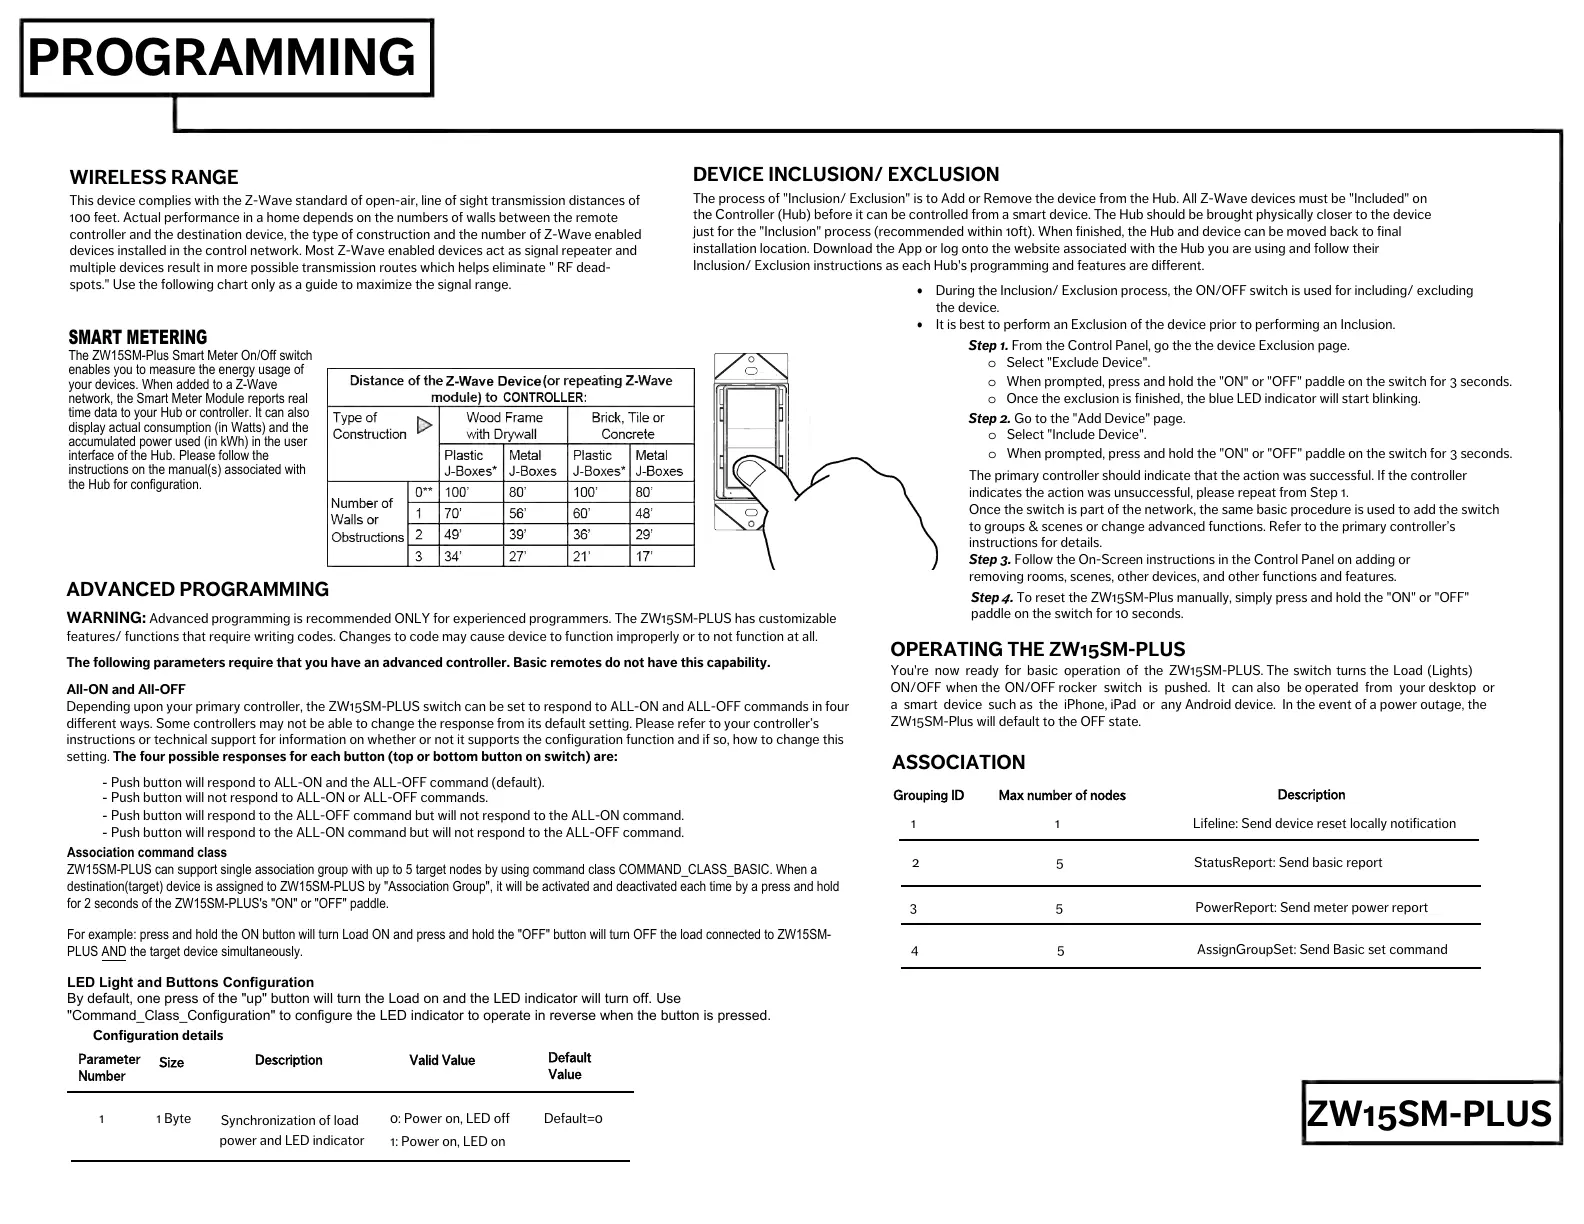
WIRELESS RANGE
This device complies with the Z-Wave standard of open-air, line of sight transmission distances of
100 feet. Actual performance in a home depends on the numbers of walls between the remote
controller and the destination device, the type of construction and the number of Z-Wave enabled
devices installed in the control network. Most Z-Wave enabled devices act as signal repeater and
multiple devices result in more possible transmission routes which helps eliminate " RF dead-
spots." Use the following chart only as a guide to maximize the signal range.
SMART METERING
The ZW15SM-Plus Smart Meter On/Off switch
enables you to measure the energy usage of
your devices. When added to a Z-Wave
network, the Smart Meter Module reports real
time data to your Hub or controller. It can also
display actual consumption (in Watts) and the
accumulated power used (in kWh) in the user
interface of the Hub. Please follow the
instructions on the manual(s) associated with
the Hub for configuration.
Association command class
ZW15SM-PLUS can support single association group with up to 5 target nodes by using command class COMMAND_CLASS_BASIC. When a
destination(target) device is assigned to ZW15SM-PLUS by "Association Group", it will be activated and deactivated each time by a press and hold
for 2 seconds of the ZW15SM-PLUS's "ON" or "OFF" paddle.
For example: press and hold the ON button will turn Load ON and press and hold the "OFF" button will turn OFF the load connected to ZW15SM-
PLUS AND the target device simultaneously.
LED Light and Buttons Configuration
By default, one press of the "up" button will turn the Load on and the LED indicator will turn off. Use
"Command_Class_Configuration" to configure the LED indicator to operate in reverse when the button is pressed.
 Loading...