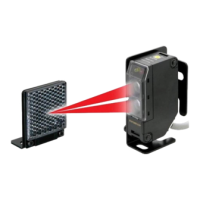
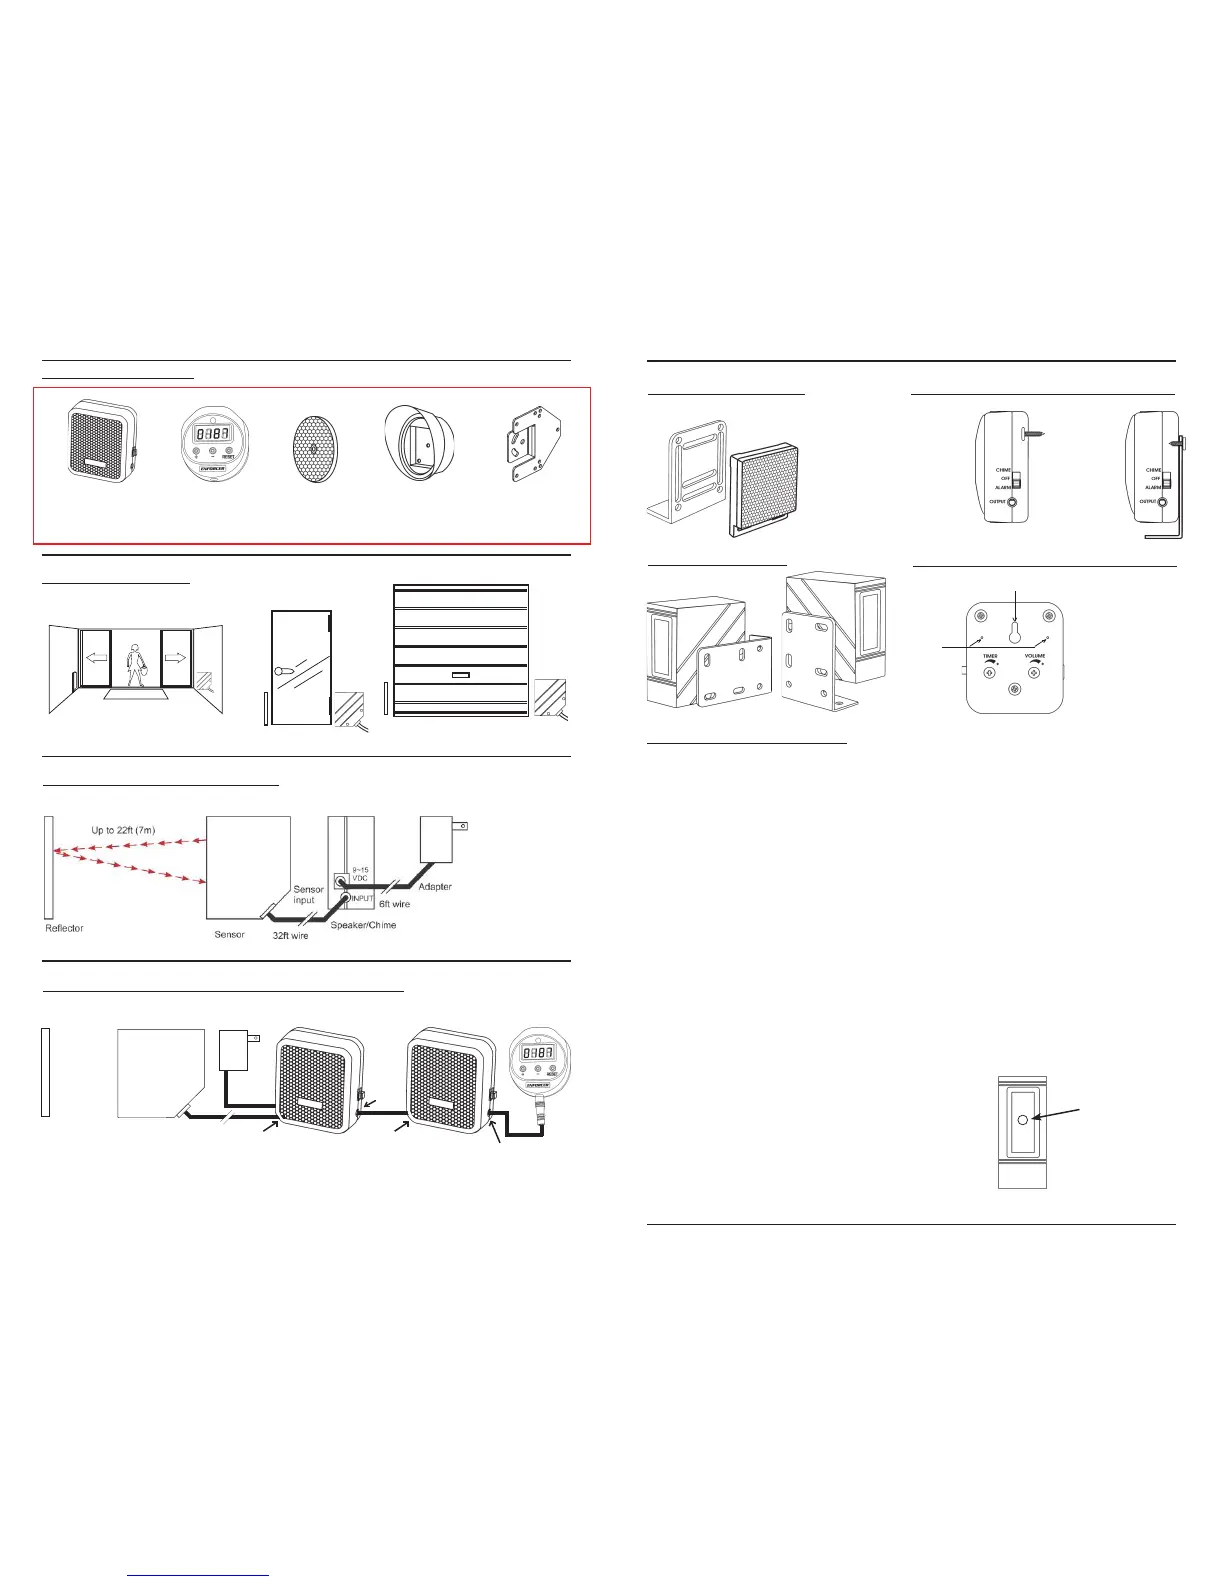
Mounting the Reflector:
Installation and Adjustment:
Sample Fixed Mounting:
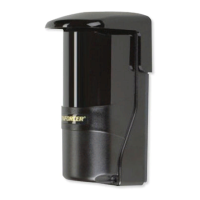
Mounting the Sensor:
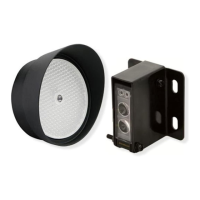
Mounting the Speaker/Electronic Chime:
Sample
Fixed
Mounting:
Sample
Bracket
Mounting:
Adjusting the Speaker/Electronic Chime:
LED Functions:
RED LED - When ON, it indicates the sensor is
powered and aligned properly.
Installation:
1. Mount the reflector and sensor so they face each
other at about 2' off the ground or knee high.
2. Connect the sensor to the speaker.
3. Connect power adaptor to the speaker.
••
••
•
For signalling in multiple rooms, add an optional
second speaker (E-931ACC-SQ).
••
••
•
Connect an optional counter (E-931ACC-CQ) to
the speaker output (if desired).
4. To find the correct alignment, slowly adjust the
angles of the sensor and/or reflector up and down
and right and left.
NOTE:Correct alignment is reached when red LED
turns ON.
Set Speaker Mode:
After the sensor and reflector have been properly
installed, the next step is to set the speaker mode.
1.
Choose between "Chime" or "Alarm" sound or "OFF".
2. If "Alarm" was chosen:
A. Set speaker to Alarm
B. Adjust the alarm sounding time from 3 to 30
seconds.
C. Set speaker Volume.
3. If "Chime" was chosen: Set speaker to Chime
4. If "OFF" was chosen:
A. Set speaker to OFF
B. The speaker will not sound when the beam is
broken.
Using the Optional Counter:
1. Automatically increases by "1" when sensor is
triggered.
2. Manually add "1" by pressing "+".
3. Manually subtract "1" by pressing "
-
".
4. Reset counter by pressing "RESET."
Testing:
1. Power up the sensor and speaker. The red LED
should be ON.
2. Pass object to be detected between the sensor
and reflector. The red LED should turn OFF and
the speaker (if connected) should sound.
Red LED
ENFORCER
®
Switch: Chime/
OFF/Alarm
Timer: 3~30 Sec.
Volume:0 ~ max.
Switch
Wall mount hole
Bracket
mounting
holes
Wiring: (one speaker, no counter)
W
e
m
e
c
l
o
Other possible applications: Offices, stores, schools, warehouse, vehicle detection, etc.
Garage
door
¤¤¤¤¤¤¤¤¤¤
¤¤¤¤¤¤¤¤¤¤
¤¤¤¤¤
¤¤¤¤¤
Sample Installations:
Main
entrance
door
Store front door
¤¤¤¤¤¤¤¤¤¤¤¤¤¤¤¤
¤¤¤¤¤¤¤¤¤¤¤¤¤¤¤¤
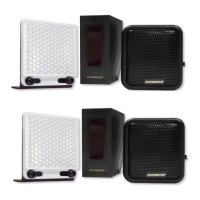
Optional Accessories:
E-931ACC-RC1Q
Round Reflector
82 x 9 mm
E-931ACC-CQ
Digital Counter
(with 32ft wire)
E-931ACC-HR1Q
Reflector Hood for
Round/Square Reflectors
Wiring: (with optional counter and second speaker)
¤¤¤¤¤¤¤
¤¤¤¤¤¤¤
Reflector
Sensor
Adaptor
Input
Up to 22' (7m)
Speaker
ENFORCER
®
Counter (optional)
Speaker (optional)
ENFORCER
®
Input
Output
Output
NOTE: a) When adding a 2nd speaker. If the application distance between speakers exceed 33 ft. (10m),
then a power adaptor is required for the 2nd speaker.
b) When there are 2 devices added to the first speaker, such as a 2nd speaker & a counter.
Then a second power adaptor is required for the 2nd speaker even when the distance is within 33 ft. (10m)
c) Speaker and counter uses a standard 1/8" stereo jacks.
E-931ACC-SQ
Speaker/Electronic Chime
(with 32ft wire)
E-931ACC-BLS8Q
Door Frame Bracket
ENFORCER
®
 Loading...