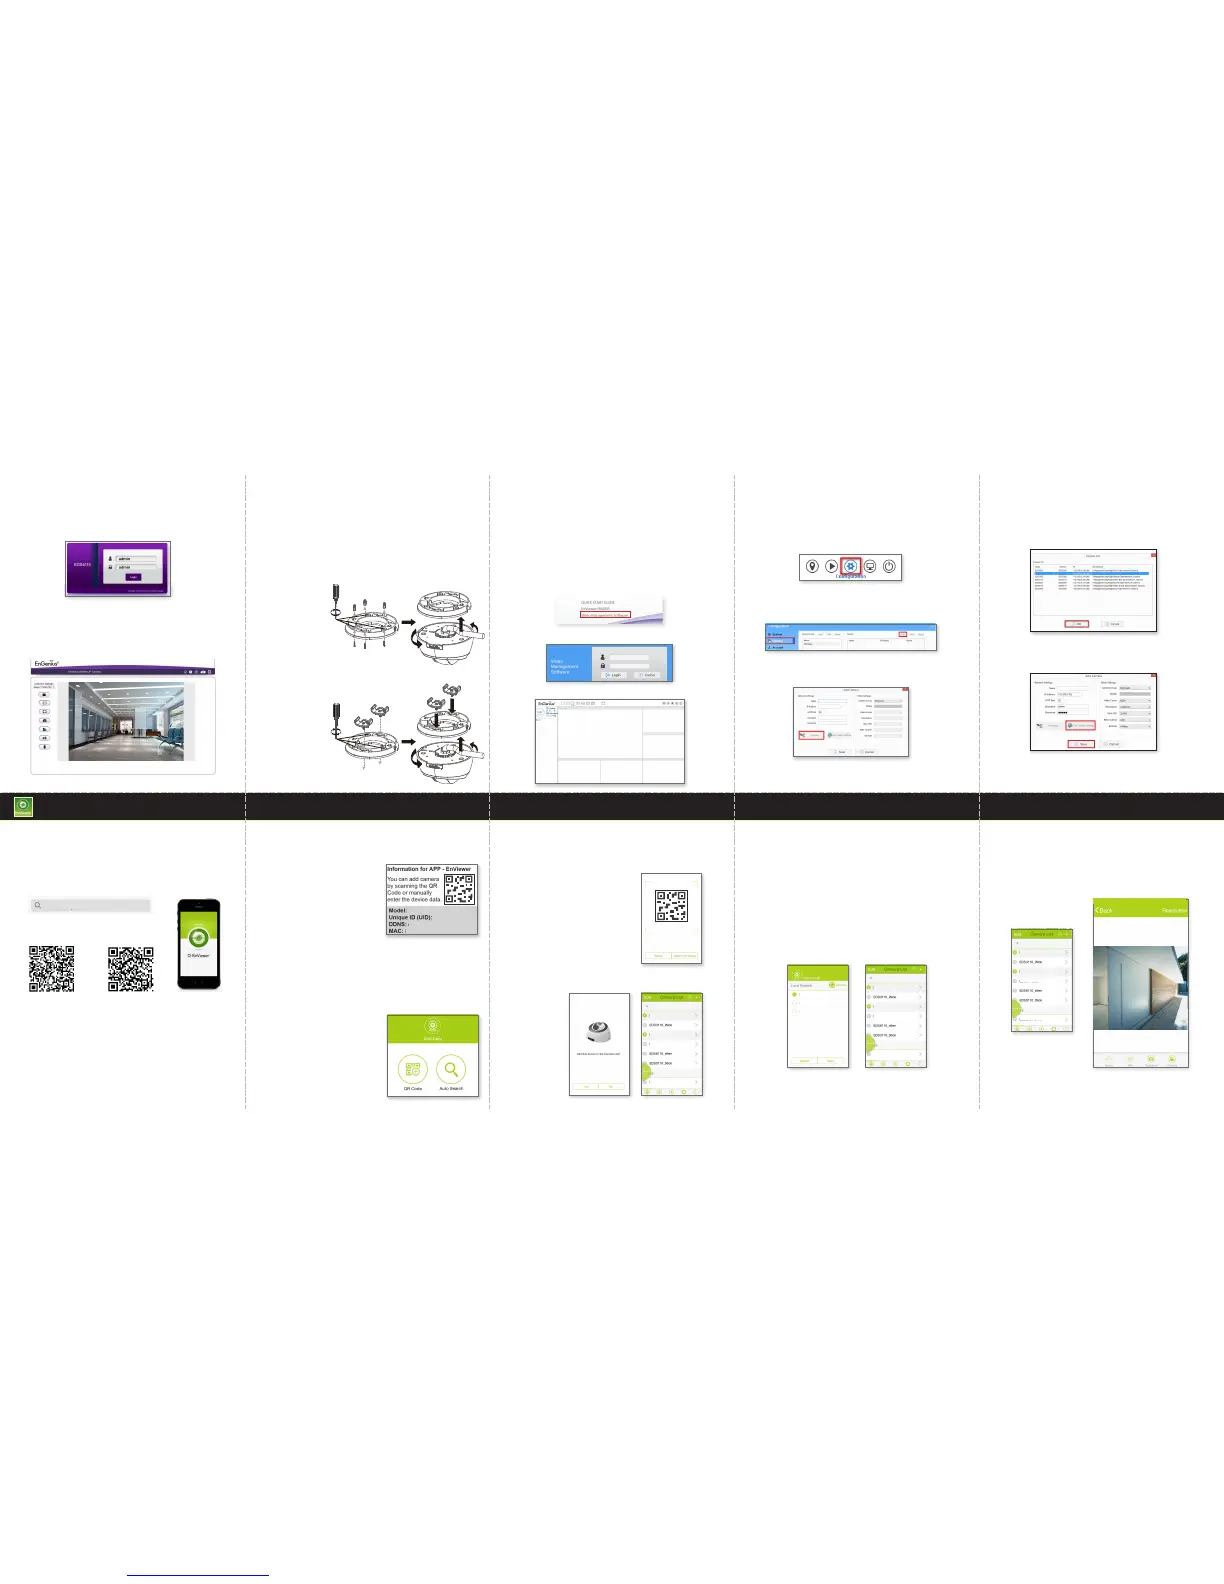
A) Select and run the VMS from the CD. Continue with the installation
process.
C) Go to Conguration and select camera to obtain the camera setting
panel.
F) Select one of the IP cameras that is available and click OK.
H) Repeat Step D) to G) until all desired cameras are added. You can now
monitor all cameras in live view.
D) Go to Camera tab, and click Add on the top right side of the Camera
page.
E) Click on Discovery to detect IP cameras under local area network (LAN).
G) Enter the camera username & password and click Get Camera Set-
tings to verify. Then click Save to add the camera and exit.
B) Run EnGenius VMS to execute live monitor.
EnGenius VMS is a free bundle Video Management Software can sup-
port multiple cameras.
(the PC-based VMS, work with EnGenius IP Camera only)
Option I - Scan QR Code Option II - Auto Search
A) Scan the QR Code with the provided
label.
B) Click “ Yes” to add the device in the Camera List.
B) All cameras within the local network will be listed. Select the device(s)
you would like to add and click on Save.
A) Click on Auto Search.
1
Get Started
2
Setup Camera
3
Live View
Download EnViewer
Scan below QR code or download “EnViewer by EnGenius” APP from
your mobile device.
Follow the EnViewer Wizard instruction,
you will have two options to add camera.
This option is recommended if you want to add multiple cameras within
your local network at the same time.
Simply select the desired camera to access video live view.
EnViewer
TM
APP Setup
EnViewer by EnGenius
Google Play
for Android™ Devices
App Store
for iPhone
®
and iPad
®
or
Option I Option II
4
Mounting the Camera
5
Setup EnGenius VMS
A) Locate an area on the ceiling or wall. Make sure the area is capable of
supporting the weight of camera.
B) Use the ceiling mount bracket screw slots to drill the mounting screws
into the ceiling or wall.
C) Place the ceiling mount bracket on the camera and route the cable on
the side of conduit entry tunnel. Twist the camera counterclockwise until
it clicks into place.
D) For installing the camera on the ceiling light grid steel
frame, screw in the hooks on both side into the ceiling
mount bracket. Secure the bracket on the steel ceiling
frame then twist in the
camera rmly.
3
Access Live View
Please enter default username (admin) and password (admin) to access
live view.
Note: You will be asked to download the WebCMS plug-in either for the
rst attempt or an updated version available.
You should now see the Live View streaming successfully.
admin
ooooooo
EDS6115
ooooooo
AA:BB:CC:DD:EE:FF
How to run VMS and add camera(s)
The default value of username and password is admin.
admin
admin
EDS6115-Outdoor
EDS6115-Living Room
EDS6115-Outdoor
EDS6115-Lobby
EDS6115-Living Room
EDS6115-Outdoor
EDS6115-Lobby
EDS6115-Outdoor
EDS6115-Living Room
EDS6115-Outdoor
EDS6115-Lobby
EDS6115
EDS6115
EDS6115 EDS6115 1-Megapixel Day/Night Dome Type Network Camera
EDS6115
EDS6115
EDS6115
Find the EnViewer QR Code Label inside
the box that is specically for your
camera and other advanced setting
information.
Prior to the usage of EnGenius Cloud
Service, please ensure the following
actions have been completed.
A) Camera device DDNS has been enabled.
Note: From the Web Management Page: Network > EnGenius Cloud
Service
B) Camera device UPnP and UPnP Traversal are both enabled.
C) Network protocol UPnP (Universal Plug and Play) Traversal
function has been enabled from your Internet Administrator or ISP
(Internet Service Provider).
EDS6115-E7FA
EDS6115-Outdoor
EDS6115-Lobby
EDS6115-Living Room
EDS6115-E7FA
EDS6115-E7FA
 Loading...