19
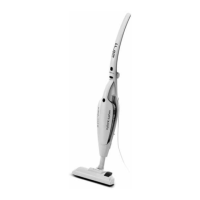
The product works in two modes:
1 as a standard electric broom through the brush for floors (O) and, by tilting the appliance body
(R) backwards, in the normal position for use
2 as handheld vacuum cleaner, by taking off the removable part (C), suitable for cleaning surfaces
and working tables through the vacuum cleaner with the brush (Q) or the crevice nozzle (P) in
case of narrow spaces.
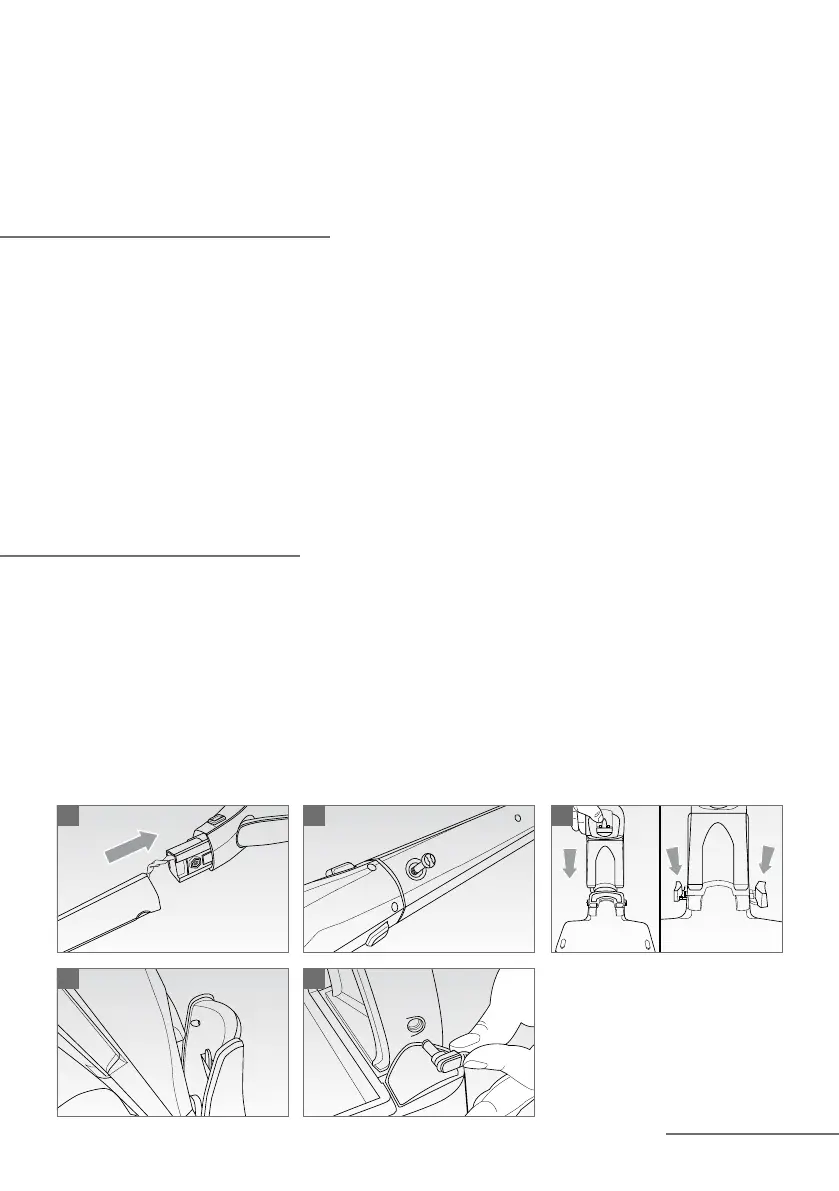
APPLIANCE ASSEMBLY
Before use, assemble the upper handle (B) on the appliance body (R), proceeding as follows:
•
assemble the upper handle (B) to the appliance body (R), by slightly pressing it until it stops,
making sure the wire is properly inserted into the appliance body (Fig. 1)
•
insert the supplied screw (S) into the apposite hole on the handle (B) and, by means of a screw-
driver, tighten it (Fig. 2).
Attention:
Be careful when using the screwdriver to avoid injury.
Attention:
Make sure the appliance is properly installed before use.
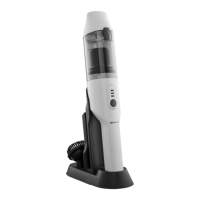
BATTERY CHARGING
•
Insert the apposite upper side (H) on the recharging base (G) by slightly pressing it until it locks
in place. Then, mount the attachments supports (U) on the base (G), Fig. 3.
•
Position the assembled appliance on the recharging base (G), making sure it properly locks on
the hook on the upper side (H) of the recharging base (G) (Fig. 4).
•
Insert the the charging adapter (I) into a mains power socket and the plug into the correspond-
ing jack situated on the recharging base (G) (Fig. 5). The recharge light (D) situated on the re-
movable body (F) will start flashing slowly, signalling the appliance is being charged. When the
light (D) is steady, the recharge is complete and the broom is ready for use. The light does not
give any information about the battery recharging level.
31
4
2
5