Duplication prohibited MP101M Environnement S.A
0–5
SEPTEMBER 2013
LIST OF FIGURES
Figure 0–1 – Beta gauge source holder 0–11
Figure 0–2 – Source dimensions (in mm) 0–12
Figure 0–3 – Radioactive clover 0–15
Figure 0–4 – Signaling label 0–16
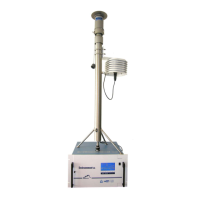
Figure 1–1 – MP101M presentation 1–2
Figure 1–2 – Keyboard and display 1–4
Figure 1–3 – Front face with the door closed 1–5
Figure 1–4 – Front face, overview of collector assembly and beta gauge 1–7
Figure 1–5 – Rear panel 1–8
Figure 1–6 – Internal view of the rear panel drawer 1–9
Figure 1–7 – Components location 1–10
Figure 1–8 – Details of the flow regulation part 1–11
Figure 1–9 – Installing the regulated sampling tube (RST) 1–18
Figure 1–10 – Regulated sampling tube (RST) 1–19
Figure 1–11 – Links between units 1–21
Figure 1–12 – Outline dimensions 1–22
Figure 2–1 – General functional diagram 2–2
Figure 2–2 – Beta gauge 2–3
Figure 2-3 – Flow regulation diagram 2–6
Figure 2-4 - Organisation of measurements 2–8
Figure 2–5 – Regulated sampling tube (RST) line assembly 2–12
Figure 3–1 – Fluids and electric connection 3–4
Figure 3–2 – Software overview 3–9
Figure 3–3 – Reference gauge insertion 3–22
Figure 3–4 – Putting in place the reference gauge 3–57
Figure 3–5 – USB disk 3–62
Figure 4–1 – Diagram of the Picolino pump 4–5
Figure 4–2 – Diagram of the KNF pump 4–7
Figure 4–3 – Cleaning of the sampling heads PM10 EN12341 and PM2.5 EN14907 4–9
Figure 4–4 – Cleaning of the US-EPA standardized PM10 inlet 4–10
Figure 4–5 – Cleaning of the US-EPA standardized VSCC
TM
4–11
 Loading...