13
INSTALLATION GUIDE
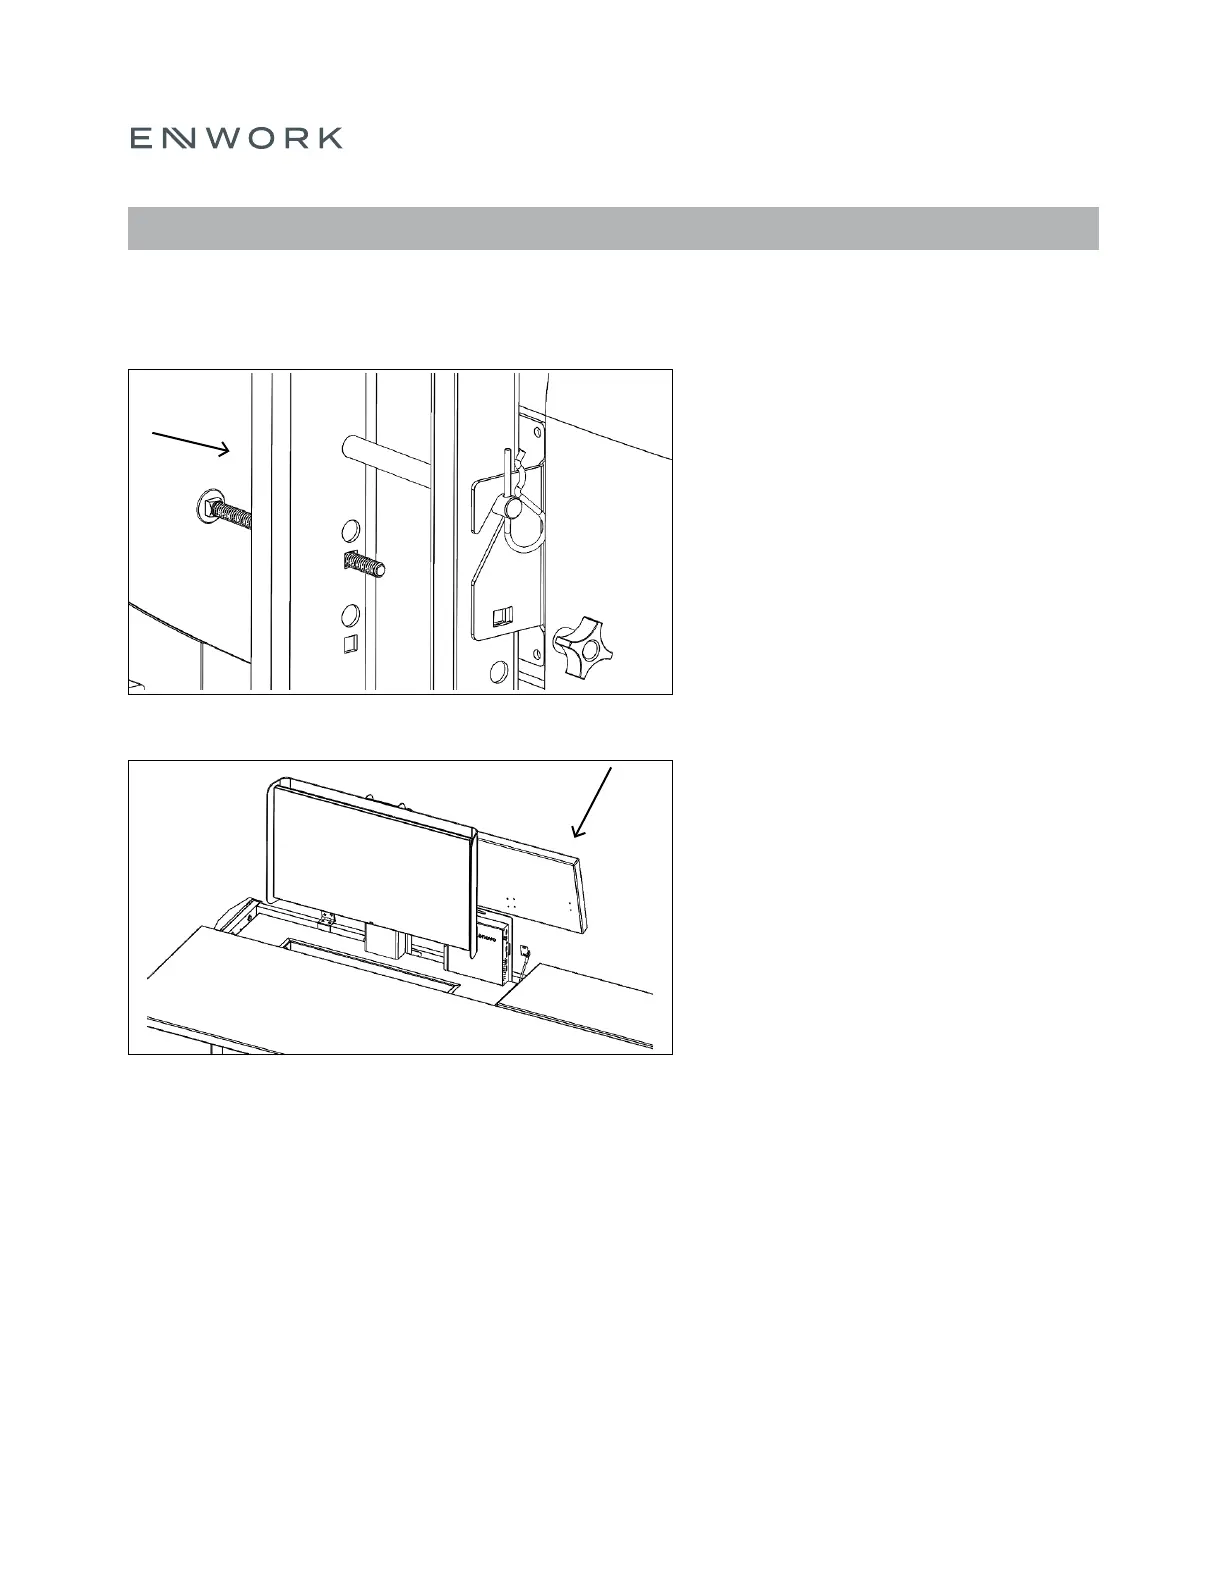
Place the Vesa Bracket over the clevis pin and
re-attach the carriage bolt and plastic knob.
Note: There are 3 height adjustments to
accommodate different monitor sizes and
viewing heights.
The angle of the Monitor can be adjusted
(5 degrees total) by loosening, re adjusting,
then re-tightening the plastic knob.
Re-attach doors from Step 1.
FIGURE 6.7
FIGURE 6.8
6) ASSEMBLY: ACCESSORIES – MONITOR &
MONITOR SHROUD