Do you have a question about the Epiq Solutions Epiq PRiSM and is the answer not in the manual?
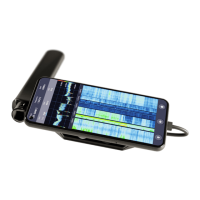
Connect the antenna to the PRISM unit via the SMA port labeled RF1.
Connect the PRISM to PCs, tablets, and smartphones using a USB-C port.
Access the PRISM interface by opening a browser and navigating to http://192.168.3.1.
Select the "PCI Survey" option from the initial splash screen.
Configure, view, and save PCI scanning results organized by technology and frequency band.
Choose which technology to display in the channel list from the bottom right.
Displays discovered channels sorted by number, further divided by frequency band.
Shows current survey configuration, pass count, and progress.
Press the "Stop" button to discontinue the ongoing survey.
Press the "Restart" button when idle to start a new survey with the last configuration.
Displays detailed information for a selected cellular channel, including decoded PCIs.
Download scan records for the current survey as individual .csv files.
Configure the scanner by selecting presets or manually setting technologies and bands.
Enable or disable specific technologies for scanning within the Survey Configuration.
Select specific frequency bands within a technology to be scanned.
Save current survey configurations as presets for later recall.
Manage configurations by exporting to or importing from JSON files.
View and update the current license to enable specific technologies.
Enable GPS data tagging for exported results by configuring a GPS application.
Install and configure the NetGPS application for obtaining GPS data.
An icon indicating the current GPS fix state within the PCI Scanner application.
Transition from the PCI Scanner to the Spectrum Analyzer application.
Launching the Spectrum Analyzer and establishing a connection to the PRISM unit.
Always visible parameters showing current radio and spectrum processor configuration.
Visual representation of the live spectrum in the frequency domain.
Frequency vs. time plot showing historical signal data and power levels.
Panel on the left offering additional information and actions.
Additional parameters and settings not in Primary Controls, accessible via selectors.
Adjust the frequency and range of the spectrum view based on the selected signal source.
Settings for Span, Start, Stop, and Gain to define the viewing range.
How to edit frequency values, including changing units and applying changes.
Use arrows or keys to adjust editable values incrementally.
RBW for frequency resolution and VBW for smoothing the display.
View comprehensive receiver settings via the Additional Information Panel.
Set the minimum and maximum power values displayed in the Spectrum Plot.
Adjust the Y-axis scale (dB/Div) and apply RF loss compensation.
Add color-graded persistence to the live spectrum for viewing signal presence.
Configure how signal pixels charge and decay based on signal presence.
Adjust waterfall color range and select different UI color themes.
Temporarily pause live spectrum updates or scroll through historical data.
Understand current, min-hold, and max-hold traces representing power measurements.
Save specific trace instances for later recall and analysis.
Place markers on the spectrum plot to identify specific frequencies.
Create delta markers to measure frequency and power differences between points.
Drag markers or their deltas to reposition them on the spectrum plot.
Modify the frequency and delta values of existing markers.
Snap markers and their deltas to the nearest signal peaks.
Delete markers from the spectrum display using various methods.
Tune the receiver to center on a specific marker's frequency.
Return to the PCI Scanner application from the spectrum analyzer view.
Detailed steps for updating the PRISM software using a web browser interface.
How to navigate to the PRISM sensor's Admin page via its IP address.
Authenticate to the Admin page using the default username and password.
Select and upload the software package file through the Admin dashboard.
Monitor the software update process, which typically takes several minutes.
Restart the PRISM sensor to apply the software update.
Overview of performing software updates manually via command line.
Transfer the software package file to the PRISM sensor using the SCP command.
Establish an SSH connection to the PRISM sensor for manual updates.
Install the transferred software package on the PRISM sensor using the opkg command.
Reboot the PRISM sensor via SSH after completing the manual installation.
| Brand | Epiq Solutions |
|---|---|
| Model | Epiq PRiSM |
| Category | Scanner |
| Language | English |