4115600 Rev.0
1-F C
4115600 Rev.0
1-F M
4115600 Rev.0
1-F Y
4115600 Rev.0
1-F K
3 Presione el botón de liberación y deslice la guía lateral hacia
la izquierda.
Press in the release button and slide the edge guide to the left.
4 Coloque el papel contra la guía lateral derecha y detrás
de la lengüeta.
Load paper against the right edge guide and behind the tab.
Nota: no cargue el papel horizontalmente; siempre cárguelo
verticalmente.
Note: Don’t load paper sideways; always load it short edge first.
5 Presione el botón de liberación y deslice la guía lateral izquierda
contra el papel.
Press in the release button and slide the left edge guide over.
6 Empuje los cartuchos hasta que
calcen en su lugar.
Press the cartridges down until
they click.
7 Cierre la cubierta del
compartimiento de cartuchos
y presiónela hacia abajo.
Close the ink cartridge cover and
press it down until it clicks.
8 Cierre la cubierta de la impresora.
Close the printer cover.
9 Pulse el botón de tinta para cargar la tinta. La carga tomará
aproximadamente tres minutos.
Press the
ink button to charge ink. Charging takes about
three minutes.
Precaución: no apague la impresora mientras la luz de
funcionamiento esté parpadeando o gastará tinta.
Caution: Don’t turn off the printer while the power light
is flashing or you’ll waste ink.
Precaución: mantenga los cartuchos fuera del alcance de los niños y no
ingiera la tinta.
Nota: los cartuchos de tinta incluidos tienen un menor rendimiento debido
al proceso de inicialización. Este proceso se realiza sólo la primera vez que
enciende el producto y garantiza un mejor rendimiento.
No cargue papel antes de instalar los cartuchos de tinta.
Caution: Keep ink cartridges out of the reach of children and don’t drink
the ink.
Note: The ink cartridges that came with your printer have a lower yield due
to the ink system charging process. This process is carried out the first
time you turn on your printer and guarantees better performance.
Don’t load paper before installing the ink cartridges.
1 Levante la cubierta de la impresora.
Lift up the printer cover.
2 Abra la cubierta del compartimiento de cartuchos.
Open the cartridge cover.
3 Saque los cartuchos de tinta de su envoltorio.
Unpack the ink cartridges.
4 Retire solamente la cinta adhesiva amarilla de cada cartucho de tinta.
Remove only the yellow tape from each cartridge.
Precaución: no retire ningún otro sello de los cartuchos.
Caution: Don’t remove any other seals from the cartridges.
5 Coloque cada cartucho en el soporte que corresponde a su color.
Insert the cartridges in the holder for each color.
Instale los cartuchos de tinta
Install Ink Cartridges
3
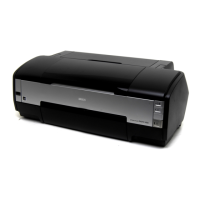
Epson Stylus
®
Photo 1410
Por favor lea esta guía antes de utilizar el producto.
Please read these instructions before using the product.
1 Abra el soporte del
papel y extraiga las
extensiones hacia arriba.
Open the paper
support and pull
up its extensions.
2 Extienda la bandeja de
salida del papel.
Open the output tray and
pull out its extension.
4
Bandeja de
salida del papel
Output tray
Botón de liberación
Release button
Guía de instalación
Start Here
Precaución: no saque los cartuchos de tinta de su envoltorio hasta que
esté listo para instalarlos. Los cartuchos están embalados herméticamente
para garantizar su fiabilidad.
Caution: Do not open ink cartridge packages until you are ready to install
the ink. Cartridges are vacuum packed to maintain reliability.
Si falta algún elemento, comuníquese con Epson según se describe al
dorso de esta guía.
If anything is missing, contact Epson as described on the back of
this sheet.
Retire toda la cinta
adhesiva y el material
de protección.
Remove all the tape
and foam sheets.
Desembale la impresora
Unpack
1
1 Conecte el cable de alimentación.
Plug in the power cable.
2 Pulse el botón de encendido .
Press the power button.
2
Encienda la impresora
Turn On the Printer
Papel grande
Larger papers
Papel pequeño
Smaller papers
Lengüeta
Tab
Papel grande
Larger papers
Papel pequeño
Smaller papers
Soporte del papel
Paper support
Cargue el papel
Load Paper