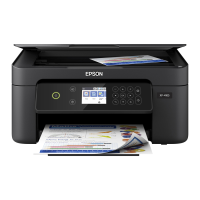
If anything is missing, contact Epson as described on the back.
Caution: Do not open ink cartridge packages until you are ready to install the ink.
Cartridges are vacuum packed to maintain reliability.
Canada only: For French speakers, remove sticker(s) from the backing sheet and
place over the corresponding text on the control panel.
Remove all protective materials including from inside the paper cassette.
1 Lift the scanner and remove the transportation lock.
2 Store the transportation lock as shown.
3 Close the scanner.
Unpack
1
Start Here
3 Slide the edge guides against the paper.
4 Lower the photo tray.
5 Squeeze the edge guides and slide them out. Then insert 4 x 6-inch or
5 x 7-inch photo paper with the glossy or printable side face-down.
Note: Make sure the paper fits under the edge guide.
6 Slide the edge guides against the paper.
7 Keep the cassette flat as you insert it.
8 Extend the output tray and flip up the stopper.
5
Load paper
(Included for
Canada only)
1 Connect the power cable.
Caution: Do not connect to your computer yet.
2 Press the On button, then raise the control panel.
To lower the control panel, press the Unlock button.
Caution: To avoid damaging your Artisan 710 Series, always press the Unlock
button to lower the control panel.
Note: For more information on using and adjusting the control panel, see your
Quick Guide.
Turn on and adjust
2
Series
The paper cassette has 2 trays. The main tray is for letter-size, legal-size,
or 8 x 10-inch paper. The photo tray is for 4 x 6- or 5 x 7-inch photo paper.
1 Pull out the paper cassette. Then slide back the photo tray and lift it up.
2 Squeeze the edge guides and slide them out. Then insert paper with the
glossy or printable side face-down.
Power cord
Install ink cartridges
4
Note: Do not load paper yet.
1 Lift up the scanner.
Select language
3
Press or to select your Language, then press OK.
2 Unpack the ink cartridges.
3 Remove only the yellow tape from each cartridge.
Caution: Don’t remove any other seals or the cartridges may leak.
4 Insert the cartridges in the holder for each color. Press each cartridge
down until it clicks.
5 Lower the scanner.
6 Wait while ink charges. Charging takes about 5 minutes.
Note: Your Artisan 710 Series ships with full cartridges and part of the ink
from the first cartridges is used for priming the Artisan 710 Series. Replacement
cartridges will print more pages.
Caution: Don’t turn off the Artisan 710 Series while the ink system is charging
or you’ll waste ink.


 Loading...