Quick Setup
Before using the projector, make sure you read these instructions and the safety
instructions in the online User’s Guide.
Contents
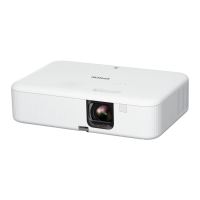
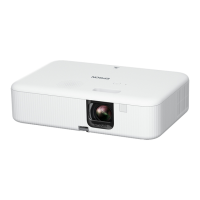
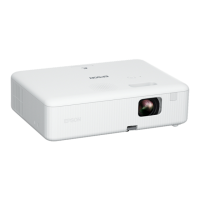
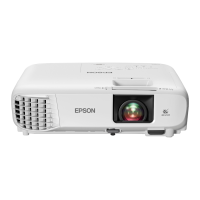
Make sure your projector box includes all of these parts:
You can place the projector on almost any flat surface or attach it to a tripod or
other hardware with an optional mount. See the online User’s Guide for more
information.
Connect the projector
Video device or computer
You can connect video equipment or a computer. Connect one end of an HDMI
cable to the projector’s HDMI port and the other end to an HDMI port on your
video device or computer. See the online User’s Guide for details.
Caution: Do not turn on the video source before connecting it to the projector;
you may damage the projector.
HDMI cable
USB device
You can connect a supported digital camera, USB flash drive, or USB storage
device to the projector’s USB-A port, and then use the projector’s PC Free
feature. See the online User’s Guide for details.
USB cable
Streaming media player
You can connect a streaming media player (not included) to your projector.
Turn on your equipment
1
Turn on your computer or video source.
2
Plug in the projector. The status light blinks, then remains lit for a few
seconds before turning off.
3
Insert the batteries into the remote control.
4
Press the power button on the projector or the remote control. The
status light flashes blue and then stays on.
5
If you connected an active source, the projector displays the source.
Otherwise, the Home screen is displayed. If necessary, select the active
source to display the image. Press the home button to return to the
Home screen.
6
The default language of the menu system is English. To select another
language, press the menu button on the remote control. Use the
directional pad and enter button to select Extended > Language, then
select your language. Press the menu button to exit the menu system.
Note: To shut down the projector, press the power button twice.
Adjust the image
1
Make sure the projector is turned on and displaying an image.
Note: If you still see a blank screen or have other display problems, see
the troubleshooting tips.
2
To reduce or enlarge the image, press the menu button on the remote
control. Use the directional pad and enter button to select Settings >
Installation > Zoom. Press left or right on the directional pad to adjust
the image size. Press the menu button to exit the menu system.
3
To adjust the image height, press and hold the foot release lever on the
bottom of the projector to extend the front adjustable foot. Release the
lever to lock the foot in the desired position.
4
Move the focus lever on top of the projector left or right to adjust the
image sharpness.
5
If your image looks like or , you may have placed the projector
off to one side of the screen at an angle. Place the projector directly in
front of the center of the screen, facing the screen squarely. If you can’t
move the projector, use the keystone button on the remote control to
correct the image shape.
6
If your image looks like or , press the keystone button on the
remote control and adjust the V-Keystone setting to correct it.
Note: For more adjustment methods, see the online User’s Guide.
Using the remote control
Choose which source
to display
Adjust image
brightness
Adjust projector
volume
Adjust the image
shape
Turn projector
on and off
Change the
color mode
Navigate projector
menus
Access the home
screen
Mute the sound
Zoom into and out
of the image
Enter a selection
Access projector
menus
Freeze the projected
image
Turn off projector
display and mute
sound
Troubleshooting
•
If you see a blank screen, check the following:
•
Make sure your computer or video device is properly connected.
•
Make sure the status light on the projector is blue and not flashing.
•
Press the power button or the A/V mute button on the
projector or remote control to wake the projector from standby or
sleep mode, if necessary.
•
If you see a blank screen when a computer is connected, check the
following:
•
On Windows
®
, hold down the Windows key and press P at the same
time, then click Duplicate.
•
If you are using a Mac laptop with macOS 12, select System
Preferences > Displays > Display Settings. Select the projector,
then choose the mirror option for your display from the drop-down
menu.
On macOS 11 and older, open System Preferences and select
Displays. Click the Arrangement tab and select the Mirror
Displays checkbox.
•
If the projector does not respond to remote control commands, make sure
the batteries in the remote control are installed correctly. Replace the
batteries, if necessary.
Registration
Register today to get product updates and exclusive offers. You can register
online at http://epson.com/webreg.
Where to get help
Manual
For more information about using the projector, you can view or download the
online manual from the Epson website, as described below.
Internet support
Visit http://epson.com/support/cow01 (U.S.) or
http://epson.ca/support/cow01 (Canada) to download software and utilities,
view the manual, get FAQs and troubleshooting advice, or contact Epson.
Telephone support services
To use the Epson
®
PrivateLine
®
Support service, call (800) 637-7661. This service
is available for the duration of your warranty period. You may also speak with a
support specialist by calling (562) 276-4394 (U.S.) or (905) 709-3839 (Canada).
Support hours are 7 am to 4 pm, Pacific Time, Monday through Friday. Days and
hours of support are subject to change without notice. Toll or long distance
charges may apply.
Optional accessories
For a list of optional accessories, see the online User’s Guide.
You can purchase screens or other accessories from an Epson authorized reseller.
To find the nearest reseller, call 800-GO-EPSON (800-463-7766). Or you can
purchase online at http://epsonstore.com (U.S. sales) or http://epsonstore.ca
(Canadian sales).
CO-W01
EPSON is a registered trademark and EPSON Exceed Your Vision is a registered logomark of Seiko Epson
Corporation.
PrivateLine is a registered trademark of Epson America, Inc.
Windows is a registered trademark of Microsoft Corporation in the United States and/or other countries.
Mac is a trademark of Apple Inc., registered in the U.S. and other countries.
General Notice: Other product names used herein are for identification purposes only and may be trademarks of
their respective owners. Epson disclaims any and all rights in those marks.
This information is subject to change without notice.
© 2022 Epson America, Inc., 4/22
Printed in XXXXXX CPD-62238