EasyManua.ls Logo

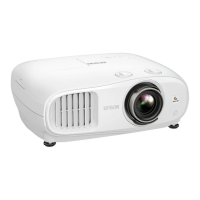
Epson Home Cinema 4010 User Manual

Epson Home Cinema 4010
4 pages
To Next Page IconTo Next Page
Page #1 background imageLoading...
Page #1 background image
Quick Setup
IMPORTANT: Before using this product, make sure you read these instructions
and the safety instructions in the online User’s Guide.
Choose a location
Keep the projector level and place it at a height so its lens is even with the top
or bottom of the screen and is centered horizontally. If this isn’t possible, use
the lens shift feature or the keystone correction button on the projector to
reposition the image (see “Adjust the image”).
In order to view 3D images correctly, RF 3D glasses must be worn within 32 feet
(10 m) of the projector. Use the image below to determine the viewing distance
for 3D projection (the shading represents the 3D viewing area):
See the online User’s Guide for more information on where to place your
projector.
Connect the projector
Connect multiple video devices and use the Source buttons on the remote
control or the button on the projector to switch between them. For
additional connection types, see the online User’s Guide.
HDMI cable
Optical HDMI cable
Note: When connecting a source that requires HDCP 2.2, you must use the
HDMI1 port.
Turn on your equipment
1
Turn on your video source.
2
Plug in the projector.
3
Press the power button on the projector or the On button on the
remote control. The shutter opens and the power light flashes blue,
then stays on.
Note: To shut down the projector, press the power button on the
projector or the Standby button on the remote control, then press the
button again to confirm, if necessary. Wait for cooldown to complete
before unplugging the projector.
4
Use the arrow buttons on the remote control to highlight any of the
options on the Home screen that appears, then press Enter to select it.
You can display a QR code, switch between projection sources, and quickly
access various adjustment options from this screen.
5
The default language of the menu system is English. To select another
language, press the Menu button on the projector or remote control.
Select Extended and press Enter. Select Language and press Enter.
Select your language and press Enter. Press the Menu button to exit
the menu system.
Using the remote control
Install the batteries as shown (two AA batteries).
Choose which source to
display
Turn projector on
Access projector menus
Adjust zoom, focus,
and lens shift
Turn off projector
display
Navigate projector
menus
Turn projector off
Control connected
sources with HDMI
Link
For more information on using the remote control, see the online User’s Guide.
Home Cinema 4010
Question and Answer IconNeed help?

Do you have a question about the Epson Home Cinema 4010 and is the answer not in the manual?

Epson Home Cinema 4010 Specifications

General IconGeneral
Brightness2400 lumens
Contrast Ratio200, 000:1
Lens ShiftVertical: ±96.3%, Horizontal: ±47.1%
3D SupportYes
Projection Technology3LCD
Color Processing10-bit
HDR SupportYes
Native Resolution1920 x 1080
Weight24.3 lbs
Lamp LifeUp to 5, 000 hours
ConnectivityHDMI (x2), USB, RS-232C, LAN
Throw Ratio1.35 - 2.84
Input LagApprox. 28 ms
Dimensions20.5 x 17.7 x 6.7 inches
Zoom Ratio1 – 2.1

Summary

Choose a location

3D Viewing Area

Diagram showing the recommended viewing distance for 3D projection.

Connect the projector

Connection Ports

Illustrates connecting video devices via HDMI cables.

HDCP 2.2 Requirement

Note on using HDMI1 port for sources requiring HDCP 2.2.

Turn on your equipment

Power On Sequence

Steps to power on the video source and then the projector.

Using the remote control

Battery Installation

Instructions for installing two AA batteries into the remote.

Remote Control Functions

Overview of key buttons like On/Standby, Source, and Menu.

Adjust the image

Test Pattern Display

Using the Pattern button to show a test pattern for adjustments.

Vertical and Tilt Adjustment

Adjusting front feet to raise or correct a tilted image.

Focus and Zoom Control

Using the Lens button and arrow keys for focus and image size.

Keystone Correction

Using buttons to correct image shape and notes on its impact.

Viewing 3D images

3D Setup Requirements

Connect 3D device and use RF 3D active shutter glasses.

Pairing 3D Glasses

Procedure to pair 3D glasses with the projector.

2D to 3D Conversion

Enabling and setting the 2D to 3D conversion feature.

Troubleshooting

No Signal Issues

Checks for blank screens, power light, and correct source selection.

3D Display Problems

Troubleshooting 3D display, viewing range, and glasses.

4K Source Limitation

Note that 2D-to-3D conversion is not compatible with 4K sources.

Where to get help

Manuals and Online Support

Information on accessing online manuals and support via website.

Telephone Support

Contact details and hours for Epson PrivateLine® Support.

Product Registration

Instructions for registering the product for updates and offers.

Optional Accessories

Information on purchasing optional accessories like 3D glasses.

Notices

Bluetooth Safety

Safety instructions and specifications for the Bluetooth module.

FCC Compliance

FCC statements regarding compliance and potential interference.

Industry Canada Compliance

Industry Canada statements regarding compliance.

Declaration of Conformity

Formal declaration of product conformity to FCC rules.

Limited Warranty Terms

Warranty Coverage

Details of the 2-year projector and 90-day lamp warranty.

Warranty Exclusions

Conditions and damages not covered by the limited warranty.

Disclaimers and Liability

Statements on warranty disclaimers and limitations of liability.

Dispute Resolution

Information on arbitration, opt-out, and governing laws.

Related product manuals