EasyManua.ls Logo

Epson Home Cinema 2100 - User Manual

Epson Home Cinema 2100
4 pages
Print Icon
To Next Page IconTo Next Page
Loading...
Quick Setup
Before using the projector, make sure you read the safety instructions in the
online User’s Guide.
Note: Your product may differ from the illustrations on this sheet, but the
instructions are the same.
Connect the projector
Choose from the following connections. See the sections below or the online
User’s Guide for details.
Video device or computer
Connect one end of an HDMI cable to one of the projector’s HDMI ports and
the other end to an HDMI port on your video device or computer.
Note: For information on connecting the projector to your computer or other
devices (camera, USB flash drive, etc.), see the online User’s Guide.
HDMI cable
Mobile media device
Connect tablets, smartphones, and other devices that support the MHL™
standard to the HDMI1 MHL port.
MHL cable
Streaming device
Some devices may require an adapter or may not require an MHL cable. Not all
features or functions may be supported. Check your device’s documentation for
more information.
Note: For information on wireless screen mirroring (Home Cinema 2150), see
the online User’s Guide.
Connect audio
Built-in speaker
The projector has a built-in speaker that can play audio from a video source
(DVD player, streaming device, etc.) connected by an HDMI cable.
External audio device
You can also play audio through an external audio device by connecting the
projector to your home theater receiver or directly to external speakers.
Note: Connecting an external audio device disables the projector’s internal
speaker. If you do not hear sound from an HDMI source, set the connected
device to PCM output.
Home theater system
Video source
Surround sound Receiver Projector
Video cable
Note: See your home theater receiver documentation for more information
on connections.
Powered speakers or headphones
3.5 mm stereo
mini cable
Turn on your equipment
1
Turn on your computer or video source.
2
Plug in the projector. The power light on the projector turns blue.
3
Open the A/V Mute slide all the way.
4
Press the power button on the projector or remote control. The status
light flashes blue and then stays on.
Note: To shut down the projector, press the power button twice.
5
Use the arrow buttons on the remote control to highlight any options
on the Home screen that appears, then press Enter to select it. You can
switch between projection sources and quickly access various adjustment
options from this screen.
6
The default language of the menu system is English. To select another
language, press the Menu button on the projector or remote control.
Select Extended and press Enter. Select Language and press Enter.
Select your language and press Enter. Press the Menu button to exit the
menu system.
Adjust the image
1
If you don’t see an image, press the Source button on the projector or
one of the source buttons on the remote control to select the image
source.
Note: If you still see a blank screen or have other display problems, see
the troubleshooting tips on the back of this sheet.
2
To raise the image, press the foot release button and lift the front of the
projector. Release the button to lock the foot in position.
3
To reduce or enlarge the image, turn the zoom ring.
4
To sharpen the image, turn the focus ring.
5
If your image looks like or , you may have placed the projector
off to one side of the screen at an angle. Place the projector directly in
front of the center of the screen, facing the screen squarely. If you can’t
move the projector, use the horizontal keystone slider on the projector to
correct the image shape.
6
Your projector automatically adjusts images that look like or ,
but if necessary you can press the or buttons on the projector to
correct it.
Using the remote control
Install the batteries as shown (two AA batteries).
Choose which source
to display
Turn projector
on and off
Control connected
devices with HDMI Link
Switch between
2D and 3D
Access the Home
screen
Navigate projector
menus
Access projector
menus
For more information on using the remote control, see the online User’s Guide.
Viewing 3D images
To view 3D content, you must first connect a 3D-compatible video device to
one of the HDMI ports on your projector. You also need a pair of Epson
®
(part
number V12H548006) or Epson-compatible RF 3D active shutter glasses.
1
Turn on and begin playback on the 3D-compatible video device.
Note: Make sure you set the video device to play content in 3D mode.
2
Press the 2D/3D button on the remote control, if necessary.
3
Slide the power switch on your 3D glasses to the On position.
Note: If the glasses don’t automatically display 3D content, you may need
to pair them with the projector. Move the glasses within 10 feet (3 m) of
the projector, then press and hold the Pairing button on the 3D glasses
for at least 3 seconds. The status light on the glasses will alternately flash
green and red, then remain green for 10 seconds if pairing is successful.
You can also automatically convert 2D HDMI content to 3D. To enable the
2D-to-3D Conversion option, press the Menu button on the projector or remote
control. Select Signal and press Enter, then select 3D Setup and press Enter.
Select 2D-to-3D Conversion and press Enter. Select the Weak, Medium, or
Strong setting, then press Enter.
See the online User’s Guide for more information on adjusting 3D images.
Home Cinema 2100/2150
Question and Answer IconNeed help?

Do you have a question about the Epson Home Cinema 2100 and is the answer not in the manual?

Summary

Quick Setup Guide

Connecting Projector Devices

Instructions for connecting video sources such as computers, mobile devices via HDMI or MHL.

Connecting Audio Sources

Guidance on connecting audio to the projector's built-in speaker or external audio devices.

Powering On Your Projector

Adjusting Projector Image

Using the Remote Control

Viewing 3 D Content

Troubleshooting Projector Issues

Getting Help and Support

Regulatory and Safety Notices

Industry Canada Compliance

Epson Projector Limited Warranty

Overview

This document serves as a quick setup and user guide for the Epson Home Cinema 2100/2150 projector, providing instructions on initial setup, image adjustment, remote control usage, 3D viewing, troubleshooting, and warranty information.

Function Description

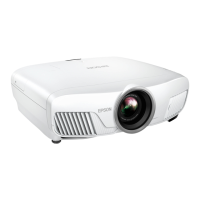
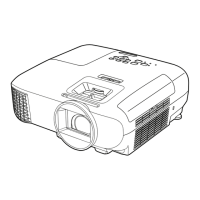
The Epson Home Cinema 2100/2150 is a projector designed for home entertainment, capable of displaying video content from various sources, including computers, video devices, mobile media devices, and streaming devices. It supports both 2D and 3D image projection, offering a versatile viewing experience. The projector includes a built-in speaker for audio playback and also allows connection to external audio devices or home theater systems for enhanced sound. It features automatic image adjustment capabilities, as well as manual controls for fine-tuning the projected image. The device is controlled via an included remote control or buttons on the projector itself, providing access to menus, source selection, and various settings.

Usage Features

Connecting the Projector: The projector offers multiple connectivity options:

  • Video Device or Computer: Connect via an HDMI cable to one of the projector's HDMI ports. The manual advises consulting the online User's Guide for connecting other devices like cameras or USB flash drives.
  • Mobile Media Device: Tablets, smartphones, and other MHL™-compatible devices can be connected to the HDMI1 MHL port using an MHL cable. Note that some devices may require an adapter, and not all features may be supported.
  • Streaming Device: Similar to mobile devices, streaming devices can be connected, though specific details are referred to the online User's Guide, especially for wireless screen mirroring on the Home Cinema 2150 model.

Connecting Audio:

  • Built-in Speaker: The projector has an integrated speaker for audio playback from HDMI-connected video sources.
  • External Audio Device: For enhanced sound, the projector can be connected to an external audio device or a home theater receiver. Connecting an external device disables the projector's internal speaker. If no sound is heard from an HDMI source, the connected device should be set to PCM output.

Turning on Equipment:

  1. Turn on your computer or video source first.
  2. Plug in the projector; the power light will turn blue.
  3. Open the A/V Mute slide completely.
  4. Press the power button on the projector or remote control. The status light will flash blue and then remain steady. To shut down, press the power button twice.

Navigating the Home Screen: After turning on, a Home screen may appear. Use the arrow buttons on the remote to highlight options and press Enter to select. This screen allows switching between projection sources and accessing various adjustment options.

Setting Language: The default menu language is English. To change it:

  1. Press the Menu button on the projector or remote control.
  2. Select Extended and press Enter.
  3. Select Language and press Enter.
  4. Choose your desired language and press Enter.
  5. Press the Menu button to exit.

Adjusting the Image:

  • No Image/Blank Screen: If no image appears, press the Source button on the projector or remote to select the correct input source. Troubleshooting tips are provided for persistent display problems.
  • Raising the Image: Press the foot release button, lift the front of the projector, and release the button to lock it in position.
  • Zooming: Turn the zoom ring to reduce or enlarge the image.
  • Focusing: Turn the focus ring to sharpen the image.
  • Keystone Correction: If the image appears distorted (e.g., trapezoidal), ensure the projector is placed directly in front of the screen. If repositioning is not possible, use the horizontal keystone slider on the projector to correct the shape. The projector also features automatic keystone correction, but manual adjustment buttons (☑ or ☐) are available if needed.

Using the Remote Control: The remote requires two AA batteries. It features buttons for:

  • Turning the projector on and off.
  • Selecting input sources (HDMI 1, HDMI 2, USB, PC, LAN).
  • Controlling connected devices via HDMI Link.
  • Accessing projector menus (Menu, Esc, Enter, arrow buttons).
  • Adjusting volume and muting.
  • Switching between 2D and 3D modes.
  • Accessing the Home screen.

Viewing 3D Images:

  1. Connect a 3D-compatible video device to an HDMI port on the projector.
  2. Ensure the video device is set to play 3D content.
  3. Turn on 3D glasses (Epson RF 3D active shutter glasses, part number V12H548006 or compatible).
  4. Press the 2D/3D button on the remote control if necessary.
  5. Slide the power switch on the 3D glasses to the On position.
  • Pairing 3D Glasses: If glasses don't automatically display 3D content, move them within 10 feet (3 m) of the projector. Press and hold the Pairing button on the glasses for at least 3 seconds. The status light will flash green and red alternately, then remain green for 10 seconds if pairing is successful.
  • 2D-to-3D Conversion: The projector can convert 2D HDMI content to 3D. To enable this:
    1. Press the Menu button.
    2. Select Signal and press Enter.
    3. Select 3D Setup and press Enter.
    4. Select 2D-to-3D Conversion and press Enter.
    5. Choose Weak, Medium, or Strong setting and press Enter.

Maintenance Features

Troubleshooting: The guide provides solutions for common issues:

  • Blank Screen/No Signal:
    • Verify the projector's status light is blue and not flashing, and the A/V Mute slide is open.
    • Press the Home button to check source input and settings.
    • For Windows 7 or later, use the Windows key + P shortcut and select Duplicate.
    • Press the Source button on the projector or remote to switch sources.
    • For Windows laptops, use the function key (e.g., Fn + F7) to display on an external monitor.
    • For Mac laptops, open System Preferences > Displays > Arrangement tab and select Mirror Displays.
  • 3D Image Display Problems:
    • Press the 2D/3D button on the remote to switch to 3D viewing mode.
    • Ensure you are within the 3D viewing range.
    • Check that 3D glasses are not in standby mode; slide the power switch Off then On.
    • Verify 3D Format settings in the Signal > 3D Setup menu match the connected device's 3D format.
    • Confirm that both the video device and media are 3D-compatible.

Support and Documentation:

  • Online User's Guide: The full manual can be viewed or downloaded from the Epson website (www.epson.com/support or www.epson.ca/support).
  • Telephone Support: Epson PrivateLine® Support (800-637-7661) is available during the warranty period. General support is available at (562) 276-4394 (U.S.) or (905) 709-3839 (Canada) during specified hours.
  • Internet Support: The Epson support websites offer solutions, utilities, documentation, FAQs, and troubleshooting advice.
  • Product Registration: Register online at www.epson.com/webreg for product updates and exclusive offers.

Optional Accessories: A list of optional accessories, including Epson RF 3D glasses (V12H548006), is available in the online User's Guide. Accessories can be purchased from authorized resellers or online at www.epsonstore.com (U.S.) or www.epsonstore.ca (Canada).

Warranty Information: The projector comes with a Two-Year Projector Limited Warranty, and the lamp has a 90-Day Lamp Limited Warranty from the date of original purchase. The warranty covers defects in workmanship and materials for products purchased new and operated in the United States, Canada, or Puerto Rico. Epson will repair or replace defective units at its option. The warranty does not cover excessive continual use, consumables (like filters), cosmetic damage, damage from improper maintenance, interaction with non-Epson products, misuse, abuse, improper installation, neglect, shipping damage, disasters, improper electrical current, software problems, chemical smoke, excessive humidity, or service by unauthorized personnel. The warranty is non-transferable and does not cover data loss.

Epson Home Cinema 2100 Specifications

General IconGeneral
Resolution1920 x 1080 (Full HD)
Contrast Ratio35, 000:1
Projection Technology3LCD
Aspect Ratio16:9
Projection Size30 - 300 inches
Lamp Life7, 500 hours (ECO mode)
Keystone CorrectionVertical ±30 degrees, Horizontal ±30 degrees
Input PortsHDMI, USB, VGA, Composite

Related product manuals