DM-D310F User’s Manual 5
Assembling the DM-D310F
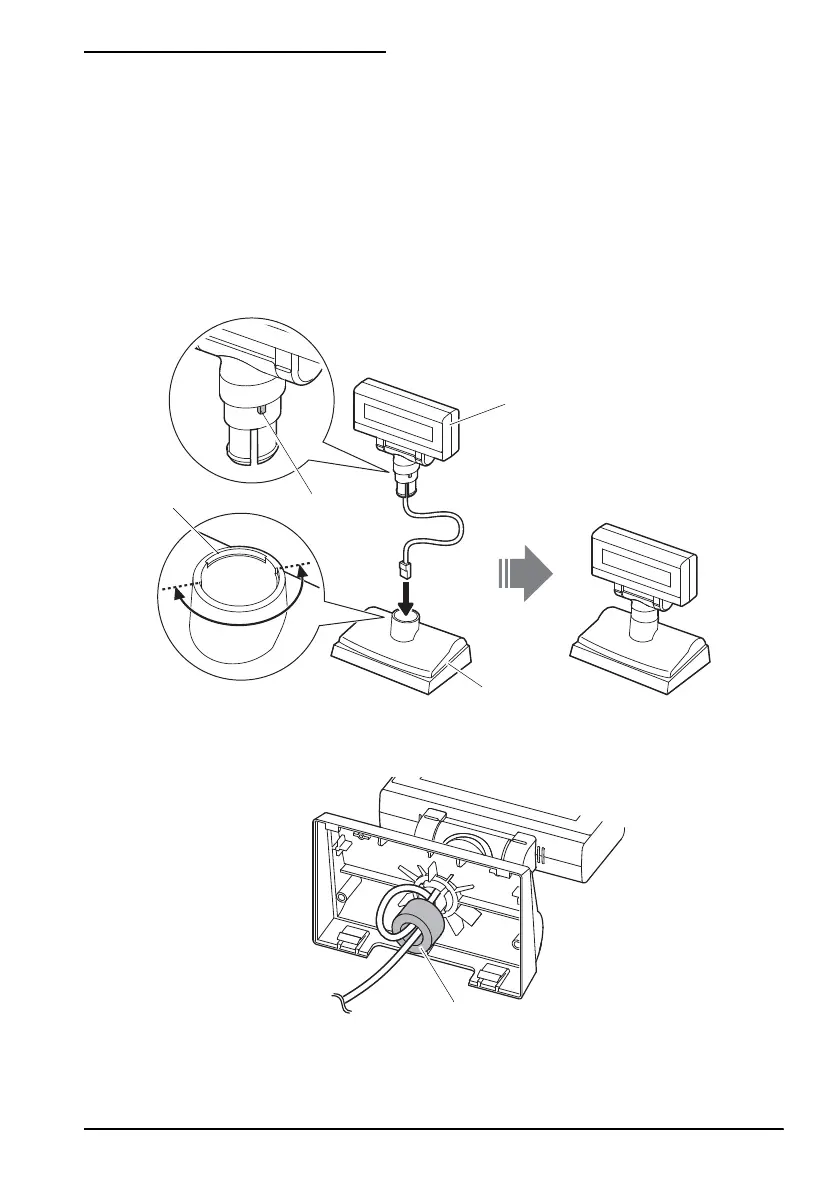
1. Pass the cable of the DM-D310F through the DM-D stand, as shown in the
illustration below.
2. Insert the pole of the DM-D310F into the hole in the DM-D stand, aligning
the projection on the pole with the wider side of the groove in the inside of
the pole of the DM-D stand (indicated in the semicircular arrow in the
illustration below), and push it until it clicks into place.
Note:
After installing the DM-D310F, check whether the display turns 180 degrees. If
not, make sure the projection on the DM-D310 is set in the wider side of the
groove in the DM-D stand.
3. Pass the cable through the hole in the ferrite core, and wrap the cable once
around the ferrite core.
DM-D310F
DM-D stand
Projection
Groove