41
Image Shape
• "Projector Setup Settings - Extended Menu" p.107
You can project an even, rectangular image by placing the projector directly
Correcting the Image Shape with the Horizontal
in front of the center of the screen and keeping it level. If you place the
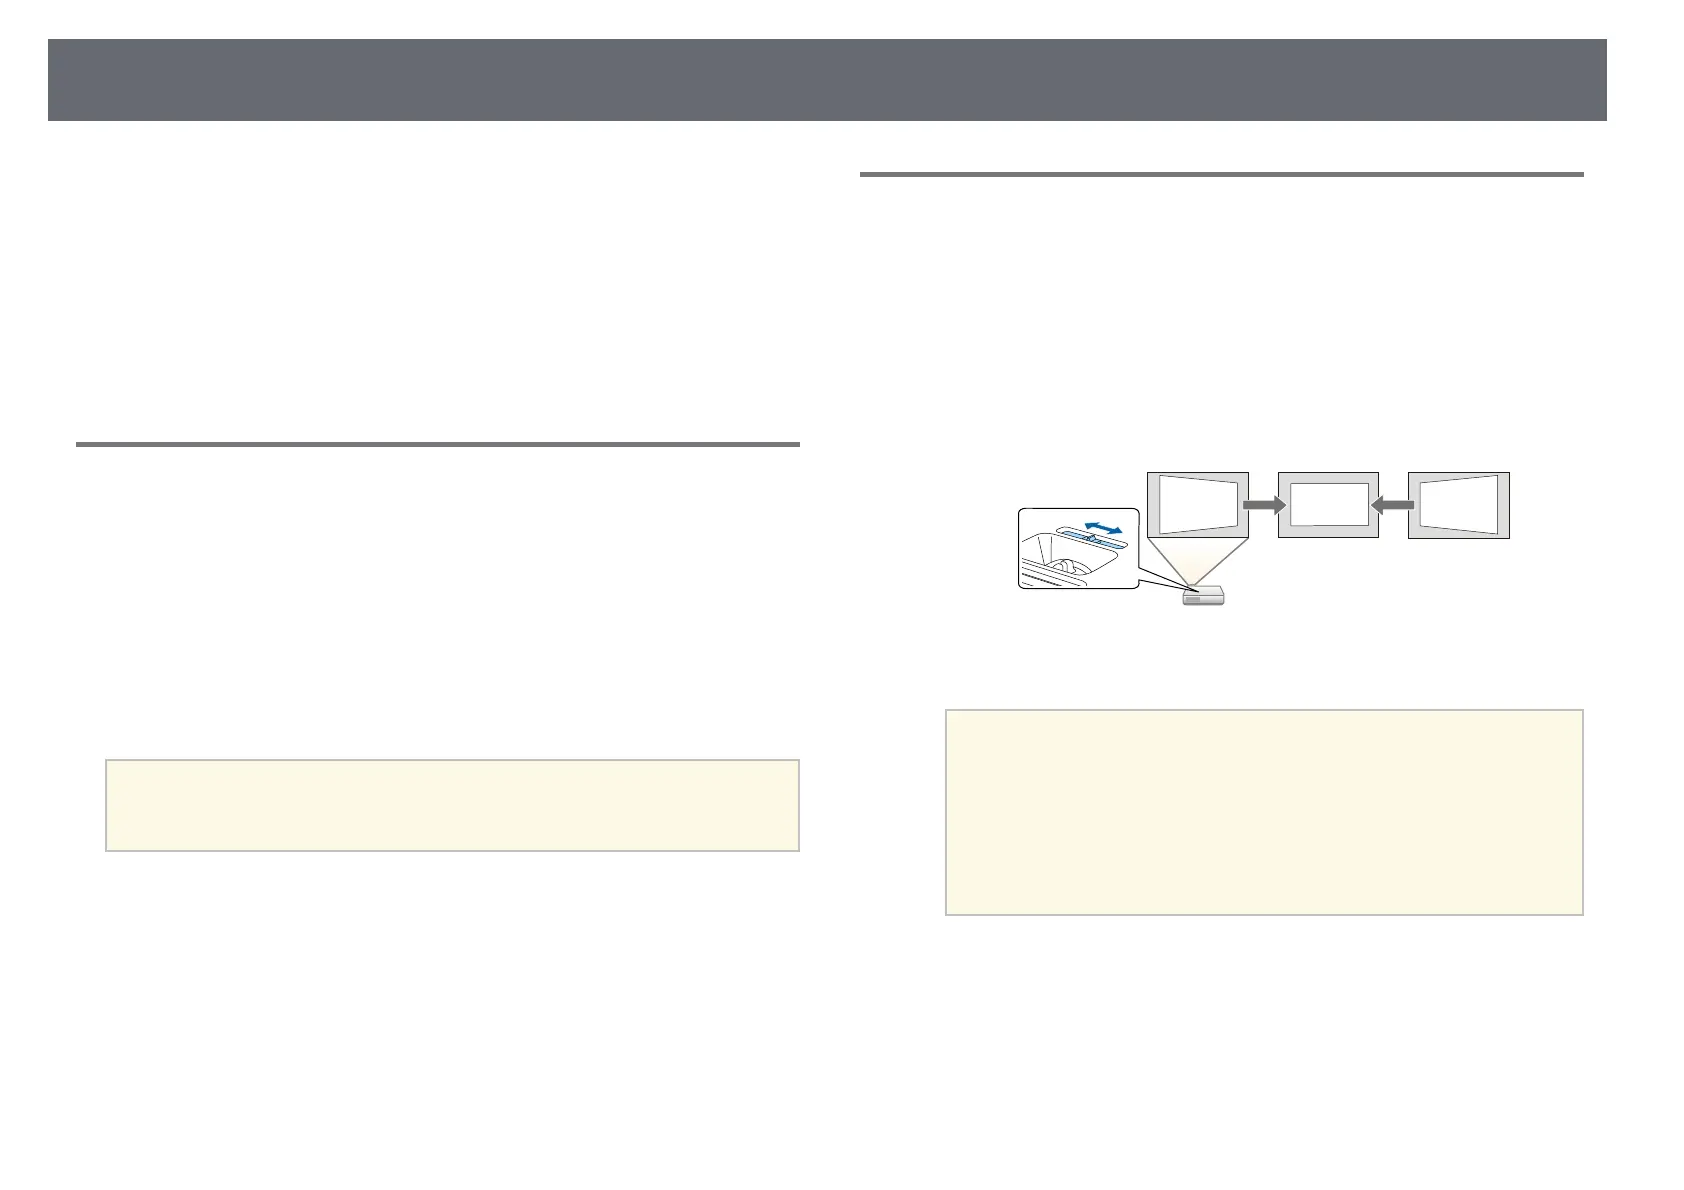
Keystone Slider
projector at an angle to the screen, or tilt it up or down, or off to the side, you
may need to correct the image shape.
You can use the projector's horizontal keystone slider to correct the shape of
gg Related Links
an image that is an uneven horizontal rectangle, such as when the projector is
• "Auto V-Keystone" p.41
placed to the side of the projection area.
• "Correcting the Image Shape with the Horizontal Keystone Slider" p.41
• "Correcting the Image Shape with the Keystone Buttons" p.42
a
Turn on the projector and display an image.
• "Correcting the Image Shape with Quick Corner" p.43
b
Adjust the slider until the image is an even rectangle.
Auto V-Keystone
When the projector is moved or tilted, Auto V-Keystone automatically
corrects any vertical keystone distortion.
When the projector is moved, it displays an adjustment screen and then
automatically corrects the projected image.
Auto V-Keystone can correct the projected image distortion in these
conditions:
After correction, your image is slightly smaller.
• Projection angle is about 30º up or down
• The Projection setting is set to Front in the projector's Extended menu
• When you use the horizontal keystone slider, set H-Keystone
Adjuster to On in the projector's Settings menu.
a
s Settings > Keystone > H/V-Keystone > H-Keystone
If you do not want to use the Auto V-Keystone function, set Auto V-
Adjuster
Keystone to Off in the projector's Settings menu.
a
• You can also correct the shape of the image in the horizontal
s Settings > Keystone > H/V-Keystone > Auto V-Keystone
direction by pressing the [Menu] button on the remote control
and selecting H/V-Keystone in the projector's Settings menu.
gg Related Links
s Settings > Keystone > H/V-Keystone
• "Projection Modes" p.38
• "Projector Feature Settings - Settings Menu" p.105
 Loading...