Do you have a question about the Epson EcoTank L6171 and is the answer not in the manual?
Remove all protective materials from the printer and inside the scanner unit.
Open ink tank cover and cap, then unpack ink bottles for filling.
Insert ink bottles into the correct slots without shaking or squeezing.
Wait for ink to fill the tank to the upper line automatically.
Repeat filling for all colors, close covers, reset ink levels, and adjust print quality.
Connect power, turn on the printer, and follow on-screen prompts for language and ink charging.
Open cassette, slide edge guides, and insert paper with the printable side down.
Insert cassette fully, pull out output tray, and select paper settings.
Connect phone cord to wall jack and product, then proceed with fax setup.
Ensure product is disconnected, run software, and select connection type (wireless, USB, wired).
Check network name (SSID) and password if network setup is unsuccessful.
Address dark screens or USB connection problems by checking cables and product status.
Locate User's Guide on desktop/App Store or contact technical support for assistance.
This document provides a comprehensive guide for setting up, using, and maintaining the Epson L6171/L6191 series of multifunction printers. It covers everything from initial unpacking and ink filling to software installation, mobile printing, and troubleshooting common issues.
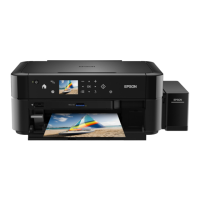
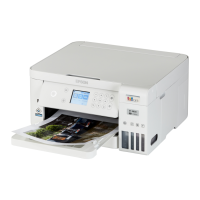
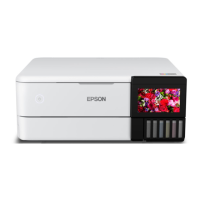
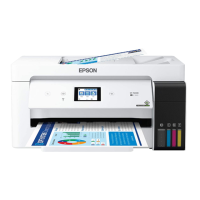
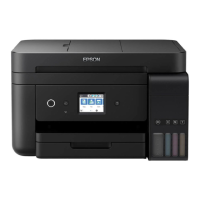
The Epson L6171/L6191 is a versatile multifunction printer designed for home and office use, capable of printing, scanning, and copying. The L6191 model also includes fax functionality. It features an integrated ink tank system, which allows for high-volume printing at a lower cost per page compared to traditional cartridge-based printers. The printer supports both wired and wireless network connections, enabling flexible placement and shared use among multiple devices. Mobile printing capabilities further enhance its versatility, allowing users to print directly from smartphones and tablets.
The setup process begins with unpacking the printer and removing all protective materials, both external and internal. This includes lifting the scanner unit to access and remove internal packing. Users are advised not to open the ink bottles until ready to fill the tanks, as they are vacuum-packed for reliability.
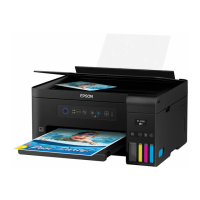
The printer utilizes an ink tank system, which requires manual filling with ink bottles. The process involves opening the ink tank cover and the cap for the specific color tank to be filled. Ink bottles are designed with a unique keying mechanism to prevent accidental filling of the wrong color. Users are instructed to unpack one ink bottle at a time, hold it upright, and slowly turn the cap to remove it. The bottle is then positioned along a slot in front of the filling port and inserted. The ink flows automatically into the tank and stops when it reaches the upper line, eliminating the need to squeeze the bottle. If ink does not flow, the user should lift and reinsert the bottle. It is crucial not to shake or squeeze the ink bottles and to avoid touching the top of the bottle after its cap is removed. After filling, the ink bottle cap should be replaced and tightened, and any remaining ink should be set aside for later use. This process is repeated for all other colors. Once all tanks are filled, the ink tank cover and scanner unit are closed.
After filling the ink tanks, the power cord is connected to the back of the product and then to an electrical outlet. The control panel is raised, and the power button is pressed to turn on the product. If an error message appears, users are advised to turn off the product and check for any remaining protective materials.
For the L6171 model, users press the navigation buttons to select their language on the LCD screen, then press the OK button. For the L6191, language, country, and time are selected. The printer then proceeds to an ink charging phase, which takes approximately 10 minutes. During this time, it is critical not to turn off the product, raise the scanner unit, or load paper, as this could waste ink. A confirmation message appears on the LCD screen, and users select "Done" to start charging. Once complete, an "OK" button is pressed to continue. After the initial charge, some ink will have been used, but the rest is available for printing.
To fully complete the ink tank filling, users repeat the initial ink filling steps for any remaining ink in the bottles. The bottle caps must be replaced before disposing of the bottles. After this, the ink tank cover and scanner unit are closed. Users then select "Next" and follow on-screen instructions to reset the ink levels.
The setup process concludes with on-screen instructions to adjust print quality, followed by pressing the "OK" button. These settings can be changed later via the product's control panel.
Paper loading involves opening the front of the paper cassette and pulling it out. The side edge guides are slid all the way out, and paper is inserted with the glossy or printable side down, ensuring it is loaded against the front edge guide and not sticking out. The side edge guides are then slid against the paper, but not too tightly, before closing the front of the cassette. The cassette is kept flat while inserting it all the way into the printer. Finally, the output tray is pulled out, and paper settings are selected on the control panel.
For the L6191 model, the phone cord is connected to a telephone wall jack and to the "LINE" port on the product. Users can then press "Proceed" to set up the fax or "Set Up Later" to configure it at another time.
Software installation is crucial for full functionality. Users are instructed to ensure the product is NOT CONNECTED to their computer before starting. If using Windows and a "Found New Hardware" screen appears, users should click "Cancel" and disconnect the USB cable. The software can be installed from the product CD or downloaded from the Epson website. After running the software package, users follow on-screen instructions. When the "Select Your Connection" screen appears, options include "Wireless connection" (which often sets up automatically but may require manual SSID and password entry), "Direct USB connection" (requiring a USB cable), or "Wired network connection" (requiring an Ethernet cable).
The printer supports various mobile printing options. Users can print directly from smartphones or tablets using iOS or Android with Epson iPrint by connecting the printer and device to the same network and tapping the action icon. Epson Print Enabler (for Android v4.4 or later) allows printing by connecting the printer and device to the same network and tapping the menu icon. Remote printing is also possible with Epson Connect and Google Cloud Print.
Users are advised not to shake or squeeze ink bottles and to avoid touching the top of the bottle after its cap is removed to prevent spills or contamination.
If printouts show lines or incorrect colors, users should run a nozzle check to identify clogged print head nozzles. If clogs are found, a print head cleaning should be performed.
If the product's screen is dark, users should ensure the product is turned on and press any button (L6171) or touch the screen (L6191) to wake it from sleep mode.
If the setup program cannot find the product after connecting it with a USB cable, users should ensure the product is on and securely connected.
For network setup issues, users should verify they have selected the correct network name (SSID), restart their router, and ensure the printer is connecting to a 2.4 GHz network (if the router offers both 2.4 GHz and 5 GHz). If a firewall alert appears, "Unblock" or "Allow" should be selected. For secure networks, the correct network password (WEP key or WPA passphrase) must be entered, paying attention to case sensitivity.
The document emphasizes careful handling of ink to prevent spills and permanent stains. If ink spills, it should be wiped off immediately with a damp towel. Users are warned to keep ink bottles out of reach of children and not to drink the ink. During ink charging, it is crucial not to turn off the product, raise the scanner unit, or load paper to avoid wasting ink.
For more detailed information on settings, loading capacity, available paper types and sizes, and other advanced features, users are directed to the online User's Guide. Windows users can access it via an icon on their desktop or Apps screen, while Mac users can find it in Applications/Epson Software/Guide. If the icon is missing, the guide can be found on the Epson website.
For further assistance, including downloading drivers, viewing manuals, FAQs, or contacting Epson, users can visit the Epson support website. Phone numbers for technical support are also provided for various countries.
The Epson L6171/L6191 is designed for ease of use and efficient operation, with clear instructions provided for every step of the setup and maintenance process. Its integrated ink tank system and mobile printing capabilities make it a practical choice for users seeking a cost-effective and versatile printing solution.
| Display | LCD |
|---|---|
| Control type | Touch |
| Product color | Black |
| Built-in display | Yes |
| Display diagonal | 2.4 \ |
| Market positioning | Home & office |
| Print technology | Inkjet |
| Maximum resolution | 4800 x 1200 DPI |
| Duplex printing mode | Auto |
| Print speed (black, normal quality, A4/US Letter) | 33 ppm |
| Print speed (color, normal quality, A4/US Letter) | 20 ppm |
| Duplex print speed (black, normal quality, A4/US Letter) | 6.5 ppm |
| Duplex print speed (color, normal quality, A4/US Letter) | 4.5 ppm |
| Envelopes sizes | 10, C6, DL |
| Maximum print size | 216 x 1200 mm |
| Paper tray media types | Bond paper, Photo paper, Plain paper |
| Non-ISO print media sizes | Executive (184 x 267mm), Legal (media size), Letter (media size) |
| ISO A-series sizes (A0...A9) | A4, A6 |
| Photo paper sizes (imperial) | 4x6, 5x7, 8x10 \ |
| Maximum ISO A-series paper size | A4 |
| USB 2.0 ports quantity | 1 |
| Wi-Fi standards | 802.11b, 802.11g, Wi-Fi 4 (802.11n) |
| Cabling technology | 10/100Base-T(X) |
| Ethernet LAN data rates | 10, 100 Mbit/s |
| Mobile printing technologies | Apple AirPrint, Epson Connect, Epson Email Print, Epson Remote Print, Epson iPrint, Google Cloud Print, Mopria Print Service |
| Copier resize | 25 - 400 % |
| Duplex copying | - |
| Maximum copy resolution | - DPI |
| Maximum number of copies | 99 copies |
| Copy speed (black, normal quality, A4) | 11 cpm |
| Copy speed (color, normal quality, A4) | 5.5 cpm |
| Scan to | Cloud, PC |
| Scanner type | Flatbed scanner |
| Duplex scanning | No |
| Input color depth | 48 bit |
| Maximum scan area | 216 x 297 mm |
| Output color depth | 24 bit |
| Maximum scan resolution | 9600 x 9600 DPI |
| Optical scanning resolution | 1200 x 2400 DPI |
| AC input voltage | 100 - 240 V |
| AC input frequency | 50 - 60 Hz |
| Power consumption (off) | 0.2 W |
| Power consumption (sleep) | 0.9 W |
| Power consumption (standby) | 5.3 W |
| Power consumption (printing) | 12 W |
| Power consumption (average operating) | - W |
| Mac operating systems supported | Mac OS X 10.10 Yosemite, Mac OS X 10.11 El Capitan, Mac OS X 10.12 Sierra, Mac OS X 10.6 Snow Leopard, Mac OS X 10.7 Lion, Mac OS X 10.8 Mountain Lion, Mac OS X 10.9 Mavericks |
| Server operating systems supported | Windows Server 2003, Windows Server 2008, Windows Server 2012, Windows Server 2013, Windows Server 2016 |
| Windows operating systems supported | Windows 10, Windows 7, Windows 8, Windows 8.1, Windows Vista |
| Storage temperature (T-T) | -20 - 40 °C |
| Operating temperature (T-T) | 10 - 35 °C |
| Storage relative humidity (H-H) | -5 - 85 % |
| Operating relative humidity (H-H) | 20 - 80 % |
| Printing colors | Black, Cyan, Magenta, Yellow |
| Country of origin | Philippines |
| Maximum duty cycle | - pages per month |
| Number of print cartridges | 4 |
| Page description languages | ESC/P-R |
| Sustainability certificates | RoHS, ENERGY STAR |
| Total input capacity | 150 sheets |
| Total output capacity | 30 sheets |
| Cables included | AC, USB |
| Depth | 347 mm |
|---|---|
| Width | 375 mm |
| Height | 231 mm |