Do you have a question about the Epson ET-2840 and is the answer not in the manual?
Download the Epson Smart Panel app from your device's app store.
Press the power button to turn on the printer.
Launch the app and follow instructions to set up your product.
Remove all protective materials from the printer before use.
Connect the power cord to the product and an electrical outlet.
Select between using the Epson Smart Panel app or manual setup.
Open the ink tank cover and the cap for the black ink tank.
Unpack and remove the cap from the black ink bottle.
Insert the ink bottle into the filling port.
Wait for ink to fill the tank automatically.
Remove the bottle and securely close it with its cap.
Securely close the black ink tank cap.
Repeat steps for Cyan, Magenta, and Yellow ink tanks.
Close the main ink tank cover.
Raise the control panel and press the power button.
Choose the display language for the printer.
Follow LCD prompts to continue setup via the app.
Hold help button for 5 seconds when Start Here sheet message appears.
Press the start button to begin ink charging.
Press OK to proceed after ink charging.
Follow on-screen instructions to adjust print quality.
Prepare printer after ink charging by adjusting feeder guard and support.
Slide edge guides to their widest position.
Insert paper into the rear feeder, noting orientation.
Slide edge guides against paper, not too tightly.
Close the paper feeder guard.
Open the front cover of the printer.
Pull out the output tray and raise the paper stopper.
Select paper settings on the product's control panel.
Ensure internet connection and product is not connected via USB.
Download and run the product's software package.
Follow on-screen instructions to run the setup program.
Choose wireless or direct USB connection and follow prompts.
Print directly from Android devices via network connection.
Use the app for intuitive printing and scanning control.
Print remotely using Epson Connect.
Print using voice assistants linked to an Epson Connect account.
Resolve issues like incorrect SSID, firewall alerts, or password entry.
Address lines or incorrect colors by running nozzle checks.
Wake the product from sleep mode by pressing any button.
Ensure product is on and USB cable is securely connected.
Access the online User's Guide via desktop icon or Apps screen.
Get help via website, phone, or contact Epson support.
Information on returning products for proper disposal.
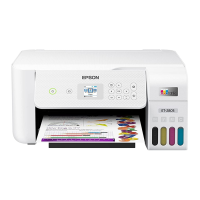
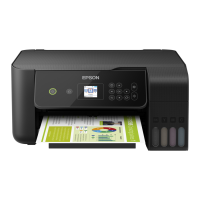
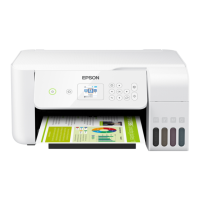
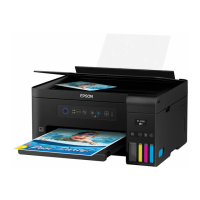
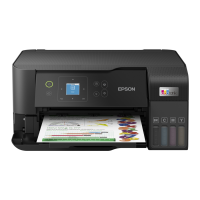
The Epson ET-2840 is a versatile all-in-one Supertank printer designed for home and small office use, offering printing, scanning, and copying functionalities. Its key feature is the integrated ink tank system, which eliminates the need for traditional ink cartridges, providing a more economical and environmentally friendly printing solution. The printer is designed for ease of use, from initial setup to daily operation, and supports various connectivity options including wireless and USB.
The ET-2840 primarily functions as a color inkjet printer, capable of producing high-quality documents and photos. It utilizes a four-color ink system (Black, Cyan, Magenta, Yellow) with refillable ink tanks. The printer is equipped with a print head that charges ink directly from these tanks, ensuring continuous printing without frequent cartridge replacements. This Supertank system is designed to deliver a high page yield, significantly reducing the cost per print compared to cartridge-based printers.
Beyond printing, the ET-2840 includes a flatbed scanner, enabling users to digitize documents and photos. The scanner supports various resolutions, allowing for detailed captures suitable for archiving or sharing. Integrated with the scanning function is the copying capability, which allows users to duplicate documents directly from the printer's control panel without needing a computer. This feature is convenient for quick reproductions of single or multiple pages.
The printer is designed to be a central hub for document management, supporting both wired and wireless connections. Its wireless capabilities allow for printing from a wide range of devices, including smartphones, tablets, and computers, without the need for physical cables. This flexibility makes it suitable for modern, multi-device households and offices.
Setting up the ET-2840 is streamlined, with an emphasis on user-friendliness. The initial setup process is guided by the Epson Smart Panel app, which can be downloaded to a smartphone or tablet. This app provides interactive, step-by-step instructions for unpacking the printer, filling the ink tanks, and configuring network settings. For users who prefer not to use a mobile device, a traditional setup method is also available.
The ink tank system is a core usage feature. Users are instructed to fill the ink tanks with the included ink bottles. The bottles are designed with a keyed system, ensuring that each color ink can only be inserted into its corresponding tank, preventing accidental mixing. The filling process is designed to be mess-free, with the ink flowing automatically into the tank and stopping when full. This design minimizes spills and waste. After the initial fill, a "ink charging" process takes place, which prepares the print head for operation. This process takes approximately 11 minutes.
Paper loading is straightforward, with a rear paper feeder that accommodates various paper types and sizes, including plain paper, glossy paper, and envelopes. Users are guided to load paper glossy or printable side up, short edge first, and to adjust the edge guides to fit the paper snugly. The printer's control panel allows users to select paper settings, ensuring optimal print quality for different media.
Connectivity options enhance the printer's usability. For wireless printing, the software installer typically sets up the connection automatically. If manual intervention is needed, users can enter their network name (SSID) and password. Direct USB connection is also supported for users who prefer a wired setup.
The ET-2840 supports mobile and voice-activated printing. Users can print directly from Android devices (v4.4 or later) by connecting the printer and device to the same network. The Epson Smart Panel app further enhances mobile functionality, turning the mobile device into a control center for printing and scanning. Epson Connect™ allows for remote printing, while integration with voice-activated assistants enables printing of various items through voice commands, adding a layer of convenience for modern smart homes and offices.
The printer's control panel features an LCD screen that displays setup messages, status updates, and options for various functions. Users can select their language, initiate ink charging, and adjust print quality directly from this panel. The interface is designed to be intuitive, guiding users through common tasks.
Maintenance of the ET-2840 is primarily focused on managing ink levels and ensuring print quality. The ink tank system is designed for easy refilling. Users are advised to periodically inspect ink levels to ensure they do not fall below the lowest lines on the tanks, as prolonged use with low ink levels can damage the product. Refilling instructions are provided in the online User's Guide.
To maintain optimal print quality, the printer includes built-in diagnostic and cleaning functions. If printouts show lines or incorrect colors, users are instructed to run a nozzle check. This diagnostic test helps identify any clogged nozzles in the print head. If gaps are found in the printout, a printhead cleaning function can be performed to clear the nozzles and restore print quality. These procedures are typically initiated from the printer's control panel or through the software interface.
Troubleshooting common issues is also addressed. If network setup is unsuccessful, users are advised to check the network name, restart their router, and ensure firewall alerts are handled correctly. A network connection report can be printed to help diagnose and resolve network problems. For issues like a dark product screen, users are reminded to ensure the product is turned on and to press any button to wake it from sleep mode. If the printer is not found after connecting with a USB cable, users should verify that the product is on and the USB cable is securely connected.
Epson also emphasizes the use of genuine Epson ink and specialty papers to ensure optimal print quality and performance. The company provides information on where to purchase replacement inks and papers, and offers customer support for technical assistance. The online User's Guide serves as a comprehensive resource for detailed instructions on maintenance, troubleshooting, and advanced features. Additionally, Epson offers a recycling program for end-of-life hardware and ink bottles, promoting responsible disposal and environmental sustainability.
| Maximum Print Resolution | 5760 x 1440 dpi |
|---|---|
| Input Paper Capacity | 100 sheets |
| Scanner Type | Flatbed |
| Scan Resolution | 1200 x 2400 dpi |
| Functions | Print, copy, scan |
| Duplex Printing | Yes |
| Connectivity | USB, Wi-Fi |
| Mobile Printing | Apple AirPrint, Mopria Print Service |
| Copy Speed (Black) | 7.7 cpm |
| Copy Speed (Color) | 3.8 cpm |
| Ink Bottle Yield (Black) | 4, 500 pages |
| Ink Bottle Yield (Color) | 7, 500 pages |
| Maximum Print Size | 8.5 x 47 in (borderless) |