General Notice: Other product names used herein are for identication purposes only and may be
trademarks of their respective owners. Epson disclaims any and all rights in those marks.
Maschinenlärminformations-Verordnung 3. GPSGV: Der höchste Schalldruckpegel beträgt 70 dB(A)
oder weniger gemäss EN ISO 7779.
Das Gerät ist nicht für die Benutzung im unmittelbaren Gesichtsfeld am Bildschirmarbeitsplatz
vorgesehen. Um störende Reexionen am Bildschirmarbeitsplatz zu vermeiden, darf dieses Produkt
nicht im unmittelbaren Gesichtsfeld platziert werden.
Для пользователей из России срок службы: 5 лет.
AEEE Yönetmeliğine Uygundur.
Ürünün Sanayi ve Ticaret Bakanlığınca tespit ve ilan edilen kullanma ömrü 5 yıldır.
Tüketicilerin şikayet ve itirazları konusundaki başvuruları tüketici mahkemelerine ve tüketici hakem
heyetlerine yapılabilir.
Üretici: SEIKO EPSON CORPORATION
Adres: 3-5, Owa 3-chome, Suwa-shi, Nagano-ken 392-8502 Japan
Tel: 81-266-52-3131
Web: http://www.epson.com/
The contents of this manual and the specications of this product are subject to
change without notice.
https://epson.sn/8050
Ink Bottle Codes / Codes des acons
d’encre / Mürekkep Şişesi Kodları
Clearing Paper Jam /
Élimination d’un bourrage papier /
Kağıt Sıkışmasını Temizleme
For outside Europe / En dehors de l’Europe / Avrupa dışı için
For Europe / Pour l’Europe / Avrupa için
http://support.epson.net/
http://www.epson.eu/support
Troubleshooting /
Dépannage /
Sorun giderme
Storing and Transporting /
Stockage et transport /
Depolama ve Nakliye
A
B
C
For Europe / Pour l’Europe / Avrupa için
BK LC M C Y LM
108
Checking Ink Levels and Relling Ink /
Vérication des niveaux d’encre et recharge /
Mürekkep Seviyelerini Kontrol Etme ve
Yeniden Mürekkep Doldurma
Check the ink levels. If any of the ink levels are below the lower line, see
steps A to I in section 2 to rell the tank.
Vériez les niveaux d’encre. Si l’un des niveaux d’encre se trouve en dessous
de la ligne inférieure, reportez-vous aux étapesA à I de la section2 pour
recharger le réservoir en question.
Mürekkep seviyelerini kontrol edin. Mürekkep seviyelerinden biri alt çizginin
altındaysa, tankı yeniden doldurmak için bölüm 2’deki A – I adımlarına bakın.
See the online User’s Guide for detailed
information. This provides you with operating,
safety, and troubleshooting instructions such as
clearing paper jams or adjusting print quality.
You can obtain the latest versions of all guides
from the following website.
Reportez-vous au Guide d’utilisation en ligne pour en savoir plus. Vous
disposerez ainsi d’instructions de fonctionnement, de sécurité et de
dépannage, comme la résolution des bourrages papier ou le réglage de la
qualité d’impression. Vous pouvez obtenir les dernières versions de tous les
manuels sur le site Web suivant.
Daha ayrıntılı bilgi için çevrimiçi Kullanım Kılavuzuna bakın. Bu, size kağıt
sıkışmalarının giderilmesi ve yazdırma kalitesinin ayarlanması gibi işletim,
güvenlik ve sorun giderme talimatlarını sağlayacaktır. Tüm kılavuzlarının en
son sürümlerini aşağıdaki web sitesinden alabilirsiniz.
For Asia / Pour l’Asie / Avrupa için
BK LC M C Y LM
057
To conrm the actual ink remaining, visually check the ink levels in all
of the printer’s tanks. Prolonged use of the printer when the ink level is
below the lower line could damage the printer.
Pour connaître le niveau d’encre restant, inspectez visuellement les
niveaux d’encre dans tous les réservoirs. Une utilisation prolongée
de l’imprimante alors que le niveau d’encre se trouve sous la ligne
inférieure peut endommager l’imprimante.
Gerçek kalan mürekkebi onaylamak için, tüm yazıcı tanklarındaki
mürekkep seviyelerini gözünüzle kontrol edin. Mürekkep seviyesi alt
çizginin altındayken yazıcının uzun süre kullanılması yazıcıya zarar
verebilir.
Support / Assistance /
Destek
O Be sure to keep the ink bottle upright when tightening the cap.
Place the printer and the bottle in a plastic bag separately and keep
the printer level as you store and transport it. Otherwise ink may
leak.
O When using the printer again after transporting, remove the tape
securing the print head.
O If print quality has declined the next time you print, clean and align
the print head.
O Assurez-vous de maintenir le acon d’encre orienté vers le haut
lorsque vous resserrez le capuchon. Placez l’imprimante et le acon
dans un sac plastique séparément et maintenez l’imprimante à
l’horizontale lorsque vous la stockez et la transportez. Autrement,
de l’encre peut couler.
O Lorsque vous utilisez à nouveau l’imprimante après le transport,
retirez le ruban qui attache la tête d’impression.
O Si la qualité de l’encre a diminué à la prochaine impression,
nettoyez et alignez la tête d’impression.
O Kapağı sıkarken mürekkep şişesini dik tuttuğunuzdan emin olun.
Yazıcıyı ve şişeyi ayrıca bir plastik poşete yerleştirin ve saklama ve
taşıma sırasında yazıcıyı düz tutun. Aksi takdirde mürekkep sızıntısı
olabilir.
O Yazıcıyı taşıdıktan sonra tekrar kullanırken, yazdırma kafasını
sabitleyen bandı çıkarın.
O Bir sonraki yazdırma işleminizde yazdırma kalitesi düştüyse,
yazdırma kafasını temizleyin ve hizalayın.
B
A
C
Guide to Control Panel
Buttons and Functions
Turns the printer on or o.
Clears a network error. Hold down for 5 seconds or more to
make network settings using the WPS push button.
Prints a network connection report to determine the causes of
any network problems. To get more information, hold this button
down for more than 5 seconds to print a network status sheet.
Stops the current operation. Hold this button down for
5 seconds until the
button ashes to run print head cleaning.
PIN Code Setup (WPS): Hold down the and
buttons simultaneously to start PIN Code Setup (WPS).
Wi-Fi Direct (Simple AP) Setup: Hold down the
and buttons simultaneously to start Wi-Fi
Direct (Simple AP) Setup.
Disable Network Service: Turn the printer on while
holding down the
button to disable Epson
Connect settings.
Restore Default Network Settings: Turn the printer
on while holding down the
button to restore the
default network settings.
When the network settings are restored, the
and
lights ash alternately and then turn o.
Print Nozzle Check Pattern: Turn the printer on
while holding down the
button to print the nozzle
check pattern.
Reading the Indication Lights
: O : On : Flashing
Normal Status
The printer is connected to a wireless (Wi-Fi) network.
The printer is connected to a network in Wi-Fi Direct (Simple AP)
mode.
Error Status
Wi-Fi connection error has occurred. Press the button to
clear the error and try again.
No paper is loaded or more than one sheet has been fed at a
time. Also, if this indicator light is on when printing a disc or PVC
ID card, insert the disc/ID card tray correctly.
After loading paper or inserting the disc/ID card tray correctly,
press the
button.
A paper jam has occurred or the disc or PVC ID card has not
been placed on the disc/ID card tray correctly.
After removing the paper or replacing the disc or PVC ID card,
press the
button.
If a paper jam occurs, see the “Clearing Paper Jam” section. If the
indicator light continues ashing, see the jammed paper section
from “Solving Problems” in the User’s Guide.
Initial ink charging may not be complete. See section 2 on the
front page to complete initial ink charging.
A maintenance box is nearing the end of its service life. The light
continues to ash until the maintenance box is replaced.
You can continue printing until the
and lights ash
alternately.
The printer was not turned o correctly. Press the button
to clear the error. We recommend performing a nozzle check
because the nozzles may have dried or clogged.
To turn o the printer, make sure you press the
button.
Flashing simultaneously: An ink pad is nearing or at the end of
its service life.
The ink pad needs to be replaced. Contact Epson or an
authorized Epson service provider to replace the ink pad. Ink
pads are not user-serviceable parts.
Check the message displayed on the computer, and then press
the
button to clear the error or to continue cleaning.
If the ink pad has reached the end of its service life, you can no
longer perform cleaning. Printing can be performed but the
quality of the printouts cannot be guaranteed.
Flashing alternately: A borderless printing ink pad is nearing or
at the end of its service life. Borderless printing is not available,
but printing with a border is available.
To replace the borderless printing ink pad, contact Epson or an
authorized Epson service provider.
Transportation lock is locked.
After unlocking the transportation lock, press the
button.
Flashing alternately: A maintenance box is at the end of its
service life. Replace the maintenance box, and then press the
button to continue printing. To replace a maintenance box,
see the User’s Guide.
The output tray has not been slid out.
Slide out the tray.
All lights turn
on except the
light.
The printer has started in recovery mode because the rmware
update failed.
For more details, see the error indicator table from “Solving
Problems” in the User’s Guide.
All lights
ashing
including the
light.
A printer error has occurred. Remove any paper inside the
printer. Turn the power o and on again. If the error continues
to occur after turning the power o and on again, contact Epson
support.
Use of genuine Epson ink other than the specied ink could cause
damage that is not covered by Epson’s warranties.
L’utilisation d’une encre authentique Epson autre que celle spéciée ici
peut provoquer des dommages non couverts par les garanties Epson.
Belirtilen orijinal Epson mürekkebi dışındaki mürekkeplerin kullanımı
sonucunda, Epson garanti kapsamına girmeyen hasarlar oluşabilir.
Frequency Range
Plage de fréquences
Frekans Aralığı
2,400–2,483.5 MHz
Maximum Radio-Frequency Power
Transmitted
Puissance maximale transmise par
la fréquence radio
İletilen En Yüksek Radyo Frekansı Gücü
20.0 dBm (EIRP)
Radio Equipment Information for Users in Europe, UK and Turkey
Légende du panneau de commande
Boutons et fonctions
Permet d’allumer ou d’éteindre l’imprimante.
Annule une erreur de réseau. Maintenez enfoncé pendant plus
de 5 secondes pour modier les paramètres du réseau avec le
bouton-poussoir WPS.
Imprime un rapport de connexion réseau pour déterminer
les causes de tout problème réseau. Pour obtenir plus
d’informations, maintenez cette touche enfoncée pendant plus
de 5 secondes pour imprimer une page d’état du réseau.
Permet d’arrêter l’opération en cours. Maintenez cette touche
enfoncée pendant 5 secondes jusqu’à ce que la touche
clignote pour procéder au nettoyage de la tête d’impression.
Paramétrage du code PIN (WPS): Maintenez
simultanément les touches
et enfoncées
pour démarrer le paramétrage du code PIN (WPS).
Paramétrage du mode Wi-Fi Direct (Simple AP):
Maintenez simultanément les touches
et
enfoncées pour paramétrer le mode Wi-Fi Direct
(Simple AP).
Désactiver le service réseau: Allumez l’imprimante
tout en maintenant la touche
pour désactiver
les paramètres Epson Connect.
Restauration des paramètres réseau par défaut:
Mettez l’imprimante sous tension en maintenant la
touche
enfoncée pour restaurer les paramètres
réseau par défaut.
Lorsque les paramètres réseau sont restaurés, les
voyants
et clignotent en alternance puis
s’éteignent.
Impression d’un modèle de vérication des buses:
Mettez l’imprimante sous tension en maintenant
la touche
enfoncée pour imprimer le modèle de
vérication des buses.
Lecture des voyants indicateurs
: Éteint : Activé : Clignotant
État normal
L’imprimante est connectée à un réseau sans l (Wi-Fi).
L’imprimante est connectée à un réseau en mode Wi-Fi Direct
(Simple AP).
État d’erreur
Une erreur de connexion Wi-Fi est survenue. Appuyez sur la
touche
pour eacer l’erreur et réessayez.
Aucune feuille de papier n’est chargée ou plusieurs feuilles
ont été entraînées en même temps. Par ailleurs, si ce voyant
lumineux est allumé lors de l’impression d’un disque ou d’une
carte d’identité en PCV, insérez le logement du disque/de la
carte d’identité correctement.
Après avoir chargé du papier ou inséré le logement du disque/
de la carte d’identité correctement, appuyez sur la touche
.
Un bourrage papier est survenu ou le disque ou la carte
d’identité en PCV n’a pas été placé(e) correctement sur le
logement du disque/de la carte d’identité.
Après avoir retiré le papier ou remplacé le disque ou la carte
d’identité en PVC, appuyez sur la touche
.
Si un bourrage papier survient, consultez la section «Nettoyage
du bourrage papier». Si le voyant continue à clignoter, voir la
section sur le bourrage papier dans «Résolution de problèmes»
dans le Guide d’utilisation.
Il est possible que le chargement d’encre initial ne soit pas
terminé. Reportez-vous à la section 2 de première page pour
procéder au premier chargement de l’encre.
Un boîtier de maintenance est quasiment en n de vie. Le
voyant continue de clignoter jusqu’à ce que le boîtier de
maintenance soit remplacé.
Vous pouvez continuer à imprimer jusqu’à ce que les voyants
et
clignotent alternativement.
L’imprimante n’a pas été mise hors tension correctement.
Appuyez sur la touche
pour eacer l’erreur. Nous vous
recommandons d’eectuer une vérication des buses car les
buses peuvent avoir séché et être bouchées.
Pour éteindre l’imprimante, appuyez sur la touche
.
Clignotement simultané: Un tampon encreur pour impression
sans marges est (quasiment) en n de vie.
Un tampon encreur doit être remplacé. Contactez Epson ou un
prestataire de service Epson agréé pour remplacer le tampon
encreur. Les tampons encreurs ne sont pas des pièces réparables
par l’utilisateur.
Vériez le message aché sur l’ordinateur, puis appuyez sur le
bouton
pour eacer l’erreur ou poursuivre le nettoyage.
Si le tampon encreur a atteint la n de sa durée de vie, vous
ne pouvez plus eectuer de nettoyage. L’impression peut être
eectuée mais la qualité des impressions ne peut être garantie.
Clignotement alternatif: Un tampon encreur pour impression
sans marges est (quasiment) en n de vie. L’impression sans
marges n’est pas disponible, mais l’impression avec une marge
est disponible.
Pour remplacer le tampon encreur pour impression sans marges,
contactez Epson ou un fournisseur de service Epson autorisé.
Le verrou de transport est verrouillé.
Après avoir déverrouillé le verrou de transport, appuyez sur le
bouton
.
Clignotement en alternance: Un boîtier de maintenance est
en n de vie. Remplacez le boîtier de maintenance, puis appuyez
sur le bouton
pour continuer l’impression. Pour remplacer un
boîtier de maintenance, consultez le Guide d’utilisation.
Le bac de sortie n’a pas été sorti.
Faites glisser le bac.
Tous les voyants
s’allument sauf
le voyant
.
L’imprimante a démarré en mode de récupération, la mise à jour
du micrologiciel ayant échoué.
Pour plus de détails, consultez le tableau des indicateurs d’erreur
dans la section «Résolution de problèmes» du Guide d’utilisation.
Tous les voyants
clignotent,
y compris le
voyant
.
Une erreur est survenue au niveau de l’imprimante. Retirez le
papier présent dans l’imprimante. Mettez l’imprimante hors
tension, puis de nouveau sous tension. Si l’erreur continue de
se produire après la procédure de mise hors tension et sous
tension, contactez l’assistance Epson.
Kumanda Paneli Kılavuzu
Düğmeler ve İşlevler
Yazıcıyı açar veya kapatır.
Bir ağ hatasını temizler. WPS düğmesini kullanarak ağ ayarlarını
yapmak için 5 saniye veya daha uzun süre basılı tutun.
Ağ sorunlarının nedenlerini belirlemek için bir ağ bağlantısı raporu
yazdırır. Daha fazla bilgi için bir ağ durumu sayfası yazdırmak
amacıyla bu düğmeyi 5 saniyeden uzun süre basılı tutun.
Mevcut işlemi durdurur. Yazdırma kafası temizliğini çalıştırmak
için
düğmesi yanıp sönene kadar 5 saniye boyunca bu
düğmeyi basılı tutun.
PIN Kodu Ayarı (WPS): PIN Kodu Ayarını (WPS)
başlatmak için
ve düğmelerine aynı anda
basılı tutun.
Wi-Fi Direct (Basit AP) Kurulumu: Wi-Fi Direct
(Basit AP) Kurulumunu başlatmak için
ve
düğmelerine aynı anda basılı tutun.
Ağ Hizmetini Devre Dışı Bırak: Epson Connect
ayarlarını devre dışı bırakmak için
düğmesine
basılı tutarken yazıcıyı açın.
Varsayılan Ağ Ayarlarını Geri Yükle: Varsayılan ağ
ayarlarını geri yüklemek için
düğmesine basılı
tutarken yazıcıyı açın.
Ağ ayarları geri yüklendiğinde,
ve ışıkları
sırayla yanıp söner ve ardından kapanır.
Püskürtme Ucu Kontrol Deseni Yazdır: Püskürtme
ucu kontrol desenini yazdırmak için
düğmesine
basılı tutarken yazıcıyı açın.
Gösterge Işıklarını Anlama
: Kapalı : Açık : Yanıp Sönüyor
Normal Durum
Yazıcı bir kablosuz (Wi-Fi) ağa bağlı.
Yazıcı Wi-Fi Direct (Basit AP) modunda bir ağa bağlı.
Hata Durumu
Wi-Fi bağlantı hatası oluştu. düğmesine basarak hatayı
giderin ve yeniden deneyin.
Hiç kağıt yüklü değil ya da birden fazla sayfa tek seferde yüklenmiş.
Ayrıca, bir disk veya PVC kimlik kartı yazdırırken bu gösterge ışığı
yanıyorsa, disk/kimlik kartı tepsisini doğru şekilde yerleştirin.
Kağıt yükledikten veya disk/kimlik kartı tepsisini doğru şekilde
yerleştirdikten sonra,
düğmesine basın.
Bir kağıt sıkışması meydana geldi veya disk veya PVC kimlik kartı,
disk/kimlik kartı tepsisine doğru şekilde yerleştirilmedi.
Kağıdı çıkardıktan veya diski veya PVC kimlik kartını
değiştirdikten sonra,
düğmesine basın.
Kağıt sıkışması meydana gelirse, “Kağıt Sıkışmasını Giderme”
bölümüne bakın. Gösterge ışığı yanıp sönmeye devam ederse,
Kullanım Kılavuzundaki “Sorun Çözme” başlığı altındaki sıkışmış
kağıt bölümüne bakın.
İlk mürekkep dolumu tamamlanmamış olabilir. İlk mürekkep
dolumunu tamamlamak için ön sayfadaki bölüm 2’ye bakın.
Bir bakım kutusu, servis ömrünün sonuna yaklaşıyor. Bakım
kutusu değiştirilene kadar ışık yanıp sönmeye devam eder.
ve ışıkları sırayla yanıp sönene kadar yazdırmaya devam
edebilirsiniz.
Yazıcı doğru biçimde kapatılmamış. Hatayı gidermek için
düğmesine basın. Püskürtme uçları kurumuş veya tıkanmış
olabileceğinden bir püskürtme denetimi gerçekleştirilmesini
öneririz.
Yazıcıyı kapatmak için,
düğmesine bastığınızdan emin olun.
Aynı anda yanıp sönüyor: Bir mürekkep pedi servis ömrünün
sonuna yaklaşıyor veya sonunda.
Mürekkep pedinin değiştirilmesi gerekir. Mürekkep pedini
değiştirmek için Epson’a veya yetkili bir Epson hizmet
sağlayıcısına başvurun. Mürekkep pedleri, kullanıcı tarafından
bakımı yapılabilecek parçalar değildir.
Bilgisayarda görüntülenen mesajı kontrol edin ve ardından hatayı
gidermek ya da temizliğe devam etmek için
düğmesine basın.
Mürekkep pedi hizmet ömrünün sonuna ulaştıysa, artık temizlik
yapamazsınız. Yazdırma yapılabilir ancak çıktıların kalitesi
garanti edilemez.
Sırayla yanıp sönüyor: Bir kenarlıksız baskı mürekkebi pedi
servis ömrünün sonuna yaklaşıyor veya sonunda. Kenarlıksız
yazdırma kullanılamıyor ancak bir kenarlıkla yazdırma
kullanılabilir.
Kenarlıksız baskı mürekkebi pedini değiştirmek için, Epson’a ya
da yetkili bir Epson hizmet sağlayıcısına başvurun.
Taşıma kilidi kilitli.
Taşıma kilidini açtıktan sonra
düğmesine basın.
Sırayla yanıp sönüyor: Bir bakım kutusu, servis ömrünün
sonunda. Bakım kutusunu değiştirin ve ardından yazdırmaya
devam etmek için
düğmesine basın. Bakım kutusunu
değiştirmek için, Kullanım Kılavuzuna bakın.
Çıkış tepsisi kaydırılmamış.
Tepsiyi kaydırın.
ışığı hariç tüm
ışıklar yanar.
Yazıcı, bellenim sürümü güncellemesi başarısız olduğundan
kurtarma modunda başlatılmıştır.
Daha fazla ayrıntı için, Kullanım Kılavuzundaki “Sorun Çözme”
bölümündeki hata göstergesi tablosuna bakın.
ışığı dahil
tüm ışıklar yanıp
sönüyor.
Bir yazıcı hatası oluştu. Yazıcı içindeki kağıtları çıkarın. Gücü
kapatıp tekrar açın. Gücü kapatıp tekrar açtıktan sonra hata
oluşmaya devam ederse, Epson destek birimine başvurun.
E
D
Proof Sign-o:
M. Nagaya CRM R. Kashiwada
K.Gazan
editor
P11451250
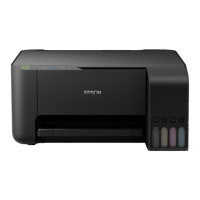
Start Here ES3
4142386_b0_00.indd A2 size
07/18/2022
4142386-00 Black
Back

 Loading...