EasyManua.ls Logo

Epson PowerLite Pro Cinema 6040UB - User Manual

Epson PowerLite Pro Cinema 6040UB
4 pages
Print Icon
To Next Page IconTo Next Page
Loading...
Quick Setup
Before using the projector, make sure you read the safety instructions in the
online User’s Guide.
Choose a location
Keep the projector level and place it at a height so its lens is even with the top
or bottom of the screen and is centered horizontally. If this isn’t possible, use
the lens shift feature or the keystone correction button on the projector to
reposition the image (see “Adjust the image”).
In order to view 3D images correctly, RF 3D glasses must be worn within 32 feet
(10 m) of the projector. Use the image below to determine the viewing distance
for 3D projection (the shading represents the 3D viewing area):
See the online User’s Guide for more information on where to place your
projector.
Connect video devices
For additional connection types, see the online User’s Guide.
Connect multiple video devices and use the Source buttons on the remote
control or the button on the projector to switch between them.
HDMI cable
Optical HDMI
Note: When connecting a source that requires HDCP 2.2, you must use the
HDMI1 port.
Turn on your equipment
1
Turn on your video source.
2
Plug in the projector.
3
Press the power button on the projector or the On button on the
remote control. The shutter opens and the power light flashes blue,
then stays on.
Note: To shut down the projector, press the power button on the
projector or the Standby button on the remote control, then press the
button again to confirm, if necessary. Wait for cooldown to complete
before unplugging the projector.
4
Use the arrow buttons on the remote control to highlight any of the
options on the Home screen that appears, then press Enter to select it.
You can display a QR code, switch between projection sources, and quickly
access various adjustment options from this screen.
5
The default language of the menu system is English. To select another
language, press the Menu button on the projector or remote control.
Select Extended and press Enter. Select Language and press Enter.
Select your language and press Enter. Press the Menu button to exit
the menu system.
Using the remote control
Install the batteries as shown (two AA batteries).
Choose which source to
display
Turn projector on
Access projector menus
Adjust zoom, focus,
and lens shift
Turn off projector
display
Navigate projector
menus
Turn projector off
Control connected
sources with HDMI
Link
For more information on using the remote control, see the online User’s Guide.
Adjust the image
1
Press the Pattern button on the remote control to display a test pattern.
2
To raise the image or correct a tilted image, adjust the front feet as
shown below.
3
Press the Lens button on the remote control and use the and buttons
to focus the image.
4
Press the Lens button on the remote control again and use the and
buttons to reduce or enlarge the image.
5
Press the Lens button on the remote control again and use the , ,
, and buttons to reposition the image.
6
If your image looks like or , you can use the buttons on the
projector to correct this.
Note: Using the keystone adjustment can affect the size and effective
resolution of your image. If possible, change the position of your
projector to eliminate the keystone effect and use the lens shift option
to position the image as necessary.
7
Press Esc to exit.
Viewing 3D images
To view 3D content, you must first connect a 3D-compatible video device to
one of the HDMI ports on your projector. You also need a pair of Epson
®
(part
number V12H548006) or Epson-compatible RF 3D active shutter glasses.
1
Turn on and begin playback on the 3D-compatible video device.
Note: Make sure you set the video device to play content in 3D mode.
2
Slide the power switch on your 3D glasses to the On position.
Note: If the glasses don’t automatically display 3D content, you may need
to pair them with the projector. Move the glasses within 10 feet (3 m) of the
projector, then press and hold the Pairing button on the 3D glasses for at
least 3 seconds. The status light on the glasses will alternately flash green and
red, then remain green for 10 seconds if pairing is successful.
You can also automatically convert 2D HDMI content to 3D. To enable the
2D-to-3D Conversion option, press the Menu button on the projector or
remote control. Select Signal and press Enter, then select 3D Setup and
press Enter. Select 2D-to-3D Conversion and press Enter. Select the Weak,
Medium, or Strong setting, then press Enter.
See the online User’s Guide for more information on adjusting 3D images.
PowerLite
®
Pro Cinema 4040/6040UB
Question and Answer IconNeed help?

Do you have a question about the Epson PowerLite Pro Cinema 6040UB and is the answer not in the manual?

Summary

Quick Setup Guide

Choose a location

Guides optimal projector placement and 3D viewing area.

Initial Operation and Settings

Using the remote control

Adjust the image

Test Pattern and Image Adjustment

Using the test pattern and remote buttons to adjust image.

Keystone and Lens Shift

Using keystone adjustment and lens shift for image correction.

Viewing 3 D images

3 D Setup and Glasses

Connecting 3D devices and setting up 3D glasses.

Troubleshooting Common Issues

No Signal or Blank Screen

Steps to resolve no signal or blank screen problems.

Epson Limited Warranty

Overview

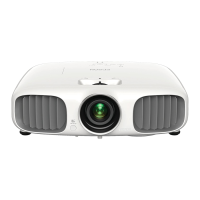
This document provides a comprehensive quick setup guide for the PowerLite® Pro Cinema 4040/6040UB projector, covering initial placement, device connection, remote control usage, image adjustment, and 3D viewing. It also includes troubleshooting tips, support information, and warranty details.

Function Description

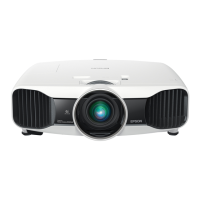
The PowerLite® Pro Cinema 4040/6040UB is a high-performance projector designed for home cinema use, capable of displaying both 2D and 3D content. It offers advanced image adjustment features, multiple connectivity options, and an intuitive remote control for ease of use. The projector is designed to deliver a high-quality visual experience, with features like lens shift and keystone correction to ensure a perfectly aligned image.

Usage Features

Initial Setup and Placement:

To begin, the projector should be placed on a level surface with its lens horizontally centered relative to the screen, and at a height where the lens is even with the top or bottom of the screen. If perfect alignment isn't possible, the projector offers lens shift and keystone correction features to adjust the image. For 3D viewing, RF 3D glasses must be worn within 32 feet (10 m) of the projector. The manual includes a diagram illustrating the optimal viewing area for 3D projection.

Powering On and Off:

To turn on the projector, press the power button on the projector itself or the "On" button on the remote control. The lens shutter will open, and the power light will flash blue before staying solid blue. To shut down, press the power button on the projector or the "Standby" button on the remote control. If necessary, press the button again to confirm the shutdown. It's important to wait for the projector to cool down completely before unplugging it.

Upon powering on, the Home screen appears. Users can navigate through the options using the arrow buttons on the remote control and select an option by pressing "Enter." The Home screen provides quick access to various functions, including displaying a QR code, switching between projection sources, and accessing adjustment options.

Language Selection:

The default menu language is English. To change it, press the "Menu" button on either the projector or the remote control. Navigate to "Extended," press "Enter," then select "Language" and press "Enter" again. Choose the desired language and press "Enter." Press the "Menu" button to exit the system.

Connecting Video Devices:

The projector supports multiple video input devices. For sources requiring HDCP 2.2, the HDMI1 port must be used. Users can switch between connected devices using the "Source" buttons on the remote control or the dedicated button on the projector. The manual provides diagrams for connecting HDMI and Optical HDMI devices.

Remote Control Usage:

The remote control is a central interface for operating the projector. It requires two AA batteries, which should be installed as shown in the manual. Key functions include:

  • On/Standby: Turns the projector on or off.
  • Home/Blank: Accesses the Home screen or blanks the projector display.
  • Source Selection: Buttons for HDMI 1, HDMI 2, P-in-P, PC, and LAN allow users to choose the input source.
  • HDMI Link: Controls connected sources via HDMI Link.
  • Lens Controls: Adjusts zoom, focus, and lens shift.
  • Menu: Accesses the projector's main menu system.
  • Navigation: Arrow buttons and "Enter" are used to navigate menus and make selections.
  • Other Buttons: Includes Mute, Color, Image, Memory, Lens1, Lens2, Frame, Int, RGBCMY, Pattern, User, 3D, Format, and Aspect buttons for various adjustments and features.

Image Adjustment:

  1. Displaying a Test Pattern: Press the "Pattern" button on the remote control to display a test pattern, which aids in accurate image adjustment.
  2. Adjusting Front Feet: To raise the image or correct a tilted image, adjust the front feet of the projector as illustrated.
  3. Focus Adjustment: Press the "Lens" button on the remote control, then use the left and right arrow buttons to focus the image.
  4. Zoom Adjustment: Press the "Lens" button again, then use the left and right arrow buttons to reduce or enlarge the image.
  5. Lens Shift: Press the "Lens" button a third time, then use the up, down, left, and right arrow buttons to reposition the image.
  6. Keystone Correction: If the image appears trapezoidal, use the keystone correction buttons on the projector to correct it. The manual notes that keystone adjustment can affect image size and resolution, so it's preferable to adjust the projector's physical position and use lens shift if possible. Press "Esc" to exit the adjustment menu.

Viewing 3D Images:

  1. Connect 3D Video Device: Connect a 3D-compatible video device to one of the projector's HDMI ports.
  2. 3D Glasses: Ensure you have Epson RF 3D active shutter glasses (part number V12H548006) or compatible glasses.
  3. Start Playback: Turn on the 3D-compatible video device and begin playback of 3D content. Ensure the video device is set to play content in 3D mode.
  4. Activate 3D Glasses: Slide the power switch on the 3D glasses to the "On" position.
  5. Pairing 3D Glasses: If the glasses don't automatically display 3D content, they may need to be paired with the projector. Move the glasses within 10 feet (3 m) of the projector, then press and hold the "Pairing" button on the glasses for at least 3 seconds. The status light on the glasses will alternately flash green and red, then remain green for 10 seconds if pairing is successful.
  6. 2D-to-3D Conversion: The projector can convert 2D HDMI content to 3D. To enable this, press the "Menu" button on the projector or remote control. Navigate to "Signal" > "3D Setup" > "2D-to-3D Conversion," then select "Weak," "Medium," or "Strong" and press "Enter."

Maintenance Features

Troubleshooting:

The manual provides a troubleshooting section for common issues:

  • Blank Screen/No Signal:
    • Verify the projector's power light is blue and not flashing.
    • Use the "Source" buttons on the remote or projector to switch input sources.
    • For Windows laptops, use the function key (e.g., Fn + F7) to display on an external monitor.
    • For Mac laptops, open System Preferences > Displays > Arrangement and select "Mirror Displays."
  • 3D Images Not Displaying Properly:
    • Check "Menu" > "Signal" > "3D Setup" > "3D Display" to ensure 3D is selected.
    • Confirm you are within the 3D viewing range (within 32 feet/10 m of the projector).
    • If 3D glasses are in standby, slide the power switch to "Off" then back to "On."
    • Verify that both the video device and media are 3D-compatible.

Support and Resources:

  • Online Manuals: For detailed information, users can access online manuals from their desktop icons (requires internet) or install them from the projector CD.
  • Telephone Support: Epson PrivateLine® Support (800-637-7661) is available for warranty period. General support is available at (562) 276-4394 (US) or (905) 709-3839 (Canada) during specified hours (Pacific Time, Monday-Friday 6 AM-8 PM, Saturday 7 AM-4 PM).
  • Internet Support: Visit www.epson.com/support (U.S.) or www.epson.ca/support (Canada) for FAQs, troubleshooting, utilities, documentation, and email support.
  • Product Registration: Register online at www.epson.com/webreg for product updates and exclusive offers.
  • Optional Accessories: The online User's Guide lists optional accessories. RF 3D glasses (part number V12H548006) and other accessories can be purchased from authorized Epson resellers (800-GO-EPSON) or online at www.epsonstore.com (U.S.) or www.epson.ca (Canadian).

Warranty Information:

Epson America, Inc. provides a three-year limited warranty for the projector and a 90-day limited warranty for the projector lamp, starting from the date of original purchase. The warranty covers defects in workmanship and materials for products purchased and operated in the United States, Canada, or Puerto Rico. Warranty service involves repair or replacement at Epson's discretion. The warranty does not cover normal wear and tear, consumables like filters, misuse, abuse, improper installation, neglect, shipping damage, disasters, improper electrical current, software problems, use of non-Epson lamps or accessories, or service by unauthorized personnel. Shipping costs for warranty service are the user's responsibility. The warranty is non-transferable.

Epson PowerLite Pro Cinema 6040UB Specifications

General IconGeneral
Contrast Ratio1, 000, 000:1
Technology3LCD
Lens ShiftVertical: ± 96.3 %, horizontal: ± 47.1 %
Throw Ratio1.35 - 2.84:1
Zoom Ratio2.1x
Color Processing10-bit
Projection System3LCD, 3-chip technology
Brightness2500 Lumens
Lamp Life5000 hours (Normal)
Input Ports2 x HDMI
Lamp TypeUHE
Dimensions (W x D x H)20.5 x 16.5 x 6.7 inches

Related product manuals