INSTALLATION
HANDBOOK
Lamp and Status Information
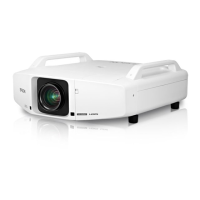
Epson PowerLite Pro Z8050WNL
1
Reading the Indicators
e projector is provided with the following four indicators that indicate the operating status of the projector.
1
Indicates the operating status. Standby condition
When the
button is pressed in this condition, projection starts.
Preparing network monitoring (maximum approx. 20 minutes) or cool down in progress
Buttons are disabled while the indicator is
Warming up
Warm-up time is about 30 seconds.
r warm-up is complete, the indicator stops g.
button does not function during warm-up.
Projecting
2
Indicates the air r status.
3
Indicates the internal temperature status.
4
Indicates the projection lamp status.
Refer to the following table to see what the indicators mean and how to remedy problems that they indicate.
If all indicators are
, check that the power cable is connected correctly and that the power is being supplied normally.
Sometimes, when the power cable is unplugged, the
t
indicator remains lit for a short period, but this is not a fault.
Indicator is lit or g red
: Lit : Flashing: : O
Status Cause Remedy or Status
Internal Error Stop using the projector, disconnect the power cable from the electrical outlet, and contact your local dealer or the nearest
address provided in the Support and Service Guide.
Fan Error
Sensor Error
Cool System Error
Stop using the projector, disconnect the power cable from the electrical outlet, and contact your local dealer or the nearest
address provided in the Support and Service Guide.
High Temp Error
(overheating)
e lamp turns and projection stops. Wait f nute tes the projector
switches to standby mode, so check the following two points.
Check that the air
and air exhaust vent are clear, and that the projector is not positioned against a wall.
If the air
lter is clogged, clean or replace it.
If the error
the points above, stop using the projector, disconnect the power cable from the
electrical outlet, and contact your local dealer or the nearest address provided in the Support and Service Guide.
When using at an altitude of 1500 m or more, set High Altitude Mode to On.
Set Direction to Pointing Down or Pointing Up when the projector is installed to project images downward or upward.
Lamp Error
Lamp Failure
Check the following two points.
Take out the both lamps and check if they are cracked.
Clean the air
lter.
If it is not cracked
t the lamp and turn on the power.
If the error continues: Replace the lamp with a new lamp and turn on the power.
If the error continues: Stop using the projector, disconnect the power cable from the electrical outlet, and contact your
local dealer or the nearest address provided in the Support and Service Guide.