EasyManua.ls Logo

Epson Pro G7 Series - User Manual

Epson Pro G7 Series
2 pages
Print Icon
To Next Page IconTo Next Page
Loading...
Firmware Update Procedure via USB Flash Drive
On Pro G7/Pro L Series
Copy the BIN firmware file to the root of the USB Flash drive. Make sure there
are no other files on the Flash drive.
Installing the USB Flash Drive
1. Turn off the projector and unplug the power cord.
2. Slide the air filter cover latch and open the air filter cover.
Remove the screw securing the wireless LAN module stopper, then remove the stopper.
Question and Answer IconNeed help?

Do you have a question about the Epson Pro G7 Series and is the answer not in the manual?

Overview

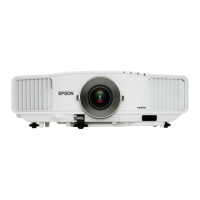
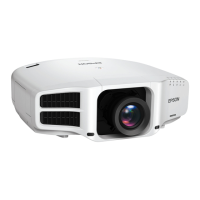
This document outlines the firmware update procedure for Pro G7/Pro L Series projectors using a USB flash drive. The process involves preparing the USB drive, physically installing it into the projector, and then initiating the update sequence.

Function Description:

The primary function described is the update of the projector's firmware. Firmware is essential software embedded in the projector's hardware that controls its basic functions and operations. Updating firmware can introduce new features, improve performance, fix bugs, or enhance compatibility with other devices. This procedure specifically uses a USB flash drive as the medium for transferring the firmware update file to the projector.

Important Technical Specifications (Implied):

  • Firmware File Type: The firmware file must be in ".BIN" format. This is a common binary file format used for firmware updates across various electronic devices.
  • USB Flash Drive Compatibility: The projector is designed to accept a standard USB flash drive for firmware updates. While specific capacity requirements are not stated, it's generally recommended to use a relatively small capacity drive (e.g., 4GB, 8GB) for firmware updates to ensure compatibility and faster processing.
  • File System: Although not explicitly mentioned, USB flash drives for firmware updates typically need to be formatted with a common file system like FAT32 to be recognized by the device's bootloader.
  • Power Requirements: The update process requires the projector to be connected to a power source. The procedure specifically instructs to connect the power cable while holding the power button, indicating a specific power-on sequence for firmware update mode.
  • Indicator Lights: The projector features LED indicators that provide visual feedback on the update status. Four LED indicators light up together, then start blinking after approximately one minute, signifying the active update process.
  • Fan Operation: During the update, the projector's fans accelerate, which is a common behavior during intensive processing to manage heat.
  • Update Duration: The entire firmware update process is estimated to take approximately three minutes.

Usage Features:

  • User-Initiated Update: The firmware update is a user-initiated process, requiring manual steps to prepare the USB drive and interact with the projector's physical controls.
  • Simplified File Placement: The firmware file needs to be placed at the "root" directory of the USB flash drive, simplifying the file management for the user.
  • Dedicated Update Mode: The specific sequence of holding the power button while connecting the power cable suggests a dedicated firmware update mode, preventing accidental updates during normal operation.
  • Visual Feedback: The LED indicators and fan acceleration provide clear visual and auditory cues to the user regarding the progress and status of the update, which is crucial for troubleshooting and ensuring the process is proceeding correctly.
  • Automatic Shutdown: Upon successful completion, the projector automatically shuts down to Standby mode, indicating the end of the update process and readiness for normal operation.

Maintenance Features:

  • Clean USB Drive Requirement: A critical maintenance step is to ensure there are "no other files on the Flash drive" besides the BIN firmware file. This minimizes the risk of conflicts or errors during the update process, ensuring the projector's firmware loader can easily locate and process the correct file. This also helps prevent the projector from attempting to read or process irrelevant files, which could lead to delays or failures.
  • Physical Access for USB Installation: The procedure requires physical access to the projector's internal components. Users must "slide the air filter cover latch and open the air filter cover," and then "remove the screw securing the wireless LAN module stopper" to access the USB port. This design choice suggests that the USB port used for firmware updates might be an internal or less frequently accessed port, possibly to protect it from dust or accidental disconnections during normal use, or because it's shared with another internal module like the wireless LAN. This also implies a level of technical comfort required from the user or a service technician for performing the update.
  • Power Disconnection: Before installing the USB flash drive, the projector must be turned off and the power cord unplugged. This is a standard safety and maintenance practice to prevent electrical hazards and ensure the projector is in a safe state for internal access and hardware manipulation.
  • Sequential Steps: The procedure emphasizes a clear sequence of steps, from preparing the USB drive to physically installing it and then initiating the update. Adhering to these steps is crucial for a successful and safe firmware update, minimizing the risk of bricking the device.
  • Error Prevention: The instruction to have only the firmware file on the USB drive is a key error prevention measure. It ensures that the projector's update mechanism doesn't get confused by other files, which could lead to a failed update or corrupted firmware.
  • Post-Update State: The projector automatically shutting down to Standby mode after the update is a maintenance feature that signals successful completion and prepares the device for its next use, without requiring manual intervention to power it off.

Epson Pro G7 Series Specifications

General IconGeneral
BrandEpson
ModelPro G7 Series
CategoryProjector
LanguageEnglish

Related product manuals