Epson Stylus
®
CX5600 Series
Lea esta guía antes de utilizar el producto.
Please read these instructions before using the printer.
Guía de instalación
Start Here
3 Despegue la cinta amarilla de cada cartucho.
Remove only the yellow tape from each cartridge.
4 Abra la tapa del soporte de cartuchos.
Open the cartridge cover.
5 Coloque los cartuchos en el soporte que corresponde a su color.
Insert the cartridges in the holder for each color.
6 Empuje los cartuchos hacia abájo.
Press the cartridges down.
7 Cierre la tapa. Presiónela hasta que
escuche un clic.
Close the cartridge cover. Press down
until it clicks.
8 Sujete la unidad del
escáner con una mano
y con la otra suelte el
soporte. Después, baje
la unidad del escáner.
Precaución: no trate
de bajar la unidad del
escáner sin soltar el
soporte ya que podría
dañar la unidad.
Hold the scanner while
you release the support.
Then close the scanner.
Caution: Do not try to close the scanner without releasing the
support, or you might damage the CX5600 Series.
9 Oprima el botón Cancelar
para cargar la tinta. La carga
tarda aproximadamente
90 segundos.
Precaución: no apague la
CX5600 Series mientras el
indicador de encendido esté
destellando o gastará tinta.
Press the button to charge the ink. Charging takes about
90 seconds.
Caution: Don’t turn off the CX5600 Series while the On light is
flashing or you’ll waste ink.
Si falta alguna pieza, comuníquese con Epson
®
como se indica al dorso.
If anything is missing, contact Epson
®
as described on the back.
Verifique el contenido
Check contents
1
1 Retire toda la cinta adhesiva
y el material de protección.
Remove all the tape
and cardboard.
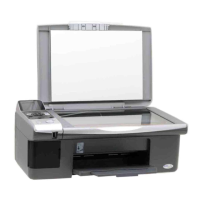
2 Levante la unidad
del escáner.
Lift up the scanner.
3 Despegue la cinta adhesiva del soporte de cartuchos de tinta.
Remove the tape holding the ink cartridge holder in place.
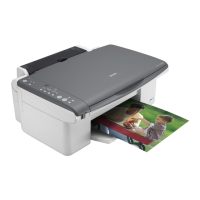
Desembale la CX5600 Series
Unpack the CX5600 Series
2
4 Sujete la unidad del
escáner con una mano
y con la otra suelte el
soporte. Después, baje
la unidad del escáner.
Precaución: no trate
de bajar la unidad del
escáner sin soltar el
soporte ya que podría
dañar la unidad.
Hold the scanner while you release the support. Then close
the scanner.
Caution: Do not try to close the scanner without releasing
the support, or you might damage the CX5600 Series.
1 Conecte el cable
de alimentación.
Connect the power
cable.
2 Oprima el
botón Encender.
Press the button.
Encienda la CX5600 Series
Turn on the CX5600 Series
3
No toque el
cable blanco.
Don’t touch the
white cable.
Precaución: no saque los cartuchos de tinta de su envoltorio hasta que
esté listo para instalarlos. Los cartuchos están embalados herméticamente
para garantizar su fiabilidad.
Nota: los cartuchos de tinta incluidos tienen un menor rendimiento debido
al proceso de inicialización. Los cartuchos de tinta subsiguientes durarán
la vida útil esperada.
Caution: Do not open the ink cartridge package until you are ready to
install the ink. Cartridges are vacuum packed to maintain reliability.
Note: The first time you install ink cartridges, the printer uses some ink
to charge the printing system, so print yields may be lower with the first
cartridges. Subsequent ink cartridges will last their full rated life.
1 Levante la unidad del escáner.
Lift up the scanner.
2 Agite los cartuchos,
luego desembálelos.
Shake the ink cartridges,
then unpack them.
Instale los cartuchos
Install cartridges
4
1 Abra el soporte del papel.
Open the paper support.
2 Gire el protector del alimentador de
papel hacia adelante.
Flip the feeder guide forward.
3 Abra la bandeja de salida de
papel y extiéndala.
Open the output tray and pull out
the extension.
4 Oprima la guía lateral y
deslícela hacia la izquierda.
Squeeze the edge guide and
slide it left.
5 Cargue una pila de papel contra la orilla derecha.
Load paper against the right side.
6 Deslice la guía lateral
hacia el papel.
Slide the edge guide over.
7 Gire el protector del alimentador
de papel hacia atrás.
Flip the feeder guide back.
Cargue el papel
Load paper
5
No cargue el papel en
posición horizontal.
Don’t load the
paper sideways.
21,6 x 28 cm
(8½ x 11 in.)
10,2 x 15,2 cm
(4 x 6 in.)

 Loading...