Do you have a question about the Erde DAXARA 158.2 and is the answer not in the manual?
| Brand | Erde |
|---|---|
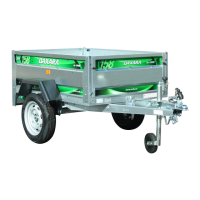
| Model | DAXARA 158.2 |
| Category | Utility Vehicle |
| Language | English |
Lists components included in COLIS/PACK A, COLIS/PACK B, and hardware sachets.
Details necessary tools for assembly and advises wearing protective gloves.
Connect the drawbar assembly to the main frame with a spacer, but do not tighten.
Attach the axle and wheels to the frame, but do not fully tighten fasteners yet.
Install wheel bolts and nuts, ensuring correct face of the nut against the rim.
Refer to separate instructions for trailers fitted with a standard jockey wheel.
Begin attaching side panels but do not tighten fasteners during these steps.
Attach mudguards or fenders to the trailer chassis using the specified bolts.
Use the click/clack system only when fully closed or stored, and re-fit safety pin.
Adjust levers, tighten nuts/bolts, and fit the chain to the rear panel.
Install the front door by aligning holes and pressing downwards to secure it.
