This document provides an instruction manual for the HWG-045WT Pop-Up Gazebo, measuring 15' x 10'. It details the assembly and de-assembly processes, lists the included parts, and offers important usage and maintenance tips.
Function Description:
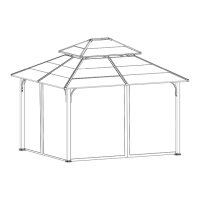
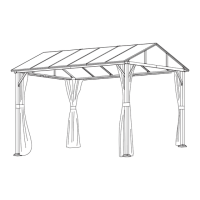
The HWG-045WT is a pop-up gazebo designed to provide temporary shelter from sun and light rain. Its pop-up mechanism allows for quick and relatively easy setup and takedown, making it suitable for various outdoor events, gatherings, or as a temporary shade structure in a backyard. The structure is supported by a collapsible frame, and a fabric canopy provides the overhead cover. The design emphasizes portability and ease of use, allowing two people to set it up efficiently.
Important Technical Specifications:
- Model Number: HWG-045WT
- Dimensions: 15 feet x 10 feet
- Components (Parts List):
- Part 1 (Frame): 1 PC – This is the main collapsible metal frame that forms the structure of the gazebo.
- Part 2 (Canopy Fabric): 1 PC – The fabric cover that provides shade and protection.
- Part 3 (Storage Bag): 1 PC – A bag designed to store the collapsed gazebo for transport and protection.
- Part 4 (Ropes): 4 PCS – Used for securing the gazebo, especially in windy conditions.
- Part 5 (Ground Stakes/Anchors): 4 PCS – Used to anchor the gazebo to the ground for stability.
- Part 6 (Corner Brackets/Supports): 4 PCS – These likely refer to the corner pieces or additional supports for the frame, possibly for securing the canopy to the frame or providing additional stability.
Usage Features:
Assembly Process:
- Preparation: Carefully remove the tent from its box and place it in a dry area for installation. Stand the frame upright on the ground.
- Initial Expansion: Two people stand on opposite sides, grasp two outer legs, lift the frame off the ground, and step backward, stopping when the frame is at arm's length.
- Canopy Placement: Place the shelter's canopy in the center of the area where it will be set up. Remove the cover from the canopy if it's in place.
- Full Expansion: Grasp the bottom of the diamond-shaped frame sections on opposite sides. Lift up and step backward until the shelter is fully opened. Users should be careful not to pinch their fingers during this step.
- Engaging Auto Sliders: At each corner, engage the auto slider by pushing up with one hand while holding down the top of the leg with the other hand. A snap button will engage in a groove, securing the slider. This process should be repeated for all other legs.
- Adjusting Height: Lift two adjacent outer legs up and pull out the inner legs until the snap locks engage. Repeat this for all legs. The shelter can be raised or leveled using adjustment holes located near the bottom of each outer leg.
- Securing Valance: Tie the buckle in the side of the valance to complete the assembly.
De-assembly Process:
- Retracting Inner Legs: Slightly lift two outer legs, depress the snap button, and telescope the inner legs up into the outer legs. Repeat this process for the remaining legs.
- Releasing Auto Sliders: At each corner, push the Snap-Button to release pressure on the slider. Repeat this for all four corners.
- Collapsing the Frame: Grasp the top of the diamond-shaped frame sections on opposite sides. Lift up and gently shake the shelter while stepping towards a partner until the unit is approximately three-quarters closed. Then, grasp two outer legs and push them together to fully close the frame, being careful not to pinch fingers. Once fully collapsed, place the cover bag over the unit for storage.
Maintenance Features:
Important Considerations for Use and Maintenance:
- WINDY CONDITIONS: Always use a stake kit or weight bag set to secure the gazebo in windy conditions. The included ropes (Part 4) and ground stakes (Part 5) are crucial for this.
- HEAVY WIND: In conditions of heavy wind, it is strongly advised to take the shelter down to prevent damage or injury.
- WET FABRIC: If the canopy fabric becomes wet, allow it to dry completely before closing and storing the gazebo. This prevents mildew and damage to the fabric.
- STORAGE: When not in use, the gazebo should be stored in its cover bag (Part 3) to protect it from dust, dirt, and environmental elements, extending its lifespan.
- CLEANING: To clean the canopy, use a mild detergent and water. Avoid harsh chemicals that could damage the fabric.
- RAIN: Do not leave the shelter unattended during rain, especially heavy rain, as water can accumulate and potentially damage the structure or cause it to collapse.
This gazebo is designed for temporary use and requires attention to weather conditions and proper storage to ensure its longevity and safe operation.