Rev.062017-BR
www.elitescreens.com
3
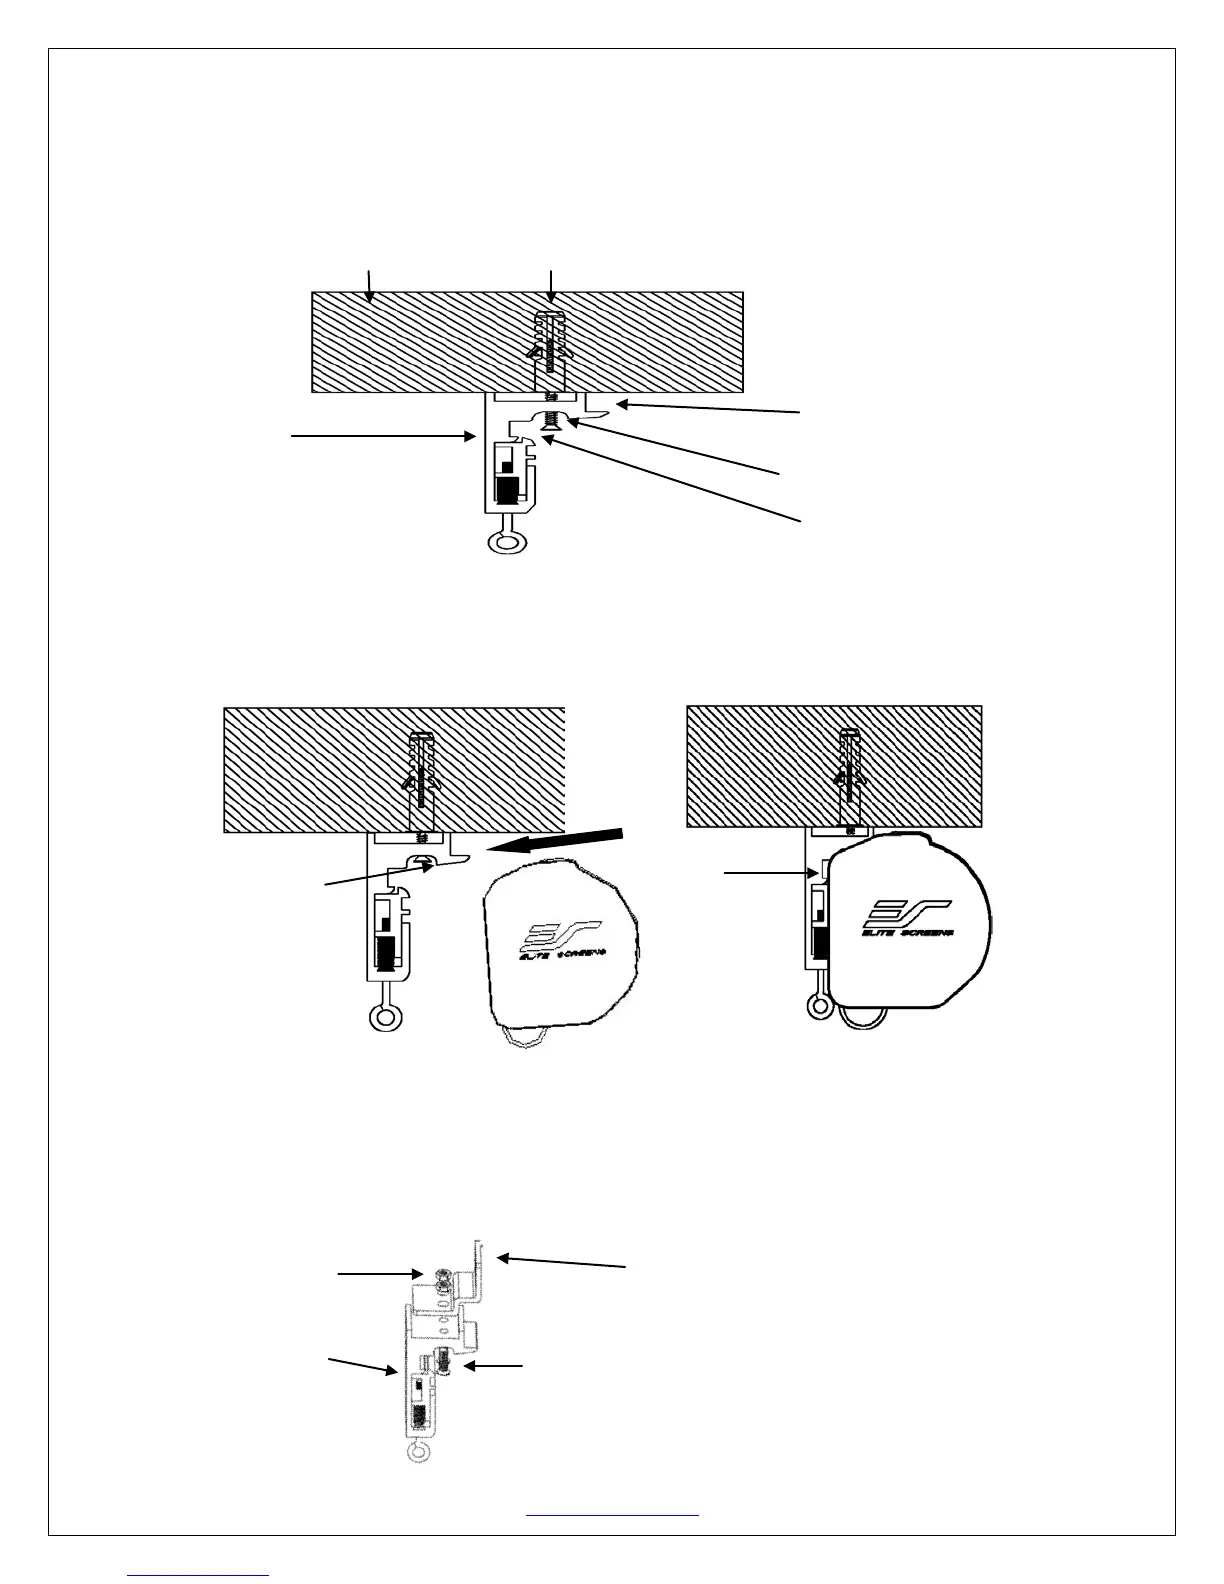
Flush Mount to the Ceiling
1. Mark the location of where the screen is to be installed, drill your holes and insert the
M10Anchors (B).
2. Install the Mounting Brackets (A) to the ceiling and secure with the M4x50 Screws (B).
Ceiling M10 Anchor
Mounting Bracket Fix Plate 1
Mounting Bracket
M4x50 Screw
Mounting BracketFix Plate 2
3. Attach the screen to the Mounting Bracket (A) by inserting the top of the case to FixPlate 1 and
securing the back of the case to Fix Plate 2. Make sure the case slots are securely attached to the
Mounting Bracket (A).
Suspended Ceiling using Chains (additional hardware required)
1. You can also hang the screen on a ceiling by using chains (not included).
2. Connect the Suspended Ceiling Bracket Connector (C) to the Mounting Bracket (A) and
secure with the M5x15 Screws & Bolts (D).
M5x15 Bolt
Suspended Ceiling Bracket Connector
(D) (C)
Mounting Bracket
(A) M5 M5x15 Screw (D)
 Loading...