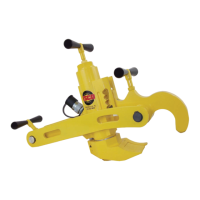
ESCO EURO BEAD BREAKER Model #10107
Purging Air
These instructions are designed for use with the ESCO Air/Hydraulic Pump. If using a dierent
pump, use this information as a guide only. Purge air from the pump and bead breaker as
follows:
1 Remove the snap rings on the rod connectors (items 35 and 38 on the parts drawing).
2 Connect the air/hydraulic pump to the tool.
3 Connect the pump to the air supply.
4 Position the pump so that it is higher than the tool and depress the PUMP end of the pedal.
5 After the clamping and breaker rods are fully extended, depress the RELEASE end of the
pedal. Repeat this cycle (PUMP - RELEASE) about ve times.
6 Extend both rods and keep them extended. Check for leaks. Make certain that the rods do
not “creep” back into the cylinders.
Cleaning
Wash the exterior of the bead breaker with warm, soapy water. Rinse with clean water and blow
the tool dry with an air nozzle. Also pay particular attention to the cleanliness of the pump.
CAUTION
Avoid seal damage. Do not use solvent to clean the bead breaker.
Storage
Prior to storing the bead breaker:
1 Completely retract both rods. An exposed rod may be subject to rusting, pitting and damage
from striking other tools.
2 If chloride is spilled on the tool, rinse with clean water and blow dry.
3 Dress rod surface nicks and dents with ne grit emery paper. Rod surface nicks and dents,
if left untended, provide a starting point for rust.
NOTE
The chrome plated rod surfaces provide the seal for the tool. Any steps taken to ensure the
continuing quality of the rod surfaces will increase the service life of the tool.
 Loading...