21
Securely insert the power cord into the power supply with grounding socket.
Check 2: Is the fuse blown?
Determine why the fuse blew and eliminate the cause, then replace the fuse.
z Is the inside of the de-soldering gun short-circuited?
z Is the grounding wire touching the heating element?
z Is the heating element lead twisted and short-circuited?
4. Pump cannot operate.
Check 1: Is the cord assembly properly connected?
Reconnect the cord assembly.
5. Solder cannot be absorbed.
Check 1: Is the spring filter full of solder?
Replace it with a new one.
Check 2: Is the ceramic filter hardened?
Replace it with a new one.
Check 3: Is there a vacuum leak?
Check the connections and replace any worn parts.
Check 4: Is the nozzle or hole in the heating element clogged?
Clean it.
6. The nozzle cannot heat up.
Check 1: Is the de-soldering gun cord assembly properly connected?
Reconnect it.
Check 2: Is the heating element damaged?
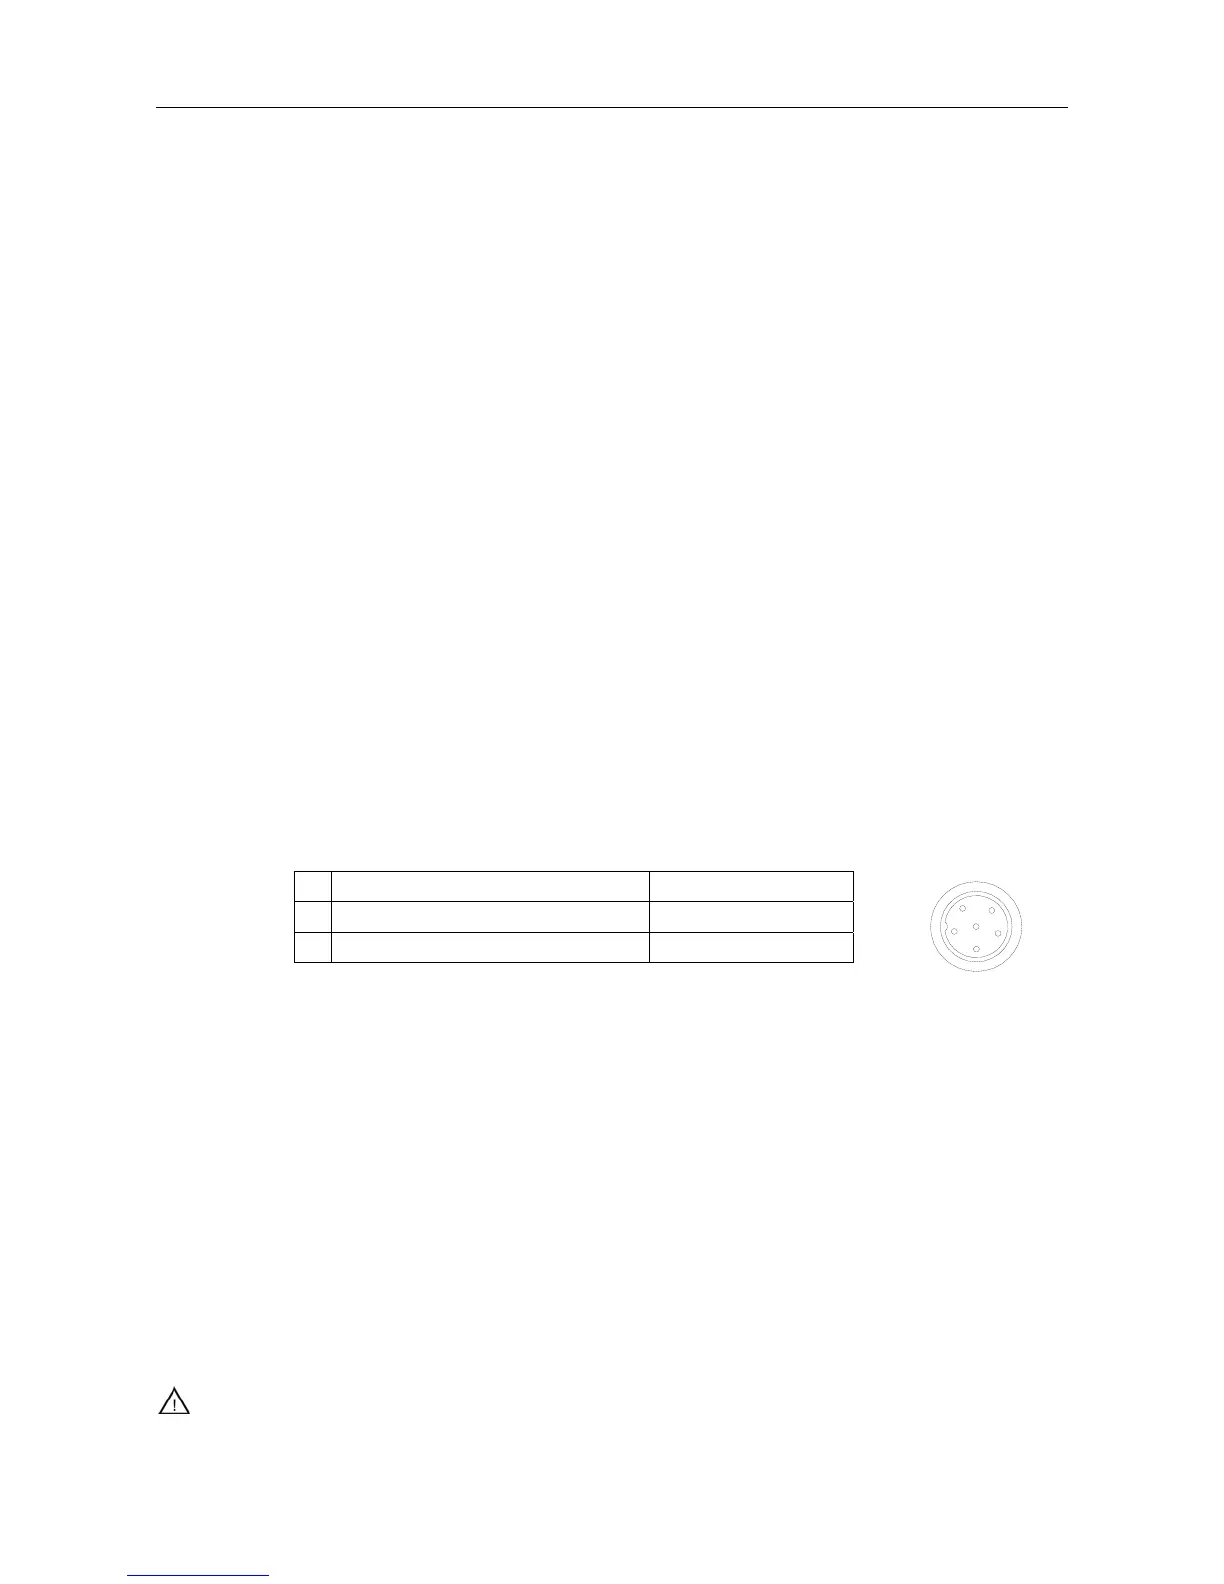
Replace it. Measure the heating element whether is broken or not as following.
A Between pins 4 & 5 (Heating element)
Under 4Ω(Normal)
B Between pins 1 & 2 (Sensor)
Under 10Ω(Normal)
C Between pins 3&Nozzle
Under 2Ω
7. Heater error, “H-E” is displayed.
Check 1: Is the de-soldering gun cord broken?
Replace it.
Check 2: Is the heating element broken?
Replace the heating element.
Check 3: Is there a nozzle on the gun?
Assemble a nozzle on the gun.
8. The temperature cannot be set.
Check 1: Is it locked by password?
Enter into the setting password.
9.2.4 Replacing the Heating Element
WARING: unplug the power cord before starting this procedure.
The resistance value of a working heating element is below 4Ω. If the value is outside the range, replace the
1
6
3
5
4