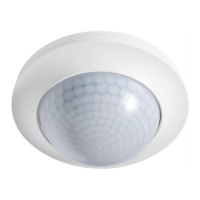
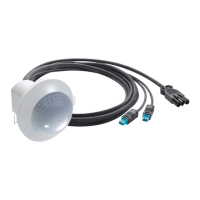
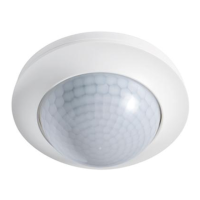
PD-C360i/8 DUO DALI
PD-C360i/24 DUO DALI
TECHNISCHE DATEN
NETZSPANNUNG 230 V ∼ 50 Hz
LEISTUNGSAUFNAHME ca. 0,5 – 0,6 W
ERFASSUNGSBEREICH 360°
REICHWEITE ca. 8 m/24 m im Durchmesser bei einer Montagehöhe von ca. 3 m
EINSTELLUNGEN am Gerät oder per Fernbedienung Mobil-PDi/Dali und Mobil-PDi/MDi-universal
DALI/DSI-AUSGANG 1 2-polig Dali/DSi-Steuerleitung/Broadcast
ANSTEUERBARE
DALI/DSI-EVGS
max. 25 Stück
DALI/DSI-AUSGANG 2 2-polig Dali/DSi-Steuerleitung/Broadcast
ANSTEUERBARE
DALI/DSI-EVGS
max. 25 Stück
NACHLAUFZEIT ca. 1 Min. – 15 Min.
LICHTWERT CA. 5 Lux – Tagbetrieb
LICHTMESSUNG Mischlicht
SCHUTZART
SCHUTZKLASSE II
BETRIEBSTEMPERATURBEREICH 0 °C…+50 °C
GEHÄUSE UV-stabilisiertes Polycarbonat
ABMESSUNGEN UP-Version: PD-C360i/8 DUO DALI Ø 108 mm, H 38 mmPD-C360i/24 DUO DALI Ø 108 mm, H 46,5 mm
FARBE weiß, ähnlich RAL 9010
BEDIENUNGSANLEITUNG
OPERATING INSTRUCTIONS
•Mobil-PDi/Dali http://www.esylux.com/p/EP10425899
•Mobil-PDi/User http://www.esylux.com/p/EM10425547
5.2EinstellungenundFunktionenperEinstellelemente
DIP-Schalter1 Funktion„Dali–DSi“
AnsteuerungvonDali-EVGs(digitaladdressablelightinginterface)
AnsteuerungvonDSi-EVGs(digitalserialinterface)
DIP-Schalter2 Remotelockon/off
„Remotelockoff“
„Remotelockon“nach30Min.ohnemanuelleEinstellung
DIP-Schalter3 Tasterbetrieb DIP-Schalter4 Werksprogramme
2-Taster-Betrieb
1-Taster-Betrieb
Büro
Klassenraum
NamederEinstellung Büro Klassenraum
Betriebs-Modus Vollautomatik Halbautomatik
Orientierungslichtwert 10 % 10 %
Korridorfunktion Aus Aus
Orientierungslichtfunktion Aus Aus
Nachlaufzeit 5 Min. 5 Min.
Nachleuchtzeit 1 Min. 1 Min.
Offset-Einstellung 100 % 100 %
Lichtsollwert 500 Lux 500 Lux
LED-Rückmeldung An An
Abschaltwarnung
Nach Ablauf der Nachlaufzeit erflogt eine 60 Sekunden andauernde Abschaltwarnung. Licht wird auf
den Orientierungslichtwert herunter gedimmt. Wird in dieser Zeit eine Bewegung detektiert oder ein Taster
betätigt, kehrt der Melder in vorherigen Zustand zurück. Erst wenn in den 60 Sekunden keine Bewegung
detektiert wird, kehrt der Melder in den Ursprungszustand zurück.
Vollautomat-Modus
Abhängig vom eingestellten Lichtwert und erkannter Bewegung schaltet der Lichtkanal automatisch ein.
Dieser bleibt an, solange Bewegung erkannt wird und der Umgebungslichtwert den eingestellten
Lichtwert nicht überschreitet. Wenn keine Bewegung mehr erfasst wird, starten die Nachlaufzeiten
der jeweiligen Kanäle. Optional kann jeder Kanal manuell mittels TasterS1–S2 ein- oder ausgeschaltet
werden. Der Vollautomat-Modus ist voreingestellt.
Halbautomat-ModusLichtkanal
Einschalten/Ausschalten manuell mittels TasterS1/S2. Sie bleiben an, solange Bewegung erkannt wird und
der Umgebungslichtwert den eingestellten Lichtwert nicht überschreitet.
5.3ZusätzlichemanuelleSteuerungperTaster
Der Melder verfügt über zwei separate „S“-Klemmen, zum Anschluss eines externen Tasters (Taster –
Arbeitsstrom – mit N-Leiter-Anschluss) je Kanal. Somit kann jederzeit manuell der Melder übersteuert
werden, um die Kanäle individuell ein- oder auszuschalten/dimmen.
Der Betrieb mit nur einem Taster ist ebenfalls möglich sofern der DIP-Schalter (siehe5.2) auf der unteren
Position eingestellt ist. Den Taster an Klemme S1 oder S2 anschliessen. Das brücken von S1 und S2 ist nicht
zulässig.
Bei Einstellung auf 1-Taster Betrieb werden alle Schalt- und Dimmbefehle (von Taster und Fernbedienung)
an beiden Kanälen gleichzeitig umgesetzt. Der Offset von Kanal1 zu Kanal2 ist davon unabhängig.
Durch längeres Betätigen (>2 Sek.) des Tasters kann die gewünschte Raumhelligkeit gewählt werden.
Taster solange gedrückt halten bis die gewünschte Raumhelligkeit erreicht ist. Dieser eingestellte
Raumhelligkeitswert wird angesteuert solange Personen im Raum anwesend sind. Verlassen die Personen
den Erfassungsbereich, dann startet die voreingestellte Nachlaufzeit. Nach Ablauf dieser Zeit schaltet
der Melder in den eingestellten Betriebsmodus.
Wiederholte kurze Betätigung des Tasters schaltet die Beleuchtung aus. Die Beleuchtung bleibt solange
ausgeschaltet wie der Melder noch eine Bewegung erfasst. Wenn keine Bewegungen mehr erfasst
werden, dann startet die voreingestellte Nachlaufzeit. Nach Ablauf dieser Zeit schaltet der Melder in
den eingestellten Betriebsmodus.
ESYLUX Produkte sind nach geltenden Vorschriften geprüft und mit größter Sorgfalt hergestellt. Der
Garantiegeber, die ESYLUX Deutschland GmbH, Postfach 1840, D-22908 Ahrensburg (für Deutschland)
bzw. der entsprechende ESYLUX Distributor in Ihrem Land (eine vollständige Übersicht finden Sie
unter www.esylux.com) übernimmt für die Dauer von drei Jahren ab Herstelldatum eine Garantie
auf Herstellungs-/Materialfehler der ESYLUX Geräte. Diese Garantie besteht unabhängig von Ihren
gesetzlichen Rechten gegenüber dem Verkäufer des Geräts. Die Garantie bezieht sich nicht auf die
natürliche Abnutzung, Veränderung/Störung durch Umwelt einflüsse oder auf Transportschäden sowie
nicht auf Schäden, die infolge Nichtbeachtung der Bedienungsanleitung, der Wartungsanweisung und/
oder unsachgemäßer Installation entstanden sind. Mitgelieferte Batterien, Leuchtmittel und Akkus sind
von der Garantie ausgeschlossen. Die Garantie kann nur gewährt werden, wenn das unveränderte Gerät
unverzüglich nach Feststellung des Mangels mit Rechnung/Kassenbon sowie einer kurzen schriftlichen
Fehlerbeschreibung, ausreichend frankiert und verpackt an den Garantiegeber eingesandt wird. Bei
berechtigtem Garantieanspruch wird der Garantiegeber nach eigener Wahl das Gerät in angemessener
Zeit ausbessern oder austauschen. Weitergehende Ansprüche umfasst die Garantie nicht, insbesondere
haftet der Garantiegeber nicht für aus der Fehlerhaftigkeit des Geräts entstehende Schäden. Sollte
der Garantieanspruch nicht gerechtfertigt sein (z.B. nach Ablauf der Garantiezeit oder bei Mängeln
außerhalb des Garantieanspruchs), so kann der Garantiegeber versuchen, das Gerät kostengünstig
gegen Berechnung für Sie zu reparieren.
DE
BEDIENUNGSANLEITUNG
WirgratulierenIhnenzumKaufdiesesqualitativhochwertigenESYLUXProduktes.UmeineinwandfreiesFunktionieren
zugewährleisten,lesenSiebittedieseBedienungsanleitungsorgfältigdurchundbewahrenSiesieauf,umgegebenenfalls
zukünftignachlesenzukönnen.
ACHTUNG:Arbeitenam230VNetzdürfennurvonautorisiertemFachpersonalunterBerücksichtigungder
landesüblichenInstallationsvorschriften/-normenausgeführtwerden.VorderMontagedesProduktesistdie
Netzspannungfreizuschalten.
Das Produkt ist nur für den sachgemäßen Gebrauch (wie in der Bedienungsanleitung beschrieben)
bestimmt. Änderungen, Modifikationen oder Lackierungen dürfen nicht vorgenommen werden, da
ansonsten jeglicher Gewährleistungsanspruch entfällt. Sofort nach dem Auspacken ist das Gerät auf
Beschädigungen zu prüfen. Im Falle einer Beschädigung darf das Gerät keinesfalls in Betrieb genommen
werden. Wenn anzunehmen ist, dass ein gefahrloser Betrieb des Gerätes nicht gewährleistet werden kann,
so ist dieses unverzüglich außer Betrieb zu nehmen und gegen unbeabsichtigten Betrieb zu sichern.
HINWEIS:DiesesGerätdarfnichtmitdemunsortiertenSiedlungsabfall
entsorgtwerden.Besitzervon
Altgerätensindgesetzlichdazuverpflichtet,
diesesGerätfachgerechtzuentsorgen.Informationenerhalten
SievonIhrerStadt-bzw.Gemeindeverwaltung.
Bewegungs- und Präsenzmelder sind Passiv-Infrarot-Melder zum automatischen Schalten einer
angeschlossenen Beleuchtung in Abhängigkeit vom Tageslicht und Anwesenheit/ Bewegung für
den Einsatz im Innenbereich.
Der Präsenzmelder ist ein Steuergerät mit integrierter Schnittstellenversorgung. Die Adressierung
der Teilnehmer/EVGs ist nicht nowendig. Alle EVGs werden über die Broadcast-Adresse gleichzeitig
angesprochen. Es können max. 25 Stück Dali/DSi-EVGs je Kanal angeschlossen werden.
Der Präsenzmelder verfügt über zwei Kanäle/Ausgänge. Der KanalC1 ist bezüglich der Lichtmessung
und Regelung der „Master-Kanal“. Der KanalC2 ist dem KanalC1 nachfolgend. Bitte beachten Sie dies
bei der Zuordnung der Lichtgruppen zu den Kanälen. Empfohlen wird die Lichtgruppe „Raum-Innenseite“
dem KanalC1 und die Lichtgruppe „Fensterseite“ dem KanalC2 zuzuordnen. Der Melder kann jedoch
richtungsunabhängig an der Decke montiert werden.
Anschlusspläne und weitere Hinweise entnehmen Sie bitte dem beiliegenden Faltblatt.
•Netzspannungzuschalten
Es beginnt eine Initialisierungsphase von ca. 25 Sek.
Die rote(Kanal1=C1),diegrüne(Kanal2=C2)unddieblaueLED blinken dabei abwechselnd.
Angeschlossene Beleuchtung ist dabei eingeschaltet.
Die Melder werden in der Einstellung Werksprogramm/fernbedienbar ausgeliefert und sind nach
Ablauf der Initialisierungsphase somit sofort betriebsbereit.
Werksprogrammübersicht(Büro)
Lichtwert C1 = Arbeitsbereich (ca. 500 Lux)
Lichtwert C2 = C2 = C1
Nachlaufzeit C1 + C2 = 5 Min.
Modus = Vollautomat
4.1FunktionnachderInitialisierungsphase
Vollautomatikmodus–Kanal„BeleuchtungC1undC2“
Liegt das Umgebungslicht über dem voreingestellten Lichtwert, dann sind die roteundgrüneLED und die
angeschlossene Beleuchtung aus.
Einschalten–automatisch, wenn der Melder durch Bewegung ausgelöst wurde und das Umgebungslicht
den voreingestellten Lichtwert unterschritten hat.
Die roteunddiegrüneLED sind als Anzeige für die Bewegungserfassung aktiv = 2 x kurzes Blitzen je
erfasster Bewegung. Ändert sich der Tageslichtwert, wird das Kunstlicht entsprechend automatisch
nachgeregelt.
Ausschalten–automatisch, wenn keine Bewegungen mehr erfasst werden, dann startet die voreingestellte
Nachlaufzeit, nach Ablauf dieser Zeit schaltet die Beleuchtung aus.
HINWEIS:SteigtjedochderTageslichtanteilanunddasUmgebungslichtübersteigtdeneingestelltenLichtwert,
soschaltetderMelderdieBeleuchtungautomatischnach5Min.aus,trotzvorhandenerBewegung/Präsenz.
DieBeleuchtungkanndanachjederzeitwiedermanuellgeschaltetwerden.
Schaltverzögerung
Um plötzliche Helligkeitswechsel bei Anwesenheit durch unerwünschtes An-/Ausschalten der
Beleuchtung zu vermeiden, wird der Melder ausschließlich zeitverzögert ausgelöst.
Zum Beispiel: Eine vorbeiziehende Wolke wäre in der Lage, ein unnötiges Schalten zu verursachen.
Zeitverzögerung von „dunkel zu hell“: 5 Min. = roteLED blinkt langsam für diese Zeit.
Eindeutige Funktionsvorwahl per DIP-Schalter direkt am Melder.
DIP-SchalteramMelder Dali/DSi-Version
21 43
IndividuelleEinstellungenkönneneinfachperFernbedienungundmanuellüberEinstellelementedurchUmschaltendes
DIP-SchaltersDIP1(sieheAbbildung)vorgenommenwerden.
5.1EinstellungenundFunktionenperFernbedienung
Hinweise entnehmen Sie bitte der Bedienungsanleitung der Fernbedienung.
•Mobil-PDi/MDi-universal http://www.esylux.com/p/EP10433993
FolgendeParameterundFunktionenkönneneingestelltwerden:
- Lichtkanal 1 und 2: Lichtleistung, Ein/Aus, DIM und DIM Stop
- Kanal 3 und 4: Ein Aus 4h Ein/Aus
- Kanal 1 - 4: Ein/Aus und 4h Ein/Aus
- Licht-/Zeitwerte und Betriebsmodie
Optionenkönnenausgewähltwerdenwie:
- 100 h Einbrennfunktion, Korridorfunktion, LED Feedback Ein/Aus,
Orientierungslicht Ein/Aus sowie die Anpassung der Sensitivität
- Einstellung der EVG Dali-Parameter
HANDLEIDING
MA00437301 • ALK 11/14
•Mobil-PDi/Dali http://www.esylux.com/p/EP10425899
•Mobil-PDi/User http://www.esylux.com/p/EM10425547
5.2Settingsandfunctionsviaadjustingelements
DIPswitch1 “Dali–DSi”function
ControlofDalielectronicballasts(digitaladdressablelightinginterface)
ControlofDSielectronicballasts(digitalserialinterface)
DIPswitch2 Remotelockon/off
"Remotelockoff"
"Remotelockon"after30minuteswithoutmanualsetting
DIPswitches3 Buttonoperation DIPswitches4 Factorysettings
2-buttonoperation
1-buttonoperation
Office
Classroom
Nameofsetting Office Classroom
Operatingmode Fullyautomatic Semi-automatic
Orientationlightvalue 10 % 10 %
Corridorfunction Off Off
Orientationlightfeature Off Off
Switch-offdelaytime 5 min 5 min
Fade-outtime 1 min 1 min
Offsetsetting 100 % 100 %
Lightsetvalue 500 lux 500 lux
LEDacknowledgement On On
Switch-offwarning
Once the switch-off delay time has elapsed, a 60-second switch-off warning is issued. The light will be
dimmed to the orientation light value. If during this time any movement is detected or a button is pressed,
the detector will return to its previous state. The detector will only return to its original state if no movement
is detected during the 60 seconds.
Fullyautomaticmode
The lightchannel will switch on automatically, depending on the preset light value and detection of
movement. This will remain on for as long as movement is detected and as long as the ambient light value
does not exceed the preset light value. The switch-off delay times for the respective channels will start if
movement is no longer detected. Each channel can also be manually switched on or off using buttonsS1-
S2. The device is preset to fully automatic mode.
Semi-automaticmodeforlightchannel
Switched ON/OFF manually using the S1/S2button. The channels will remain on for as long as movement
is detected and as long as the ambient light value does not exceed the preset light value.
5.3Additionalmanualcontrolbybutton
The detector has two separate “S” terminals for connecting an external button (button – operating
current – with zero conductor connection) for each channel. This means that the detector can be manually
overridden at any time so that the channels can be switched on or off and dimmed individually.
The device can also be operated with just 1 button, provided the DIP switch (see5.2) is in its lower position.
Connect the button to terminal S1 or S2. Bridging S1 and S2 is not permitted.
When set to 1-button operation, all switch and dim commands (from the button and remote control) are
addressed to both channels simultaneously. This does not affect the offset of channel1 to channel2.
Press and hold the button for more than 2seconds to select the desired ambient brightness. Hold down
the button until the desired ambient brightness is reached. This preset ambient brightness level will be
maintained for as long as persons are present in the room. Should these persons leave the detection
range, the preset switch-off delay time will start. Once this time has elapsed, the detector will revert to the
set operating mode.
Press the button again briefly to switch the lighting off. The lighting will remain switched off for as long as
the detector continues to detect movement. The preset switch-off delay time will start once movement is no
longer detected. Once this time has elapsed, the detector will revert to the set operating mode.
ESYLUX products are tested in accordance with applicable regulations and manufactured with the utmost
care. The guarantor, ESYLUX Deutschland GmbH, Postfach 1840, D-22908 Ahrensburg, Germany
(for Germany) or the relevant ESYLUX distributor in your country (visit www.esylux.com for a complete
overview) provides a guarantee against manufacturing/material defects in ESYLUX devices for a period
of three years from the date of manufacture.
This guarantee is independent of your legal rights with respect to the seller of the device.
The guarantee does not apply to natural wear and tear, changes/interference caused by environmental
factors or damage in transit, nor to damage caused as a result of failure to follow the user or maintenance
instructions and/or as a result of improper installation. Any illuminants or batteries supplied with the
device are not covered by the guarantee.
The guarantee can only be honoured if the device is sent back with the invoice/receipt, unchanged,
packed and with sufficient postage to the guarantor, along with a brief description of the fault, as soon
as a defect has been identified.
If the guarantee claim proves justified, the guarantor will, within a reasonable period, either repair the
device or replace it. The guarantee does not cover further claims; in particular, the guarantor will not be
liable for damages resulting from the device’s defectiveness. If the claim is unfounded (e.g. because the
guarantee has expired or the fault is not covered by the guarantee), then the guarantor may attempt to
repair the device for you for a fee, keeping costs to a minimum.
GB
OPERATING INSTRUCTIONS
Congratulationsonyourpurchaseofthishigh-qualityESYLUXproduct.Toensurecorrectdeviceoperation,pleasereadthese
installation/operatinginstructionscarefullyandkeeptheminasafeplaceforfuturereference.
CAUTION:workonthe230Vpowersystemmustbecarriedoutbyauthorisedpersonnelonlywithdueregardto
theapplicableinstallationregulations.Switchoffthepowersupplybeforeinstallingthesystem.
Use this product only as intended (as described in the user instructions). Changes or modifications to the
product or painting it will result in loss of warranty. You should check the device for damage immediately
after unpacking it. If there is any damage, you should not install the device under any circumstances.
If you suspect that safe operation of the device cannot be guaranteed, you should turn the device off
immediately and make sure that it cannot be operated unintentionally.
NOTE:thisdevicemustnotbedisposedofasunsortedhouseholdwaste.Useddevicesmustbedisposedofcorrectly.
Contactyourlocaltowncouncilformoreinformation.
Motion and presence detectors are passive infrared detectors that automatically switch connected lighting
depending on natural light and presence/movement and are suitable for use indoors.
The presence detector is a control device with an integrated signal interface. There is no need to address
the lights/electronic ballasts separately. All ballasts are addressed at the same time via the broadcast
address. A maximum of 25 Dali/DSi electronic ballasts can be connected per channel.
The presence detector has two channels/outputs. ChannelC1 is the "Master channel" in terms of light
measurement and light control. ChannelC2 is subordinate to channelC1. Remember to bear this in mind
when assigning lighting groups to the channels. We recommend that you assign the "room interior"
lighting group to channelC1 and the "window side" lighting group to channelC2. Nevertheless, it is still
possible to mount the detector on the ceiling in any orientation.
Please refer to the supplied leaflet for wiring diagrams and further instructions.
•Connectthepowersupply
A warm-up phase of approx. 25 seconds is initiated.
The red(channel1=C1),green(channel2=C2)andblueLEDs flash alternately. The connected lighting is
switched on.
The detectors are preset to “factory settings/remote control” and are therefore immediately ready for use
after the warm-up phase.
Overviewoffactorysettings(office)
Light value C1 = working area (approx. 500lux)
Light value C2 = C2 = C1
Switch-off delay time C1 + C2 = 5 min
Mode = Fully automatic
4.1Functionafterthewarm-upphase
Fullyautomaticmode–channel“lightingC1andC2”
If the ambient lighting level is higher than the default light value, the redandgreenLEDs and the connected
lighting will be switched OFF.
Automaticswitch-on, if the detector is triggered by movement and the ambient lighting level falls below the
default light value.
The redandgreenLEDs are enabled to indicate motion detection: 2 short flashes each time movement
is detected. Should there be a change in the natural light value, the artificial light will be adjusted
accordingly.
Automaticswitch-off, if movement is no longer detected, the lighting will be switched off once the preset
switch-off delay time has elapsed.
NB:However,shouldthenaturallightinglevelincreaseandtheambientlightinglevelexceedthepresetlight
value,thedetectorwillautomaticallyswitchthelightingoffafter5minutes,regardlessofanymovement/
presence.Subsequently,thelightingcanbeswitchedbackonmanuallyatanytime.
Switchdelay
The detector will only be triggered after a time delay to avoid sudden changes in brightness caused by
undesired switching on/off of the lighting when persons are present. Example: a passing cloud could
potentially cause unnecessary switching.
Time delay from "dark to light": 5 minutes = redLED flashes slowly during this period.
Clear pre-selection of functions using DIP switches directly on the detector.
DIPswitchesonthedetector Dali/DSiversion
21 43
Individualadjustmentscaneasilybemadebyremotecontrolormanuallybymeansofadjustingelementsselectedby
operatingDIPswitch1(seeillustration).
5.1Settingsandfunctionsviaremotecontrol
Please refer to the operating instructions for the remote control:
•Mobil-PDi/MDi-universal http://www.esylux.com/p/EP10433993
Thefollowingparametersandfunctionscanbeset:
- Light channels 1 and 2: luminous efficiency, ON/OFF, DIM and DIM stop
- Channels 3 and 4: ON/OFF and 4 hours ON/OFF
- Channels 1 to 4: ON/OFF and 4 hours ON/OFF
- Light/time values and operating modes
Optionscanbeselected,including:
- 100-hour burn-in function, corridor function, LED feedback ON/OFF,
orientation light ON/OFF and sensitivity adjustment.
- Setting the electronic ballast Dali parameters
TECHNICAL DATA
MAINS VOLTAGE 230 V AC 50 Hz
POWER CONSUMPTION approx. 0.5 – 0.6 W
FIELD OF DETECTION 360°
RANGE approx. 8 m/24 m in diameter at an installation height of approx. 3m
SETTINGS on device or via remote control Mobil-PDi/Dali and Mobil-PDi/MDi-universal
DALI/DSI OUTPUT 1 2-pin Dali/DSi control cable/broadcast
NO. OF SELECTABLE DALI/DSI
ELECTRONIC BALLASTS
max. 25
DALI/DSI OUTPUT 2 2-pin Dali/DSi control cable/broadcast
NO. OF SELECTABLE DALI/DSI
ELECTRONIC BALLASTS
max. 25
approx. 1 minute – 15 minutes
5 lux – daytime operation
LIGHT MEASUREMENT mixed light
PROTECTION CLASS II
OPERATING TEMPERATURE RANGE 0°C…+50°C
HOUSING UV-stabilised polycarbonate
DIMENSIONS recessed-mounted version: PD-C360i/8 DUO DALI Ø 108 mm, H 38 mmPD-C360i/24 DUO DALI Ø 108 mm, H 46.5 mm
COLOUR white, similar to RAL 9010
•Mobil-PDi/Dali http://www.esylux.com/p/EP10425899
•Mobil-PDi/User http://www.esylux.com/p/EM10425547
5.2Réglagesetfonctionsdisponiblesvialecommutateur
CommutateurDIP1 Fonction"Dali–DSi"
GestiondeballastsélectroniquesdetypeDali(DigitalAddressableLightingInterface)
GestiondeballastsélectroniquesdetypeDSi(DigitalSerialInterface)
CommutateurDIP2 VerrouillageàdistanceON/OFF
«VerrouillageàdistanceOFF»
«VerrouillageàdistanceON»après30minsansréglagemanuel
CommutateursDIP3 Fonctionnementparpoussoir CommutateursDIP4 Préréglagesd'usine
Fonctionnementavec2poussoirs
Fonctionnementavec1poussoir
Bureaux
Sallesdeclasse
Nomduréglage Bureaux Sallesdeclasse
Modedefonctionnement Automatique Semi-automatique
Éclairaged'orientation 10 % 10 %
Fonctioncouloirs Désactivée Désactivée
Fonctionéclairaged’orientation Désactivée Désactivée
Duréed’activation 5min 5min
Duréed'éclairage 1 min 1 min
Réglaged'écart 100 % 100 %
Valeurdeconsignedel'éclairage 500lux 500lux
SignalisationLED Activée Activée
Alertededésactivation
Au terme de la durée d'activation, une alerte de désactivation s'enclenche pour une durée de 60secondes.
L’éclairage se règle sur le taux d’éclairage d’orientation. Si un mouvement est détecté ou une touche est
actionnée pendant ce laps de temps, le détecteur retourne au mode précédent. Si aucun mouvement
n'est détecté au cours de ces 60secondes, le détecteur se remet en mode initial.
Modeautomatique
Le canalÉclairage est activé automatiquement si la luminosité baisse jusqu'à atteindre le seuil programmé
et qu'un mouvement est repéré dans la zone de détection. Il reste actif tant que des mouvements sont
perçus et que la luminosité ambiante ne dépasse pas le seuil programmé. Si le détecteur ne perçoit
plus de mouvements, la durée d'activation des canaux concernés s'amorce. Il est possible, si besoin,
d'activer ou de désactiver chaque canal au moyen des poussoirsS1–S2. Le mode automatique est le
mode prédéfini.
Modesemi-automatique–CanalÉclairage
Activation/désactivation manuelle au moyen du poussoirS1/S2. Le canal reste actif tant que des
mouvements sont perçus et que la luminosité ambiante ne dépasse pas le seuil programmé.
5.3Commandemanuelledel'interrupteur
Les détecteurs disposent de deux bornes "S" permettant de raccorder un interrupteur externe
(interrupteur – courant de travail – raccordement au neutre) par canal. Ainsi, il est possible, à tout
moment, de contourner le système automatique pour éteindre/allumer/réguler manuellement les canaux.
Le fonctionnement avec un seul poussoir est également possible lorsque le commutateur DIP (voir5.2) se
trouve en position basse. Raccorder le poussoir à la borne S1 ou S2. Il est interdit de raccorder S1 et S2
en même temps.
En cas de réglage sur le fonctionnement avec 1 poussoir, tous les ordres de commutation et
de régulation (provenant du poussoir et de la télécommande) sont envoyés aux deux canaux
simultanément. Cela n'a aucune incidence sur le décalage entre le canal1 et le canal2.
Un appui long (>2 s) permet de choisir une luminosité ambiante différente. Pour ce faire, maintenez le
poussoir enfoncé jusqu'à ce que la luminosité ambiante atteigne le niveau souhaité. Cette luminosité
ambiante est conservée tant que des personnes se trouvent dans la pièce. Si les personnes quittent la
zone de détection, le détecteur laisse s'écouler la durée d'activation programmée. Une fois cette durée
écoulée, il passe en mode automatique.
Un nouvel appui court entraîne l'extinction de l'éclairage, L’éclairage reste éteint tant que le détecteur
perçoit des mouvements. Si le détecteur ne perçoit plus de mouvements, la durée d’activation
programmée s’amorce. Une fois cette durée écoulée, il passe en mode automatique.
Les produits ESYLUX sont fabriqués avec le plus grand soin et testés selon les normes en vigueur.
Le garant, ESYLUX Deutschland GmbH, Case postale 1840, D-22908 Ahrensburg (pour l’Allemagne)
ou le distributeur de la marque dans votre pays (vous trouverez toutes les informations nécessaires à
ce sujet sur le site www.esylux.com) garantit les appareils ESYLUX contre les défauts de fabrication et
de matériaux pour une durée de 3 ans à partir de la date d’achat.
Cette garantie est indépendante de vos droits légaux vis-à-vis du vendeur de l’appareil.
L’usure naturelle, les modifications de l’appareil dues à son milieu d’installation et les dommages
résultant de son transport n’entrent pas dans le cadre de la garantie. De même, ne sont pas couverts
les défauts dus au non-respect des instructions de montage et d’entretien et/ou à une installation
inappropriée. Sont également exclues de la garantie les batteries, sources lumineuses et piles fournies
avec l’appareil.
La procédure de garantie ne pourra être enclenchée que sur présentation d’un appareil non modifié après
constatation du défaut, ainsi que d’un ticket de caisse valable, accompagnés d’une courte description de
l’anomalie constatée et expédié au garant dans un emballage approprié et suffisamment affranchi.
Si le recours en garantie s’avère justifié, le garant peut décider soit de réparer, soit de remplacer
l’appareil dans les meilleurs délais. La garantie ne comprend aucun autre recours. Le garant n’est
notamment pas responsable de tout dommage causé par un défaut de l’appareil. Si le recours de
garantie s’avère injustifié (par exemple, si la garantie a expiré ou si le défaut constaté n’est pas couvert
par celle-ci), le garant tentera de réparer l’appareil au meilleur coût.
FR
Félicitations!AvecceproduitESYLUX,vousavezfaitlechoixdelaqualité.Pourl'utiliserdanslesmeilleuresconditions,
veuillezlireattentivementcettenoticedemontageetd'utilisationetlaconserverenvued'uneéventuelleconsultationfuture.
ATTENTION:seulesdespersonnesautoriséesetqualifiéespoureffectueruneinstallationconformeauxnormeset
prescriptionsenvigueurpeuventintervenirsurleréseau230V.Coupezlecourantavantd’installerleproduit.
Ce produit ne doit être utilisé que dans les conditions prévues par le présent mode d’emploi.
Toute modification du produit (ajout, peinture, etc.) entraîne l’annulation de la garantie.
Une fois que vous avez déballé l’appareil, vérifiez qu’il ne présente aucun défaut. En cas d’anomalie,
ne le mettez pas en marche.
Si vous n’êtes pas certain que l’appareil peut être utilisé en toute sécurité, éteignez-le immédiatement
et prenez vos dispositions pour empêcher toute utilisation involontaire.
REMARQUE:cetappareilnedoitenaucuncasêtrejetéaveclesdéchetsmunicipaux.Lespropriétairesd'équipements
électriquesouélectroniquesusagésonteneffetl'obligationlégaledelesdéposerdansuncentredecollectesélective.
Informez-vousauprèsdevotremunicipalitésurlespossibilitésderecyclage.
Les détecteurs de mouvement et de présence sont des détecteurs à infrarouge passif automatisant
le fonctionnement, en intérieur, d'un éclairage raccordé selon la lumière naturelle et la présence/le
mouvement de personnes.
Ce détecteur de présence inclut un dispositif de commande avec alimentation des interfaces raccordées.
L'adressage des appareils/ballasts électroniques n'est pas nécessaire puisqu'ils sont pilotés en même
temps via l'adresse de diffusion «Broadcast». Chaque canal peut gérer jusqu'à 25 ballasts électroniques
de type Dali/DSi.
Le détecteur de présence dispose de deux canaux/sorties. Le canalC1 fait office de «canal maître» pour
ce qui concerne la photométrie et le réglage. Le canalC2 suit le canalC1. Ces données doivent être prises
en compte lorsque des groupes d’éclairage sont affectés aux canaux. Il est recommandé d’assigner
le groupe d’éclairage «fond de la pièce» au canalC1 et «côté fenêtre» au canalC2. Le détecteur peut
également être installé au plafond selon n'importe quelle orientation.
Vous trouverez les schémas électriques et d'autres informations utiles dans le dépliant fourni.
•Mettezledispositifsoustension.
Une phase d’initialisation de 25s environ s’amorce.
Les LEDrouge(canal1=C1),verte(canal2=C2)etbleue clignotent en alternance. L'éclairage raccordé
s'allume.
Au terme de la phase d'initialisation, les détecteurs sont prêts à l'emploi car ils sont réglés, à la livraison,
sur préréglages d'usine/télécommande.
Listedespréréglagesd'usine(bureaux)
Luminosité C1 = espace de travail (500lux env.)
Luminosité C2 = C2 = C1
Durée d’activation C1 + C2 = 5min
Mode = automatique
4.1Aprèslaphased'initialisation
Modeautomatique–canalÉclairageC1etC2
Si la luminosité ambiante est supérieure à la valeur limite définie, les LEDrougeetverte et l'éclairage
raccordé restent éteints.
Activationautomatique: lorsque le détecteur perçoit un mouvement et mesure une luminosité ambiante
inférieure à la valeur limite définie.
Les LEDrougeetverte indiquent les mouvements détectés = 2 clignotements courts par mouvement perçu.
L'éclairage s'ajuste automatiquement lorsque la lumière du jour varie.
Désactivation-automatique:si le détecteur ne perçoit plus de mouvements, il laisse s'écouler la durée
d'activation programmée, puis désactive l'éclairage.
REMARQUE:Silaluminositéambianteaugmenteau-delàdelavaleurlimitedéfinie,ledétecteuréteintl'éclairage
raccordéautermed'undélaide5minutes,mêmes'ilperçoitencoreuneprésenceoudesmouvements.L'éclairage
peut,àtoutmoment,êtrerallumémanuellement.
Temporisation
Pour éviter les changements de luminosité trop soudains dus à une activation/désactivation indésirable
de l’éclairage en cas de détection de présence, le détecteur s’active exclusivement sur la base d’une
temporisation. Par exemple: le passage d’un nuage pourrait activer inutilement le détecteur.
Temporisation «sombre à clair»: la LEDrouge clignote lentement pendant 5min.
Fonction de programmation claire grâce aux commutateurs DIP intégrés au détecteur.
CommutateurDIPdudétecteur VersionDali/DSi
21 43
Vouspouvezfacilementadaptercesréglagesàvosbesoinssoitaveclatélécommande,soitmanuellementaumoyendes
élémentsderéglageaprèsavoirmodifiélapositionducommutateurDIP1(voirillustration).
5.1Réglagesetfonctionsdisponiblesvialatélécommande
Vous trouverez plus de précisions dans la notice d’utilisation de la télécommande
•Mobil-PDi/MDi-universal http://www.esylux.com/p/EP10433993
Lesparamètresetfonctionssuivantspeuventêtreréglés:
- Canaux Éclairage 1 et 2 : puissance lumineuse, activation/désactivation, DIM et arrêt DIM
- Canaux Éclairage 3 et 4 : activation/désactivation, activation/désactivation pendant 4 h
- Canaux 1 - 4 : activation/désactivation et activation/désactivation pendant 4 h
- Luminosités/durées et modes de fonctionnement
Différentesoptionspeuventêtresélectionnées,comme:
- 100 h de rodage, fonction couloirs, activation/désactivation de l'indicateur LED,
activation/désactivation de l'éclairage d'orientation et ajustement de la sensibilité.
- Réglage des paramètres des ballasts électroniques Dali
TENSION D'ALIMENTATION 230VAC 50 Hz
CONSOMMATION env. 0,5 – 0,6 W
360°
8 m/24 m de diamètre env. pour une hauteur de montage de 3 m env.
sur l'appareil ou avec la télécommande infrarouge Mobil-PDi/Dali et Mobil-PDi/MDi-universal
SORTIE 1 DALI/DSI double fil pilote Dali/DSi/Broadcast
DALI/DSI COMMANDABLES
25 max.
SORTIE 2 DALI/DSI double fil pilote Dali/DSi/Broadcast
DALI/DSI COMMANDABLES
25 max.
1 à 15 min env.
env. 5 lux – mode jour
éclairage mixte
CLASSE DE PROTECTION II
0 °C…+50 °C
BOÎTIER polycarbonate résistant aux UV
DIMENSIONS montage encastré : PD-C360i/8 DUO DALIDUO DALI Ø 108 mm, H 46,5 mm
COULEUR blanc, similaire à RAL 9010