eSYNiC - Wifi Repeater
04
eSYNiC - Wifi Repeater
03
eSYNiC - Wifi Repeater
02
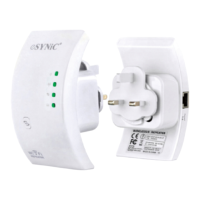
A1. Plug the Wi-Fi Repeater to a wall socket.
How to configure the Wi-Fi Repeater
eSYNiC - Wifi Repeater
01
Introduction:
A6. Select your current w router SSID to continue,if you can not find your wifi
router,PLSrefresh and try it again.
ireless
A7.
SSID,just input your current wifi security key and continue
When you get the page below, please do NOT change the repeater
eSYNiC - Wifi Repeater
05
eSYNiC - Wifi Repeater
06
eSYNiC - Wifi Repeater
07
展开尺寸:360 x 240 m m
成品尺寸:120 x 90 m m
The eSYNiC Wi-Fi Repeater boosts your Wi-FI signal and extends the range of your
wireless network to areas of your home that previously had little or no signa.
Extend Network-Extend Internet access throughout your home for wireless devices
like iPads ,laptops ,smart phones ,game consoles and TVs.
Enhance Existing Equipment -keep your current equipment and improve coverage to
eliminate wireless “dead zones”.
NOTE: reset
10
If you need to the Wi-Fi Repeater, you need press and hold the reset
button inside the tiny hole for seconds till all the LED indicator reflash
A2. Click the network icon ( or ) on
the right bottom of your desktop ,You will find
the signal from the Repeater .Click on
“Connect” and wait for a few seconds
eSYNiC
A3.Open the web browser and type the Default
IP address in the address
bar,the default IP address for this eSYNiC wifi
Repeater is ,and then press Enter
to continue.For better compatibility,we
recommend using the Microsoft IE browser .
http://192.168.10.1
192.168.10.1
A4. Type the username and password in the login page,the default username and
password are both .Click Submit button to continue.admin
A5. After loging in the management page,PLS select the Repeater mode, Click
on the to continue.Repeater Button
Click on ‘Apply’ button, The Repeater will restart.
Wait for a few seconds,your Wi-Fi Repeater is ready for use.
*We suggest that your current wifi Security Key should not included strange symbol
such as $ *& ^,it might lead to a fail configuration,Character and Number
recommended.
1. Plug the eSYNiC wifi Repeater to a wall socket. Connect the repeater to your
PC/Laptop via RJ45 network cable included.
2. Follow process A3 to A8 to configure your Wi-Fi Repeater.
B. Configure the repeater mode with Rj45 Cable.
Note:
If you can NOT Load the management page on your browser
.PLS hold the reset button for 5-8 seconds until all LED indicators re-flash ,then
remove the eSYNiC wifi repeater from power socket and retry step A1 to A3 again .
http://192.168.10.1
WiFi-Repeater
User Manual
You can configure the wifi Repeater via RJ45 network cable included Or
wirelessly on your PC/Laptop
sSYNiC
A. Configure the Repeater Mode wirelessly.
Wireless Repeater Mode
Wireless AP Mode
· 1 x Wireless-N Repeater
· 1 x RJ-45 Networking Cable
· 1 x Quick installation Guide
R
WPS REV.3.2
Reset
RJ45 Port
Power Indicator
WPS Indicator
Wireless Indicator
LAN Indicator
WPS Button
Package Contents
Before you starting to use this repeater, please check if there’s anything missing in
the package, and contact your dealer of purchase to claim for missing items:
INSTALLATION
The latest eSYNiC wifi Repeater Support TWO typical Mode ,Wireless Repeater mode
and Wireless AP mode ,You can select the proper mode depends on your network
environment
In the wireless repeater mode ,the eSYNiC wifi Repeater will expend the wifi
coverage of your current wifi network and enhance the strength of the wifi signal .
No any wired connection required to your Router or broadband ,extend
the wifi signal wirelessly .
This AP model is wireless Access
Point (AP) in which it can convert
signal into wireless wifi signals.
Application:
Connect the eSYNiC wifi repeater to the
wired broadband interface (or wired router at
home)with RJ45 network cable,you will create
a new wifi hot port,and full wifi coverage in
your home
A8.Wireless Repeater mode configure successfully
*The default wireless SSID and Security key of WI-FI Repester is same as your
AP/router after successful installation.
1. Plug the Wi-Fi Repeater into a wall socket.
2. Follow process A3 to A4.
3. Click on ‘AP’ to continue.
C. Configure the Wireless AP Mode.
4.The following message will be displayed on your web browser:
* The Management Page will be locked after you successful configuration,You
can NOT login the management page via the http://192.168.10.1, If you want to
login the managerment page again,PLS hold the reset button for 8-10 seconds
to make all setting become factory default setting .and reconfiguration the wifi
repeater again.