ETC Setup Guide
One-Port DMX Gateway
One Port DMX Gateway Setup Guide Page 2 of 2 Electronic Theatre Controls, Inc.
Wall Mount Installation
For surface mount applications ETC recommends the use of an ETC 1 gang surface mount backbox
(part# 1064A1037). For flush mount applications, ETC recommends the use of RACO #690 backbox or
equivalent (provided by others).
Terminating Cat5 Cable
Terminate Cat5 wiring with the included Category 5 connector (a two piece female RJ45 assembly with
a base unit and a cap) that is supplied in the kit with your gateway. The cap has colored marking on one
end to indicate where to insert each of the cable’s color-coded wires. Use the T568/B wiring scheme, as
illustrated on the cap label, for compatibility with the ETC network wiring convention.
Step 1: Follow standard Cat5 installation procedures to remove the end of the cable jacket and
expose the conductors.
Step 2: Untwist the conductors and insert them into the connector cap according to the T568/B
color-coded label. The cable jacket should come close to the edge of the connector with
as little of the conductors visible as possible.
Step 3: Press the cap firmly on the connector base until the two pieces snap together. Be sure not
to break the plastic while applying pressure.
Step 4: Use the supplied double-sided sticky tape to secure the connector to the inside of your
backbox.
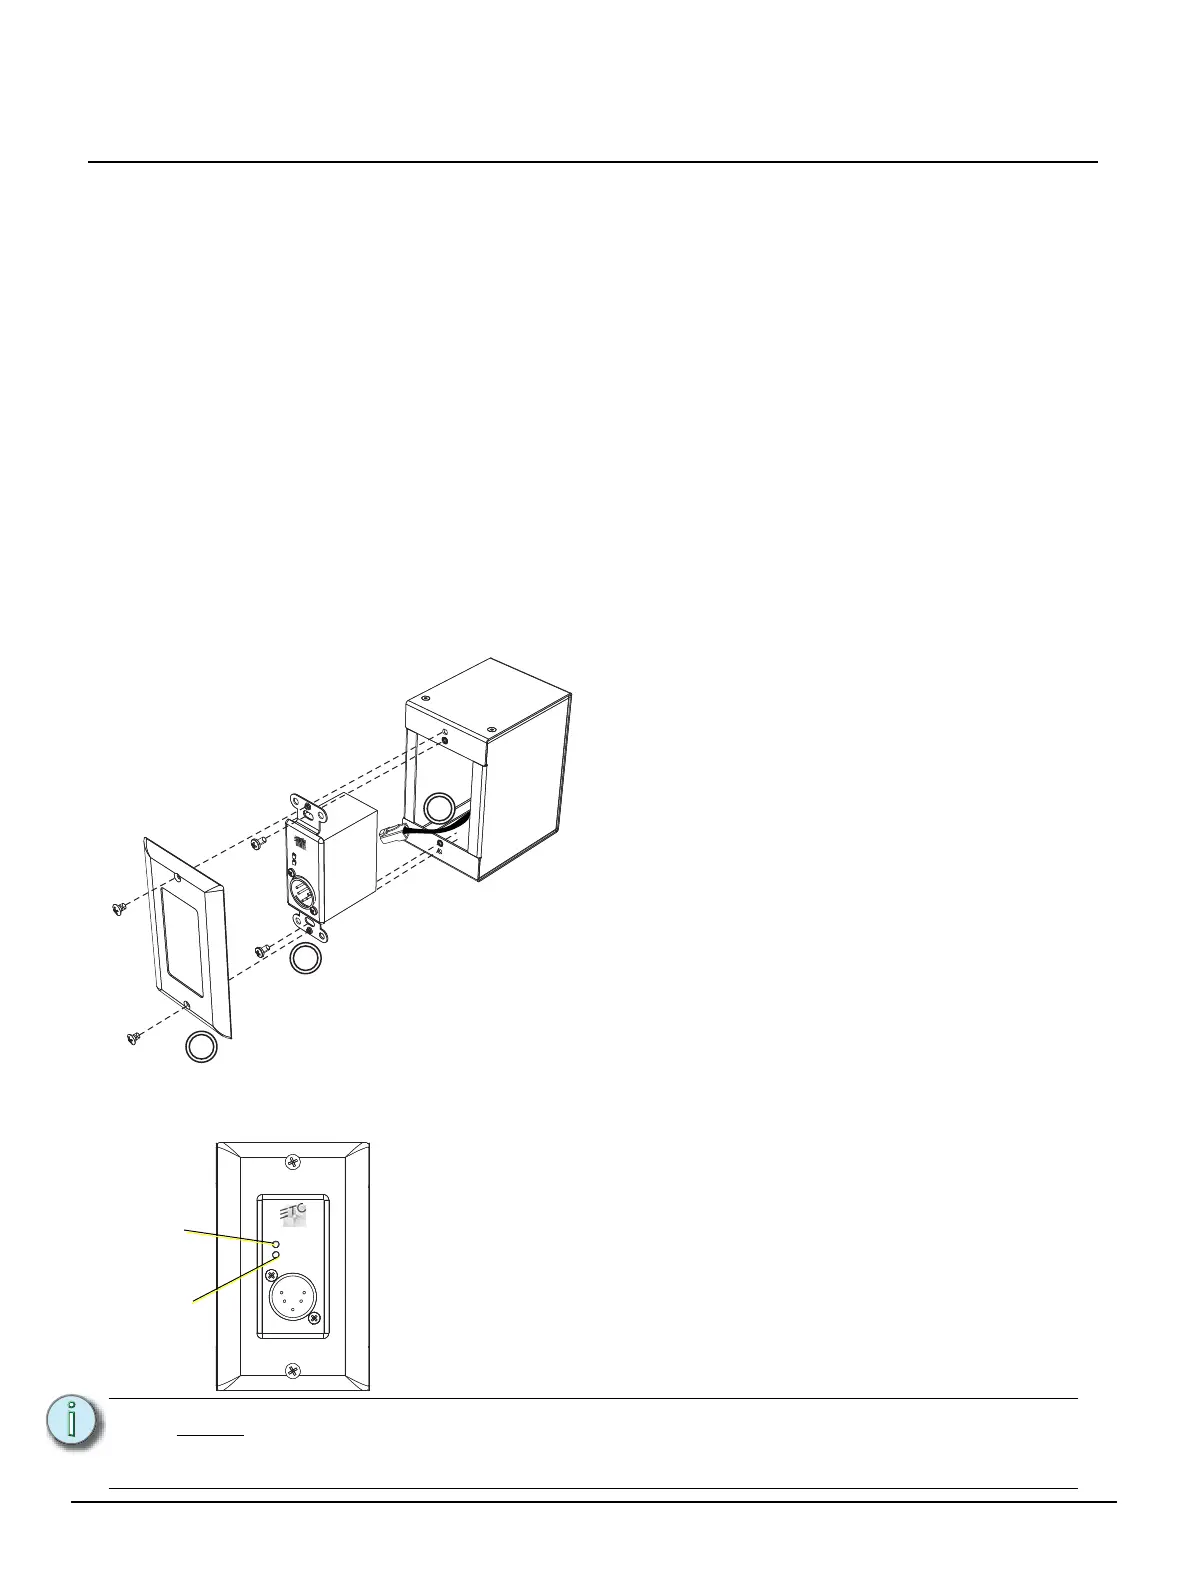
LEDs
Once connected to the PoE network, the LEDs will illuminate as follows:
Note:
Software configuration for the One Port DMX Gateway is completed using ETC
Network Configuration Editor (NCE) v4.3.0 (or newer) for Net3 and ETCNet2
systems.
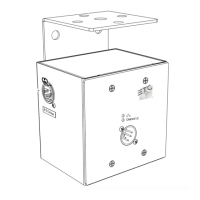
Installation into a Backbox
Step 1: Ensure the backbox is clean and free of
any obstructions.
Step 2: Plug the supplied RJ45 patch cable into
the female RJ45 that you have previously
installed into the backbox and the
connector on the Net3™ One-Port DMX
Gateway.
Step 3: Using the two silver screws from the
installation kit, install the gateway into the
backbox.
Step 4: Using the two black screws from the
installation kit, secure the faceplate to the
gateway.
Network/
Power
DMX
• NET/Power – an illuminated blue LED indicates power and network
connection. Flashing indicates active data is being transmitted and
received.
• DMX– an illuminated green LED indicates a DMX connection with valid
data. For a DMX input port, a blinking LED indicates no active DMX is
present. For an output port, a blinking LED indicates no valid sACN or
EDMX data is present over the network.
 Loading...