EX17162 Web-Smart Switch Installation Guide
Copyright 2016 EtherWAN Systems, Inc. Page 2
All Rights Reserved
5 Apply AC Power
A. Connect the female end of the supplied AC
power adapter cable to the power receptacle
on the switch rear panel. Connect the other
end to a grounded 3-pronged AC outlet.
B. On the switch rear panel, move the ON/OFF
switch to the ON position.
When you apply AC power:
All green PoE, Link/ACT, and 1000M LEDs
blink momentarily.
The fans start.
The yellow Power LED goes ON.
The Link/ACT and 100M LEDs for every port
connected to a device flash, as the switch
conducts a brief Power On Self-Test (POST).
6 Configure the Switch
After the switch passes its POST, perform a basic
configuration of the switch.
A. Connect an available 10/100 Mbps RJ-45
switch port to a PC using a Category 5 or
better Ethernet cable.
B. Confirm that the Link/ACT LED for the switch
port to which the PC is connected is ON.
C. Configure the PC’s TCP/IP settings to use the
subnet 192.168.2.2.
D. In a Web browser, type http://192.168.2.1
in the address bar and press Enter.
E. At the User Log In screen, type admin for the
ID (username)and password (both are case
sensitive), and then click OK.
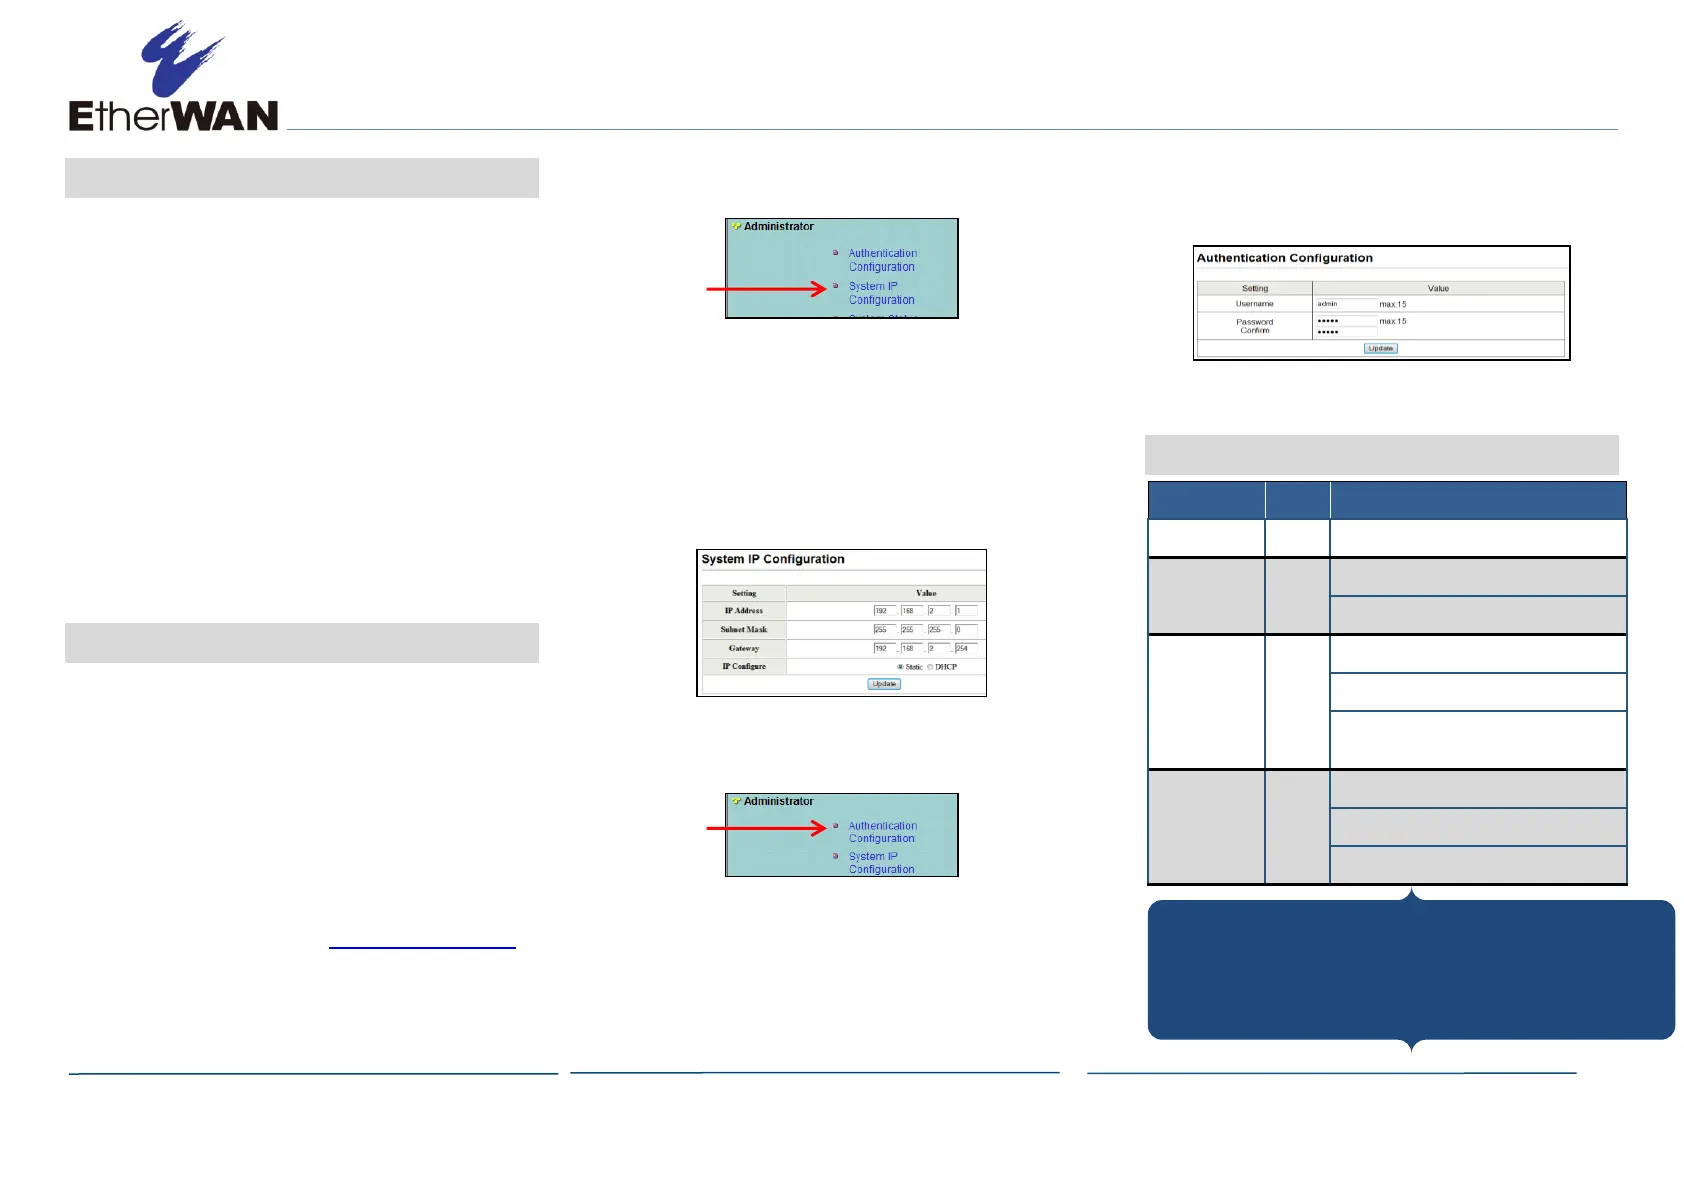
F. In the left pane, click Administrator >
System IP Configuration.
G. At the System IP Configuration page, perform
one of these steps next to IP Configure:
- If your network uses a DHCP server, click
DHCP.
- If your network uses static IP addresses,
click Static. Enter the switch’s IP
Address, Subnet Mask, and Gateway
settings.
H. Click Update.
I. In the left pane, click Administrator >
Authentication Configuration.
J. At the Authentication Configuration page,
complete the following fields:
- Username = enter a new username.
- Password = enter a new password.
- Confirm = re-enter the new password.
Username and password are case-sensitive.
Permitted characters are a-z, A-Z, 0-9,
underscore, and plus, minus, and equals signs.
K. Click Update.
7 Front Panel LEDs
ON = switch is receiving power.
ON = Power Device (PD) is connected.
OFF = PD is disconnected.
ON = valid network connection.
OFF = no data transmission on port.
Flashing = port is sending or receiving
data.
ON = 1000 Mbps port connection.
OFF = 10 Mbps port connection.
Flashing = 100 Mbps port connection.
Congratulations! You have successfully
performed a basic installation. For advanced
configuration information, refer to the user guide.

 Loading...