8e6b5250-532e-4fc8-bc8f-0be2f7ec7200 / DP1.0 / 2013-06-19 3 / 12 Eurolyser Diagnostica GmbH
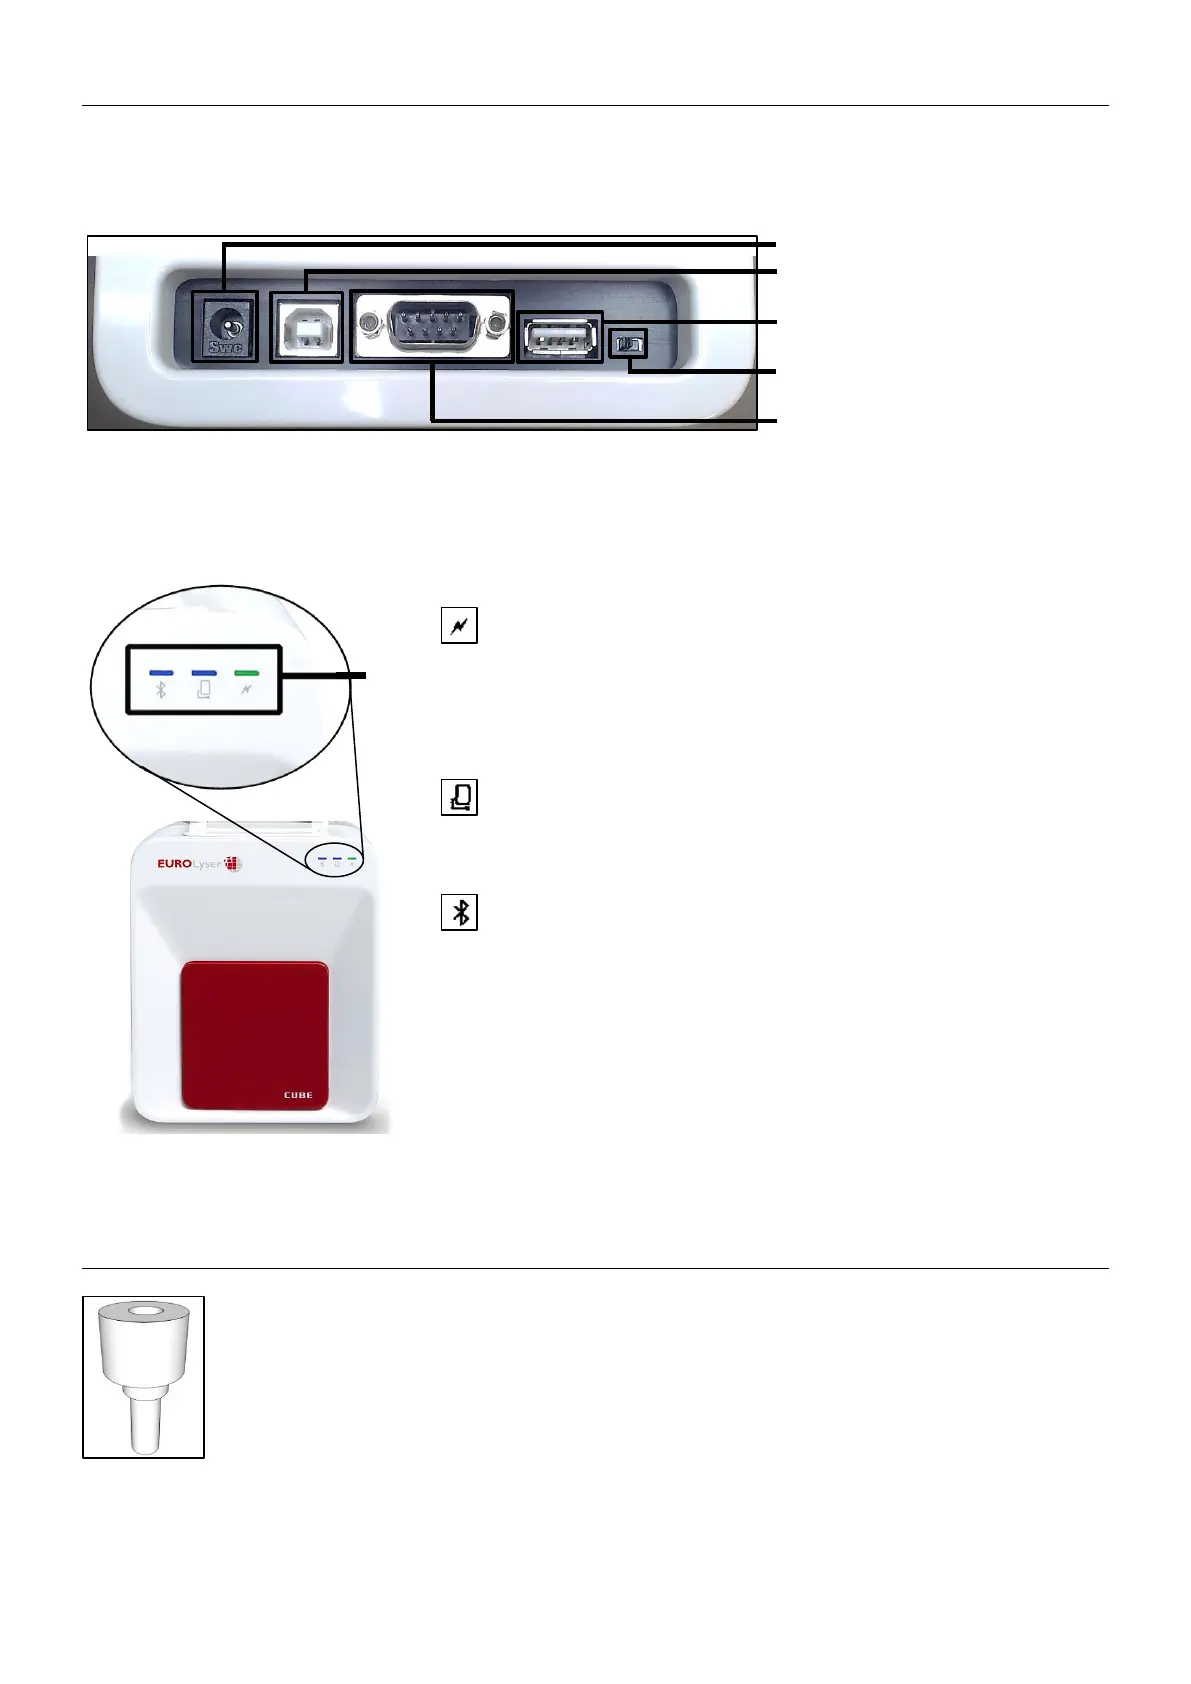
Setting up the Eurolyser CUBE Laboratory Photometer
Set up the Eurolyser CUBE laboratory photometer. Plug the power supply (AC adaptor plug) to the
Instrument and the power cable into the wall socket.
Power supply
USB Socket for connecting a
PC (for data transfer)
USB Port for connecting a
Tablet PC
Bluetooth on/off switch
(left: Bluetooth OFF)
RS 232 socket for connecting a
printer, a barcode reader or a
PC (for data transfer)
LEDs on the Eurolyser CUBE
This green LED indicates the readiness of the photometer
Flashing: the Instrument is warming up and testing cannot be
started yet (Note: this takes approximately 10 min.)
Constantly lit: the Instrument is warmed up and ready for use
Off: the Instrument is not plugged in
This blue LED indicates a connection to a Tablet PC:
Constantly lit: a connection with a Tablet PC is established
Off: the Tablet PC is not connected
This blue LED indicates a Bluetooth connection to Tablet PC:
Constantly lit: a connection with a Tablet PC is established
Flashing: Bluetooth is activated on the photometer but no
Instrument is connected via Bluetooth
Off: Bluetooth is switched off
Note: the Bluetooth connection is currently not operational.
The Tablet PC must be connected to the Instrument via the
USB-cable!
Transport lock
Upon first use the white transport lock is to be removed from the door of the Instrument.
Note: keep both the transport lock and the original packaging. In case of a defect the
Instrument is to be returned in the original packaging with the transport lock installed to
prevent further damage from transport!
 Loading...