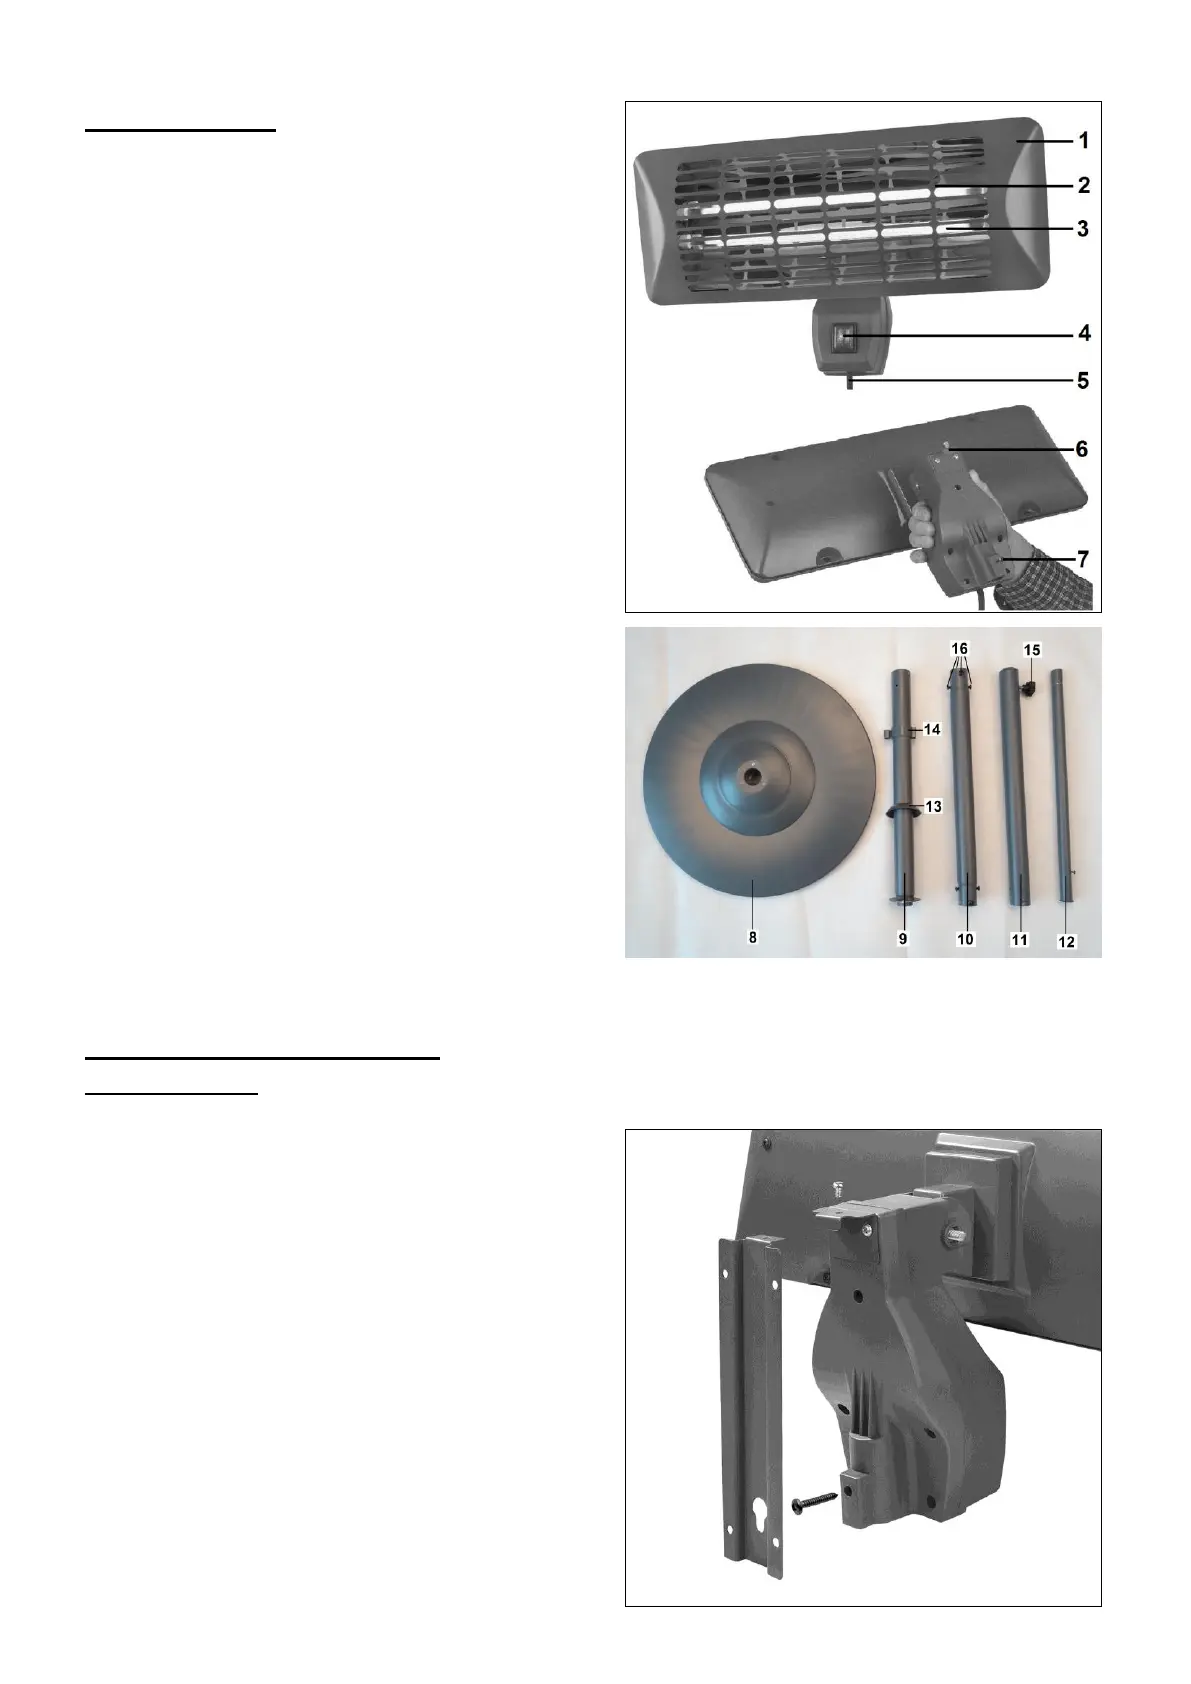
DESCRIPTION
Front heating element:
1. Heater housing
2. Grille
3. Quartz lamp (2x)
4. Operating switch (2x)
5. Electrical cable with plug
A wall bracket, plugs and screws (not
illustrated) are supplied for wall mounting
Back of heating element:
6. Bracket (for hanging the patioheater)
7. Hanging screw
Standard (only S version):
8. Base
9. Stand, bottom section
10. Stand, middle section
11. Stand, top section
12. Stand, adjustable section
13. Protective cover
14. Cable guide
15. Black locking screw
16. Fixing screws for stand
INSTALLING THE HEATER
Wall mounting:
The housing of the heater (1) must be at least 30 cm from the ceiling, 50 cm from side-walls
and 1.80 m above the floor.
The patio heater must be affixed to a sturdy
wall made of stone or cement. Never attach to
walls made of wood or other flammable
material! Attach using the bracket supplied; do
not use any other supports or attachments!
Drill four holes in the correct places for the
plugs and attach the wall bracket to the wall
using the screws. The curved part of the plate
must be uppermost and the ‘keyhole’ must be
located at the bottom of the support. The wall
bracket must be horizontal.
Turn the hanging screw (7) into the
corresponding hole on the side of the patio
heater, until it protrudes a maximum of 5 mm
(see diagram).
 Loading...