8
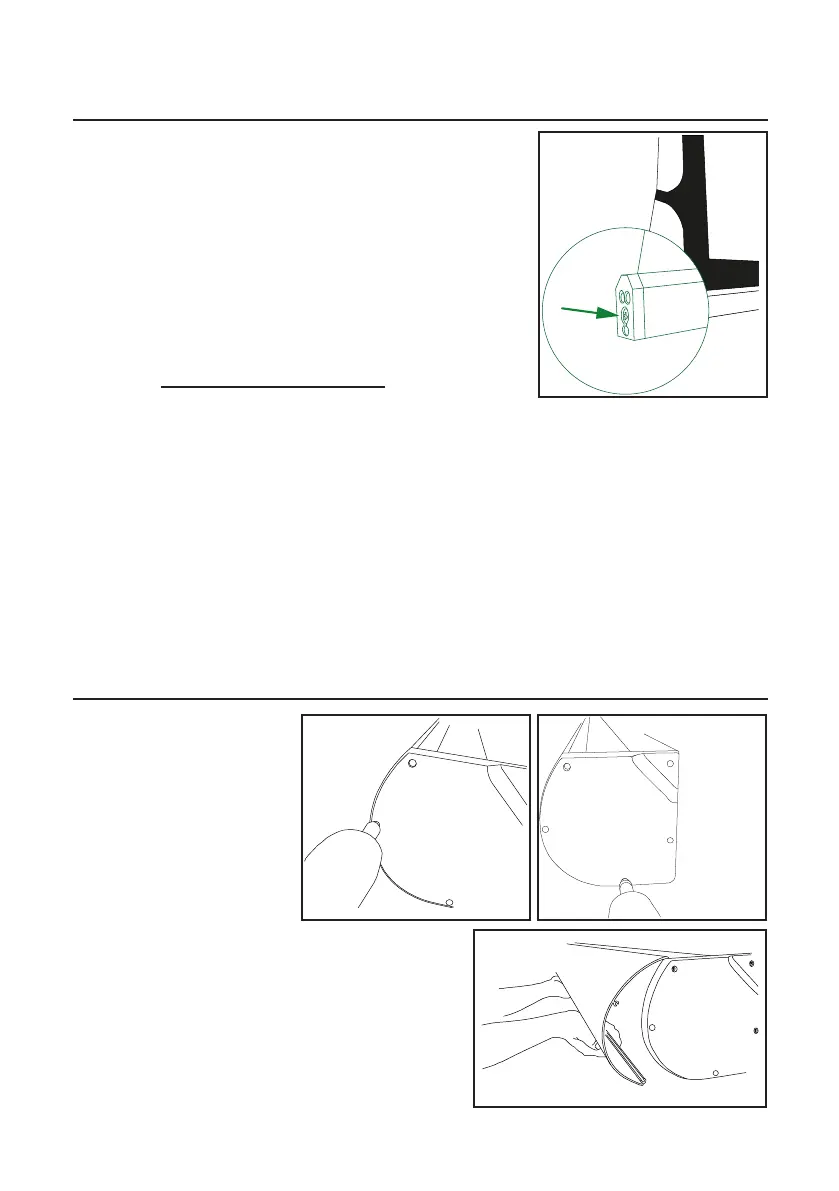
EN: To keep the surface flat you may need to adjust the
tensioning as the surface will change with time and
temperature. This is done with the tensioning screw
marked in fig 13. It is adjustable with 1/6 turn increments.
Only adjust it in a single increment at a time!
1. Carefully lift the bottom bar with a firm grip
2. Press the screw in 2-3mm to unlock it and turn it
clockwise to increase the tension, anti-clockwise to
decrease it
3. Let the screw come out and lock again
4. Leave the screen to hang and set for a minute
5. Repeat procedure if necessary
SE: För att bibehålla ytan slät kan trådarnas spänning behöva justeras emellanåt. Detta beror på att
dukmatrialet ändras med tid och temperatur. Justeringen görs med skruven som markerats i fig 13.
Tråden kan justeras i
1/6-dels varv per steg. Justera endast med 1 steg åt gången!
1. Lyft försiktigt bottenprofilen med ett stadigt grepp
2. Tryck in skruven 2-3mm för att släppa låset och vrid skruven medsols för att spänna tråden, mot-
sols för att släppa efter
3. Släpp ut skruven så att den hakar i sitt lås igen
4. Låt duken hänga och ”sätta sig” några minuter
5. Repetera om nödvändigt
Tensioning (TabTension only) / Trådspänning (endast TabTension)
How to open case / Öppna kassetten
EN: The front lid can be
removed while the screen
remains installed on the wall.
To open the case remove the
screws shown in fig 14 & 15
on both ends. Lift and remove
the lid (fig 16).
SE: Täcklocket kan tas bort medan duken fortfarande
är installerad på väggen. Lossa skruvarna som visas i
fig 14 & 15 på båda sidor. Lyft och ta haka loss locket
(fig 16).
fig 14 fig 15
fig 16
fig 13
 Loading...