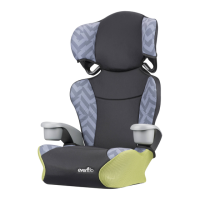
Re-check the level
indicator. Ball should be
between the blue zone
for forward-facing.
To remove the lower
anchor connector
assembly strap, pull red
release strap. Remove the
other strap on the other
side of the seat from the
vehicle anchor.
8.
7.
IMPORTANT:
• Before installing this child restraint forward-facing with
the vehicle seat belt, you MUST move the Lower Anchor
Connector (UAS) Assembly to the rear-facing belt path
so that it does not interfere with the vehicle seat belt.
Refer to page 27 for instructions on moving the Lower
Anchor Connector Assembly (UAS) to the forward-facing
belt path.
• Check your vehicle owner’s manual to determine how to
lock your seat belt for child restraint installation. The seat
belt must be locked to properly secure the child restraint.
• ALWAYS USE TETHER STRAP, if a Tether Anchor
is available. If not available, ALWAYS store the
Tether Strap
(p.
63
)
.
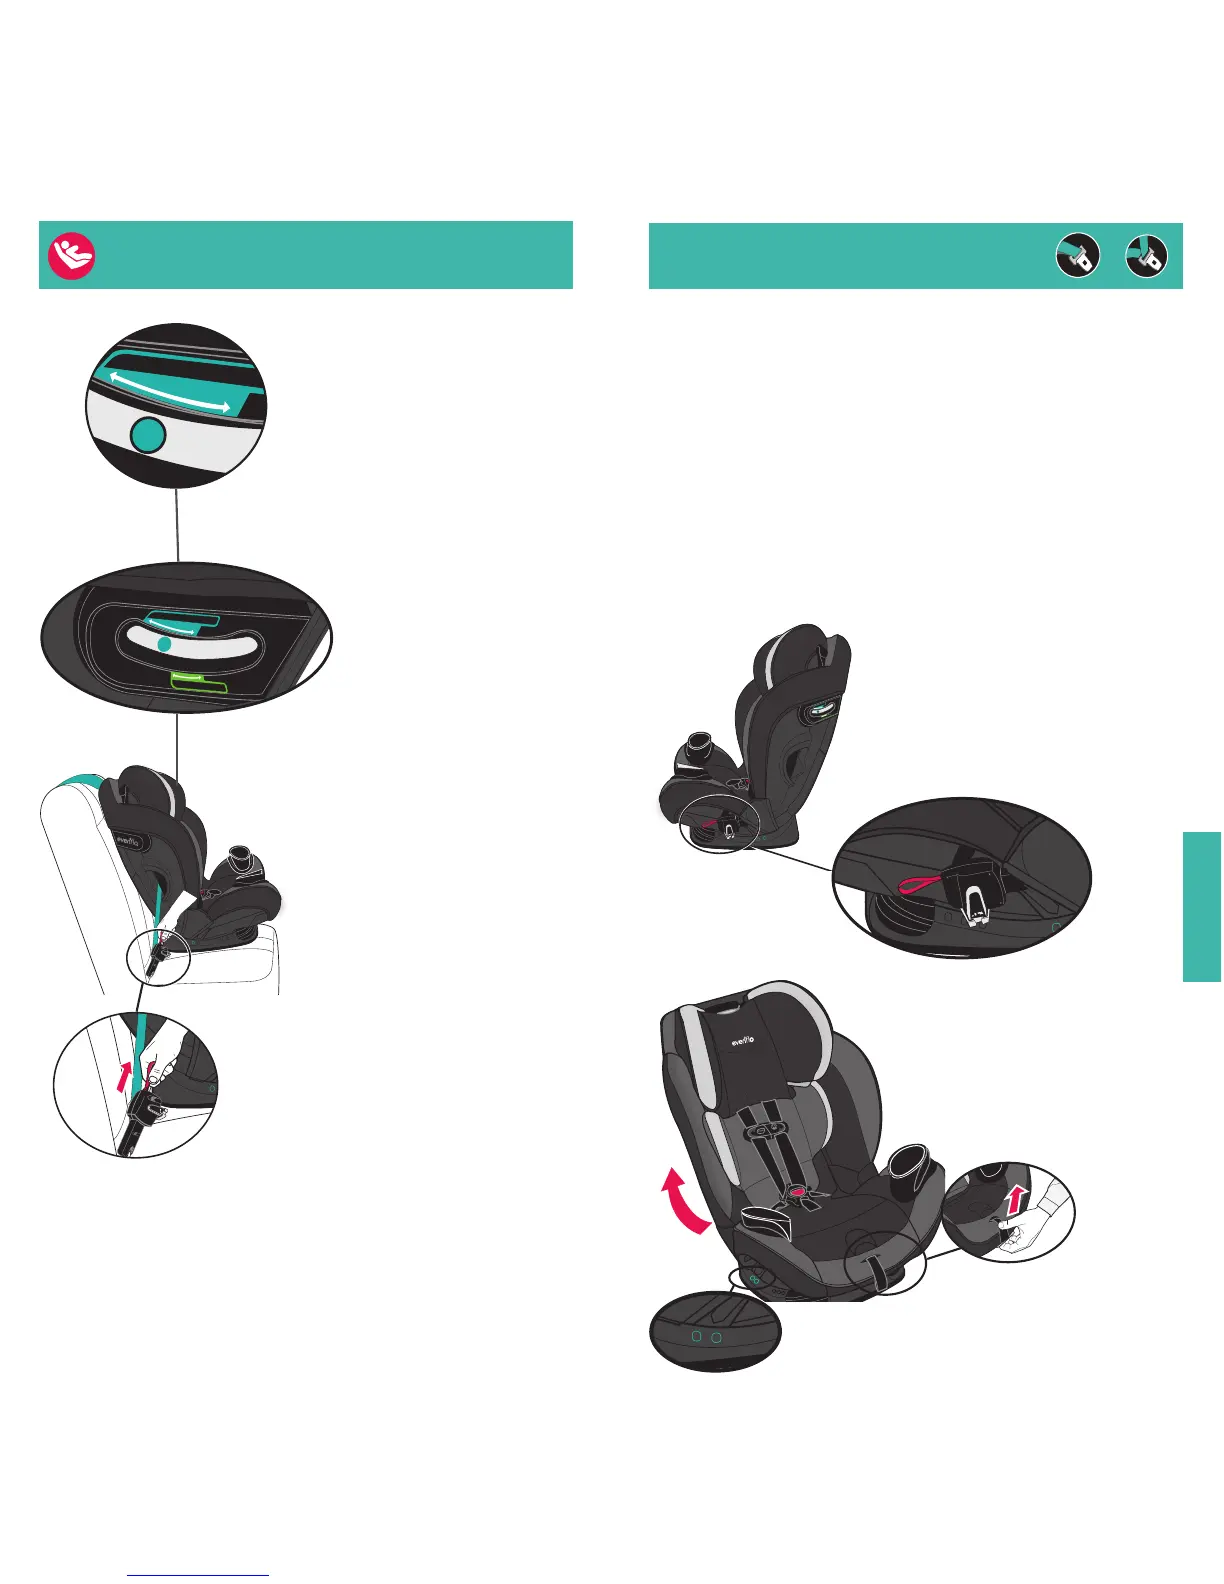
Re-route the lower anchor
connector strap through the
rear-facing belt path (p.
27
).
Store the lower anchor connector
(UAS) in the rear-facing belt path
as shown.
1.
2.
Forward-facing Installation
with Vehicle Seat Belt
Forward-facing Installation with Lower
Anchor (UAS) Connectors (cont.)