Do you have a question about the EverSewn sparrow 15 Series and is the answer not in the manual?
Remove the screw (a) and the face plate.
Remove the screw (b) and the free arm cover.
Remove 4 screws (c, d,e,f) after laying down the machine.
Remove face plate, cap, free arm cover, base plate, then 4 screws (g,h,i,j) and loosen screw (k).
Loosen screw (I), remove screw (m), and detach the pattern selector dial and front cover.
Explanation of symbols used for troubleshooting and adjustment procedures.
Adjusting the play of the arm shaft to ensure smooth operation.
Adjusting the meshing of arm shaft worm and pattern cam for proper movement.
Adjusting the needle bar supporter to set the needle position correctly.
Setting the correct height of the presser foot using a gauge.
Adjusting the needle's horizontal movement for maximum zigzag stitch.
Ensuring the needle drops in the center of the needle hole for correct stitching.
Adjusting the needle's left/right position for even zigzag stitching.
Setting the correct height of the needle bar using a gauge for proper needle movement.
Adjusting the threader stopper to ensure the hook enters the needle hole freely.
Adjusting the distance between the needle and the hook tip for proper timing.
Adjusting the timing between the needle and hook for correct stitch formation.
Adjusting the distance between drive gears to prevent shaking.
Adjusting play in gears for proper meshing and timing.
Adjusting feed cam position to resolve delivery, stitch, and breakage issues.
Adjusting feed lifting rock cam for correct feed dog movement.
Setting the correct height of the feed-dog using a gauge.
Adjusting feed-dog front-to-back position relative to the needle plate.
Adjusting feed-dog left-to-right position relative to the needle plate.
Adjusting upper thread tension using a dial tension gauge.
Adjusting bobbin case tension using a bobbin case tension gauge.
Adjusting motor belt tension using a belt tension gauge.
Adjusting settings for reverse patterns that are too close or too open.
Adjusting pattern cam contact plate for even forward/backward feeding in buttonholes.
Troubleshooting buttonhole stitching issues by adjusting screws for cloth delivery.
Adjusting bobbin winding intensity and shape for proper filling.
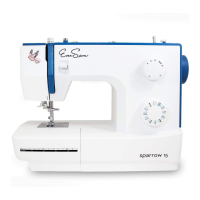
| Brand | EverSewn |
|---|---|
| Model | sparrow 15 Series |
| Category | Sewing Machine |
| Language | English |