4
9. Fermez la configuration d’instrument (Device Setup) en cliquant sur "OK".
10. Ouvrez la petite fenêtre Generic Remote en allant sur "Devices" –
"Generic Remote".
Vous pouvez maintenant aisément alterner entre les réglages multi-voie 1-48 et les
réglages d'une voie en choisissant dans cette fenêtre.
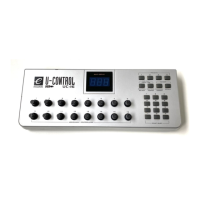
11. Sur l’UC-33, sélectionnez le preset 01 (10).
Ce preset pilote les voies 1-8, 17-24 et 33-40, selon le réglage sélectionné dans la
fenêtre Generic Remote du logiciel.
12. Réglez la fenêtre Generic Remote sur "Channel strip".
La configuration "Channel strip" vous donne un contrôle total des réglages de la voie,
niveau d'envoi, correcteur 4 bandes, sélection d'effet d'insert, volume, panoramique
G/D et avant/arrière, sélection de sortie et volume général. La configuration effectuée
concernera la voie de mixer actuellement sélectionnée, et vous pouvez passer
rapidement d'une voie à l'autre.
13. Sélectionnez le preset 10 pour les voies 9-16, 25-32 et 41-48 et changez pour la
fenêtre appropriée dans Generc remote.
Créer vos propres configurations Generic Remote
Après avoir travaillé avec les configurations presets, vous pouvez vouloir personnaliser ou
créer les vôtres en fonction de votre méthode de travail. La documentation Steinberg
explique en détail comment faire.
Note : si vous avez déjà créé votre propre configuration Generic Remote, veillez à
l'exporter avant d'importer les configurations U-Control.
1. Sélectionnez le preset 12 (7).
2. Installez la démo Sound Studio Pro II du dossier de démonstration de votre
CD-ROM Music Creator.
3. Lancez la démo Sound Studio Pro II.
4. Allez dans le menu "Options|MIDI Devices". Assurez-vous que l'UC-33 est
sélectionné comme unité MIDI IN. Sélectionnez la sortie de votre carte son
comme périphérique MIDI OUT. Assurez-vous que c'est la SEULE unité
sélectionnée.
5. Sélectionnez "Multitrack record" dans la fenêtre des pistes.
6. Appelez le mixer MIDI en cliquant sur l'icône "Mixer" dans la barre d'outils.
Les commandes 1-8 ont été réglées pour piloter respectivement le volume des voies 1-8.
9-16 pilotent le panoramique de chaque voie. 17-24 pilotent la reverb et 25-32 le chorus.
Le fader master pilote le volume de la voie de batterie tant que celle-ci est affectée à la
voie 10. Bougez les commandes sur l'UC-33 et observez comment bougent les comman-
des sur le mixer MIDI.
Cliquez sur le bouton "prise MIDI" de la barre de transport. Cela activera la télécom-
mande des fonctions de la barre de transport. Ces fonctions ont été affectées aux bou-
tons lecture, arrêt, avance et retour rapides de l'UC-33 pour qu'ils se comportent comme
tel. Les boutons du pavé numérique ont été affectés à d'autres commandes de transport.
Notamment, 0 a été affecté à l'activation du mode enregistrement (RECORD). Essayez et
constatez ! Le preset 13 sert à piloter les canaux 9-16.
Sound Studio Pro II Evolution
7
Evolution UC-33e Getting Started
1. Power up your PC.
2. Insert the Evolution Installer CD-ROM.
The installer should open automatically. If not, select run from the start menu and
type d:\autorun where 'd' is your CD-ROM drive, then press ENTER.
3. Click on ’install drivers’.
4. Follow instructions on screen.
5. When finished exit setup.
6. Switch on the UC-33.
Windows will proceed with the installation of a USB driver and a MIDI driver. Once com-
pleted, you are ready to go. Windows may ask you to restart your computer if you have
previously installed an Evolution device.
1. Power up your PC.
2. Insert the Evolution Installer CD-ROM.
The installer should open automatically. If not, select run from the start menu and
type d:\autorun where 'd' is your CD-ROM drive, then press ENTER.
3. Click on ’Driver Installer’.
4. Follow instructions on screen.
5. When finished exit setup.
6. Switch on the UC-33.
Windows will automatically recognise the UC-33 and ask for the Evolution
Installer CD-ROM.
7. Select the CD-ROM drive and click OK.
Windows will then ask you to select the CD-ROM drive again for the MIDI driver.
8. If Windows reports the drivers have not been digitally signed, click on
’Continue Installation’.
9. Select the drive once more.
10. Click OK and you are ready to go.
If you do not have OMS installed, please run the OMS installer first. Otherwise jump to
“Installing the UC-33 OMS Driver” on page 8.
To install OMS:
Make sure that all programs are shut down before you begin the installer. Also make
sure you have removed any dongles you may be using.
1. Insert the Evolution Installer CD-ROM.
2. Double click on the Evolution Installer CD icon on your desktop
3. Double click on the OS 9 folder.
4. Double click on Install OMS 2.3.8
5. Follow the on-screen instructions
6. OMS will now take a few moments to install OMS. When it has finished it
will ask you to restart the computer, click ’Restart’.
Installing Drivers For Windows 98/ME
Installing Drivers For Windows 2000
Installing Drivers For Apple Mac OS 9.x