TOOLS REQUIRED
• Tape Measure
• Pencil
• Spirit Level
• Screwdriver
• PZ2 Screw Bit
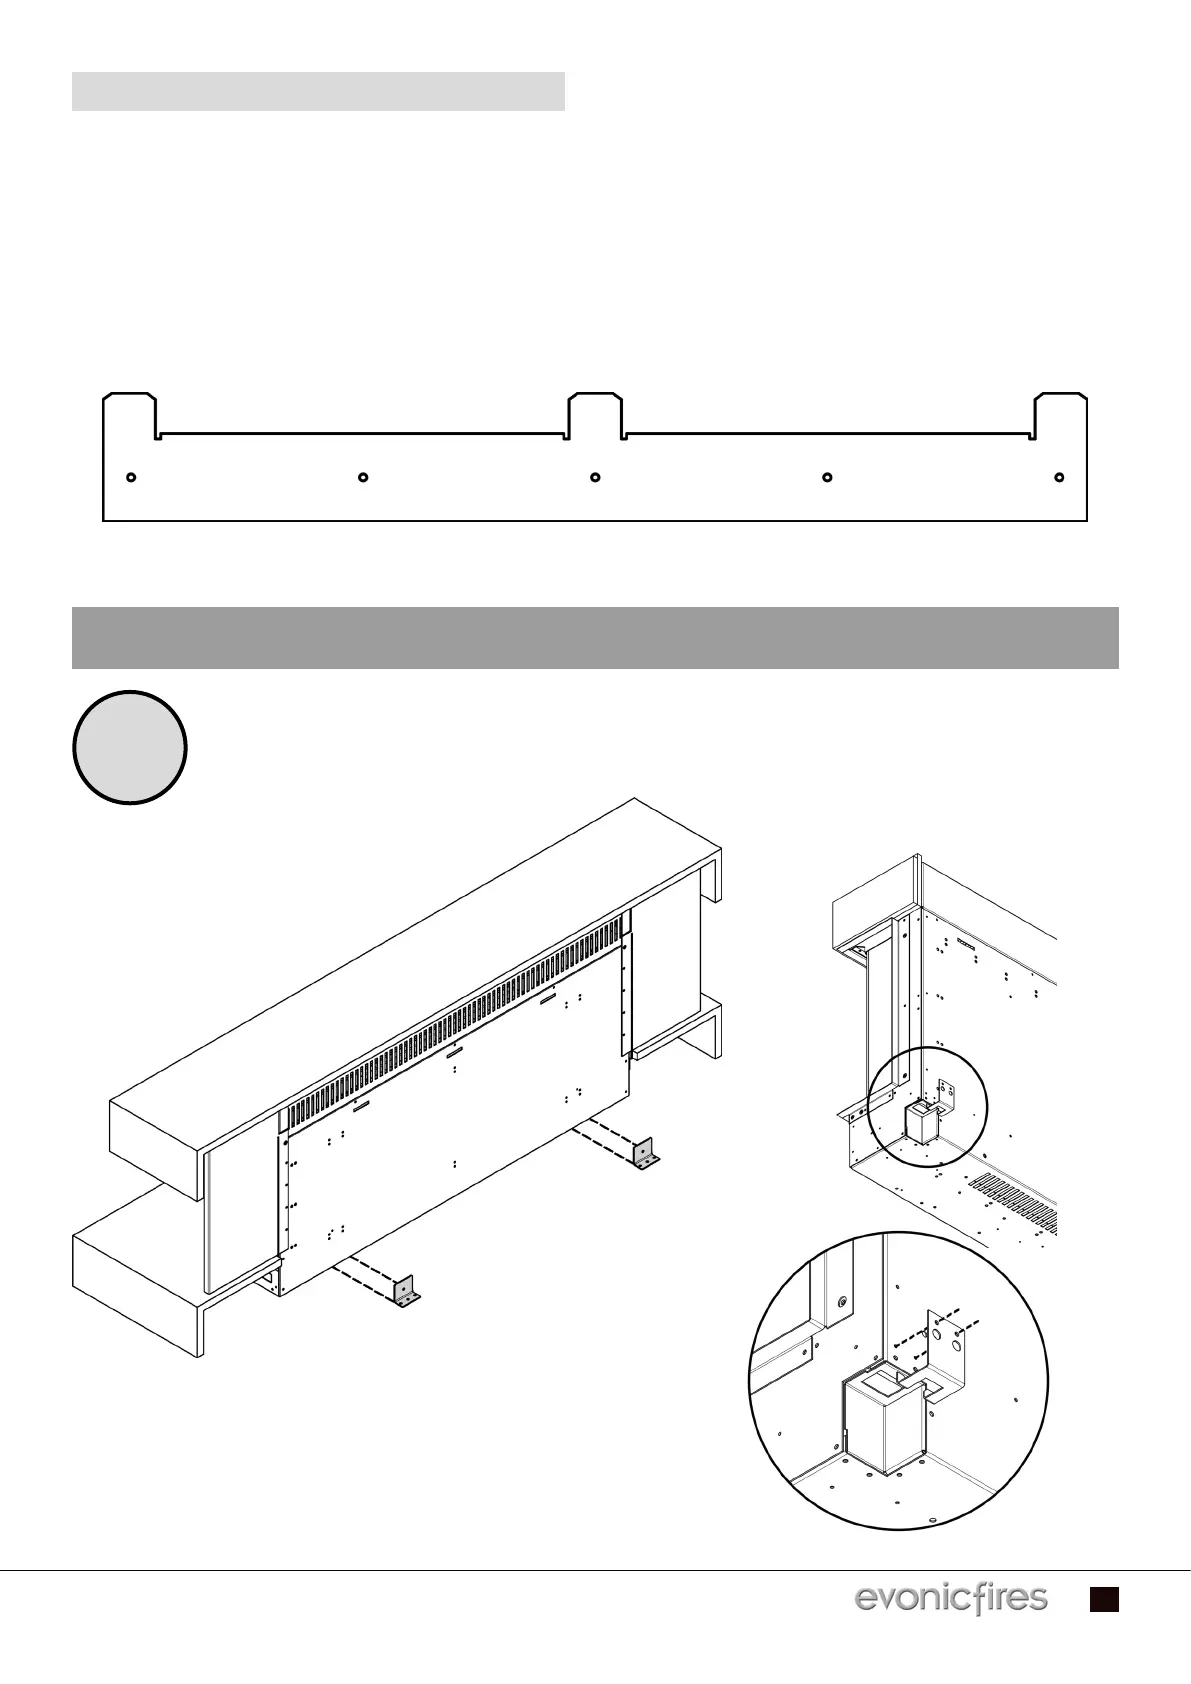
The appliance is supplied with a wall bracket, shown above.
INSTALLATION STEPS
• Drill Bit
• Wall Plugs (Masonry type supplied)
• Wall Screws (Masonry type supplied)
• Stud Detector (For plasterboard
installations only)
• Wall Anchors (For plasterboard
installations only. Not supplied)
1
Remove the two bottom mounted transit brackets, you won’t need these for
installation. Then screw on the IEC Clip to the bottom back of the case, with
the two provided screws.
9
EVONIC - 104 INSTRUCTION MANUAL TEMPLATE ISS. 1EVONIC - 104 INSTRUCTION MANUAL TEMPLATE ISS. 1 S&S ISS. 17S&S ISS. 17