8
Handle:
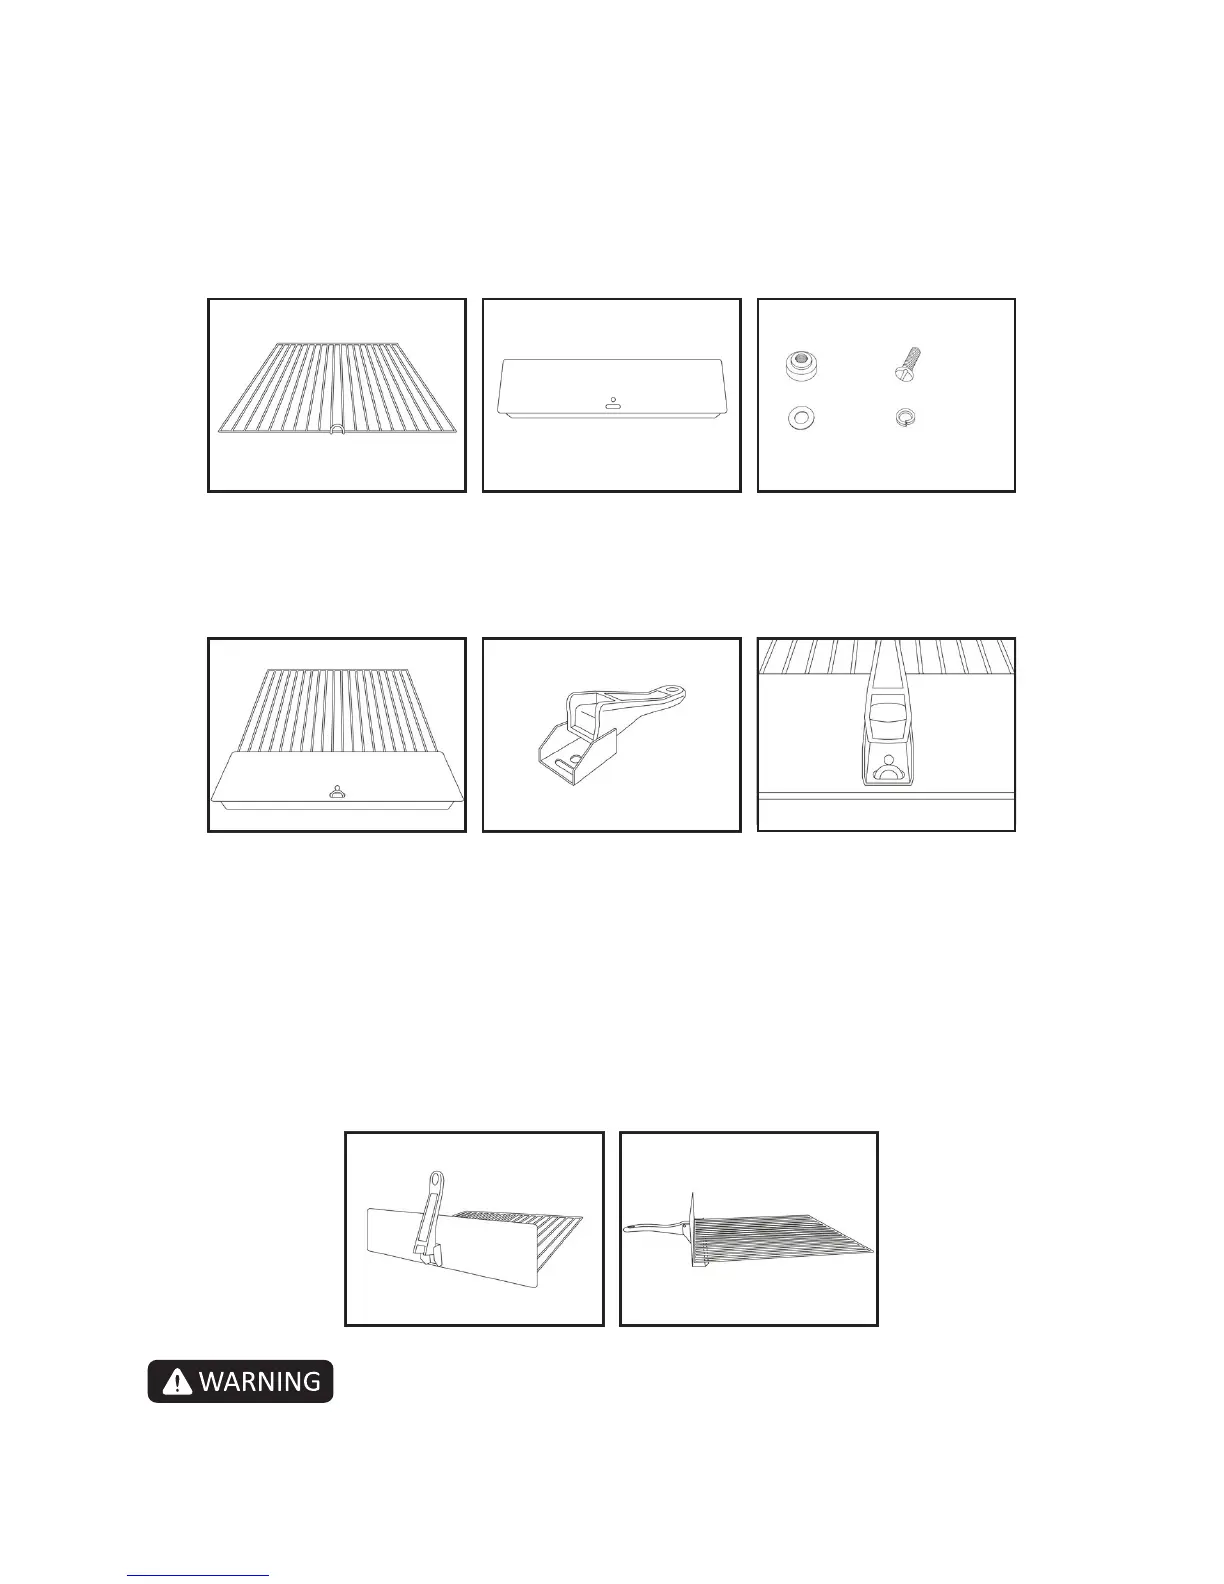
1. Remove the baking rack and baking rack cover from the pizza oven. Ensure that the
following components are included in the packaging: large bolt, thumb nut, washer and
locking washer.
2. Set the baking rack on a stable countertop with the loop facing up and slightly over the
edge of the counter.
3. Set the baking rack cover at on the baking rack so the loop on the baking rack is inserted
through the curved rectangular opening of the baking rack cover. (Fig. D)
4. Flaen the handle bracket as shown in Figure E. Place the handle bracket over the loop of
the baking rack so it is resng on the baking rack cover. (Fig. F)
5. Simultaneously, gently pull the handle and baking rack cover towards you. Ensure that the
handle and handle bracket remains at against the baking rack cover. (Fig. G)
6. Place the washer on the large bolt and insert the large bolt through the round hole
underneath the handle on the exterior of the unit. Ensure that the bolt captures the loop,
handle bracket and baking rack cover.
7. Thread the locking washer on the large bolt on the interior side of the baking rack cover.
Place the thumb nut on the large bolt aer the locking washer and ghten.
8. Lastly, posion the handle so it is perpendicular to the baking rack cover. (Fig. H) Slide the
assembled baking rack and cover into the pizza oven.
Fig. G Fig. H
Fig. D Fig. E
Fig. F
Improper assembly of the handle to the baking rack cover could cause the baking rack to rotate
and fall when food is removed from the pizza oven. Do not aempt to grab hot foods with bare
hands when removing food from the pizza oven.
Baking Rack
Fig. A
Baking Rack Cover
Fig. B
Fig. C
Various Components
Thumb
Nut
Washer
Locking
Washer
Large
Bolt