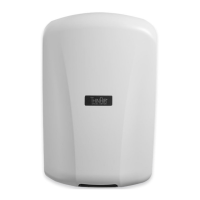
EXCEL DRYER, INC 1.800.255.9235 EXCELDRYER.COM ADMIN@EXCELDRYER.COM
357 CHESTNUT STREET, EAST LONGMEADOW, MA 01028
3/2018
2
READ AND SAVE THESE INSTRUCTIONS
WARNING: For proper electrical connections, check your local building codes.
Your unit must be installed by a qualied, licensed electrician.
PRE-INSTALLATION WIRING
• Checkthattheelectricalsupplycorrespondstothatshown
on the rating sticker of unit. If the dryer is connected to any
electrical supply other than that stated on the rating sticker of
theunit,permanentdamageorimproper,unsafeoperationof
the unit may result.
• Make sure electricity is switched off at the main panel before
installing,maintainingorcleaningthishanddryer.Dryer
must be installed in accordance with current local wiring and
building regulations.
• Do not wire this hand dryer into the lighting circuit. It must be
protected by an independent circuit.
• Dryer is intended to be permanently connected to power
supply,andmustbeproperlygrounded.
SAFETY
• Troubleshooting and internal maintenance must be performed
byqualiedservicepersonnel.
• Do not use any power wash equipment for cleaning on or
near this unit.
• Do not use for drying hair.
• Do not obstruct air inlets or outlets.
1. Disconnectthepowersourcepreviouslybroughttothehand
dryerlocation(seepre-installationwiringabove).
2. UsetheTamper-ProofWrenchsuppliedandremovethe
Tamper-ProofBoltonbottomofcoverliftingupwardsto
removecoverfrombaseplate.
3. Ifelectricalwiringentryistobemadefromtherear,remove
theappropriatepre-formedknockoutonthebaseplate.
Ifentryistobemadefromtheside,knockoutthepreformed
areaontherightsideofcoverforyoursupplyconnection
usingknockoutgasketprovided.Arigidconduitmustbeused.
4. Select the appropriate mounting height for dryer (Table 1)
andfastener,asrecommended(Table2).Thereshould
benoobstructionbetweenthehanddryerandtheoor.
Ifmountingoveracountertop,distancefromcountertodryer
mustbe15”(381mm)minimum.
CAUTION: Do not use Base Plate as a guide when drilling.
Make sure no pipe work (gas, water, air) or any electrical cables
or wires are located directly behind the area to be drilled.
5. AttachBasePlateatthefourcornerstosmoothwall.
Identifythevoltageofyourdryerfromtheratingstickerof
the unit. Then connect to a dedicated branch circuit not
exceeding20Amp.
6. Useoneof2knockoutsprovidedforserviceentryonbackof
BasePlate.Ifusingsurfacewiringuseknockoutinrightside
ofcover.UseKnockoutGasketsuppliedaroundconduitfor
water seal. See Mounting Details.
7. Secureelectricalwiringtoterminalsasindicatedbythe
schematicafxedtoblowerhousing.Anidentiedground
connectionpointissuppliedontheBasePlateforyour
equipment ground wire. Dryers should be installed per local
code requirements.
8. CarefullyreplaceCoverbyinsertingtopofcoverover
bracketandtiltingdownward.UseTamper-ProofBolt
previouslyremovedinstep2.
9. Restorepowerandtestforproperoperation.Inmultiple
installations,makesuretheserialnumbermarkedonthe
insidematchesthecovernumber.
10.ReturnTamper-ProofWrenchtoowner.
SUGGETSTED MOUNTING HEIGHT
from oor to bottom of dryer:
Men 45"(114cm)
Women 43"(109cm)
Teenagers 41"(104cm)
SmallChildren 35"(89cm)
Accessible 37"(94cm)
MOUNTING HARDWARE
Recommended Fastener (not supplied):
MasonryWall ½”ExpansionSleevewith¼”LagBolt
HollowWall ¼”WingTypeToggleBolt
WoodenWall ¼”LagScrewWithWasher
1 2
INSTALLATION INSTRUCTIONS
TABLE1 TABLE2
IMPORTANT SAFETY INSTRUCTIONS
 Loading...