Do you have a question about the Exit Galaxy and is the answer not in the manual?
Key safety guidelines for operating the basketball system, including adult supervision and proper use.
Recommendations for storing the basketball system outdoors safely.
Rules and precautions for playing basketball with the system.
Guidance on maintaining the system and understanding warranty terms.
Assemble the middle pole sections, adjustment knob, and handle slider.
Connect the top and bottom poles to the middle pole, leaving bolts loose.
Attach arm brackets to the backboard using bolts and locknuts.
Attach the backboard bracket to the ring and then to the backboard.
Connect the upper arm to the arm bracket and the upper arm connector to the upper arm.
Attach the spring arm to the backboard bracket, leaving bolts loose.
Attach the bottom arm to the backboard bracket, leaving bolts loose.
Install the upper arm to the top pole with spacers, leaving bolts loose.
Install the bottom arm to the top pole with spacers, leaving bolts loose.
Install the spring arm to the top pole, leaving bolts loose.
Assemble rear handle, attach adjustment arm to bottom arm and slider.
Attach springs to the spring arm and bottom arm, then hang on bolt.
Install the anchor connector to the bottom pole using bolts and locknuts.
Dig a pit, place anchor, and pour concrete to secure the base.
Attach the anchor to the anchor connector using bolts and washers.
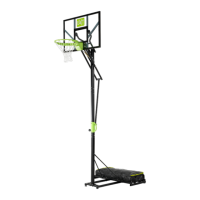
Instructions on how to adjust the rim height using the adjustment knob.
| Material | Metal, Plastic |
|---|---|
| Product type | In-ground |
| Product color | Black, White, Green |
| Frame material | Steel |
| Backboard shape | Rectangular |
| Number of pieces | 4 pc(s) |
| Suggested gender | Boy/Girl |
| Recommended usage | Outdoor |
| Backboard material | Polycarbonate (PC) |
| Recommended age (min) | 3 yr(s) |
| Height adjustment range | 2300 - 3050 mm |
| Minimum number of players | 1 |
| Number of height positions | 5 |
| Package volume | 184400 cm³ |
| Package weight | 53900 g |
| Packaging languages | Multi |
| Pole package weight | 31500 g |
| Anchor package weight | 9400 g |
| Ring/net package weight | 5400 g |
| Backboard package weight | 7600 g |
| Number of packaging boxes | 4 |
| Pole package dimensions (WxDxH) | 1250 x 390 x 147 mm |
| Anchor package dimensions (WxDxH) | 200 x 200 x 630 mm |
| Ring/net package dimensions (WxDxH) | 650 x 530 x 135 mm |
| Backboard package dimensions (WxDxH) | 1190 x 790 x 40 mm |
| Quantity per pallet | 5 pc(s) |
| Quantity per intermodal container (20ft) | 135 pc(s) |
| Quantity per intermodal container (40ft) | 280 pc(s) |
| Quantity per intermodal container (40ft, HC) | 300 pc(s) |
| Invoice unit | No |
| (cdm) Audiences | Child, Adult |
| (cdm) Seasonalities | Permanent |
| Commercial unit type | Consumer unit single |
| (cdm) Parental presence | Recommended |
| Target audience details | Child, Teenager |
| EU TSD warning | To be used under direct adult supervision |
| (cdm) Additional colors | White, Green |
| Safety directive age warning (2009/48/CE) | Not suitable under 36 months |
| Height | 3050 mm |
|---|---|
| Weight | 48600 g |