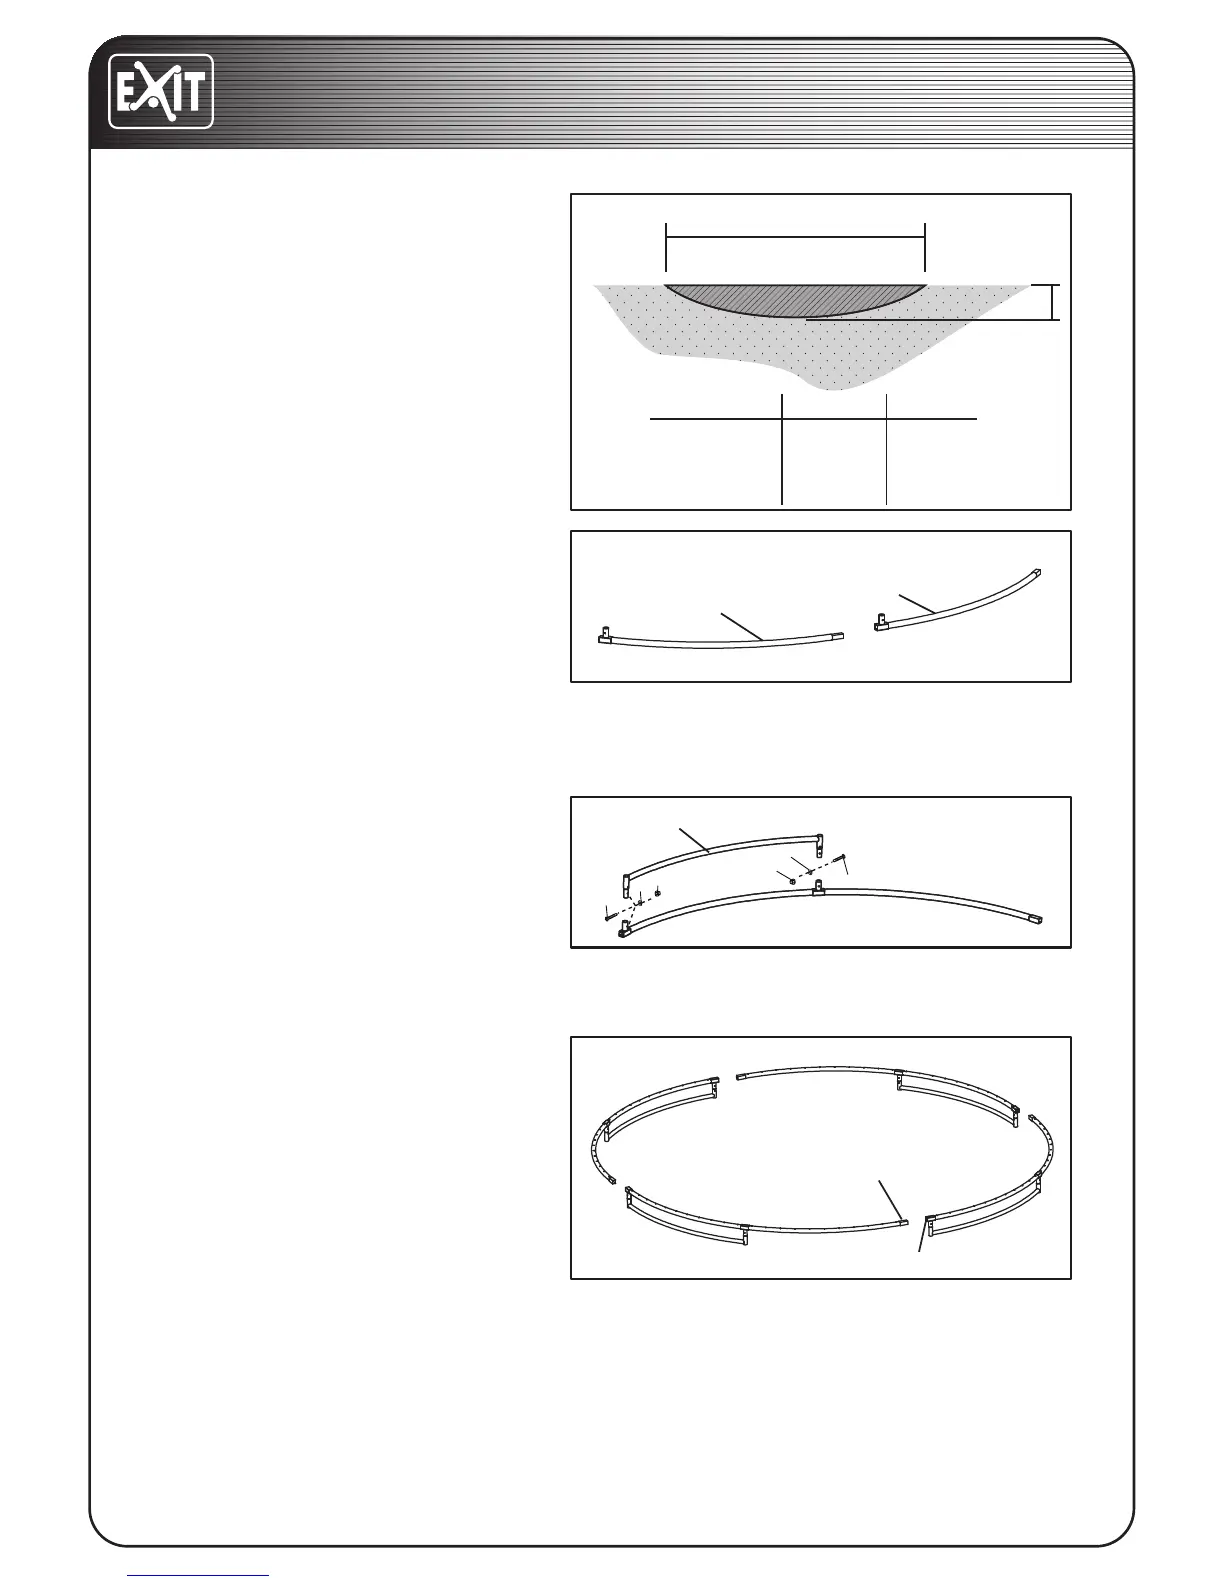
STEP 1
Before assembling your trampoline,
dig a pit which suit for your trampo-
line, please refer to the table 1 for
the further information.
STEP 2
Lay two Top Tubes (1) with T-joint on
the ground in the positions as shown.
Make sure the Top Tubes are turned
so the small holes (spring holes) are
facing the ground.
Insert one end of the Top tube (1)
with T-joint into the other Top tube(1)
with T-joint as shown .
STEP 3
Insert the leg(2) into the T-joint
as shown, secure with M6 X45mm
Bolt(4) and M6 Nut(5) and M6 Wash-
er(10), the unt A will be attached.
Repeat steps 1 and 2 three additional
times to assemble three more leg
section
1
D1
Size EXIT InTerra D1øPit
ø8ft
ø10ft
ø12ft
(ø244cm)
(ø305cm)
(ø366cm)
ø194cm
ø255cm
ø316cm
min. 65cm
min. 70cm
min. 75cm
ø14ft (ø427cm) ø377cm min. 75cm
øPit
2
1
1
3 2
10
5
4
5
10
4
4
Large End
Small End
STEP 4
Note: This step requires two persons.
During this step, you will connect the
four assembled leg sections together.
Stand two leg sections and hold them
in the positions as shown. Slide the
large end of one of the remaining Top
Tubes onto the small end of the indi-
cated Top Tube on one of the leg sec-
tions. Insert the small end of the Top
Tube into the indicated Top Tube
with T-joint on the other leg section.
Repeat this step until all four leg sec-
tions
are connected. When this step is
completed, the frame will be fully as-
sembled and freestanding.