WARNING!! : Please be careful where your hands and other parts of the
body are placed as the connector points and spring attachments can cre-
ate hand or body traps.
STEP 5
Caution: It is wise to wear
leather gloves while attaching
the Springs. Be careful where you
place your hands as the Springs
and frame joints can pinch.
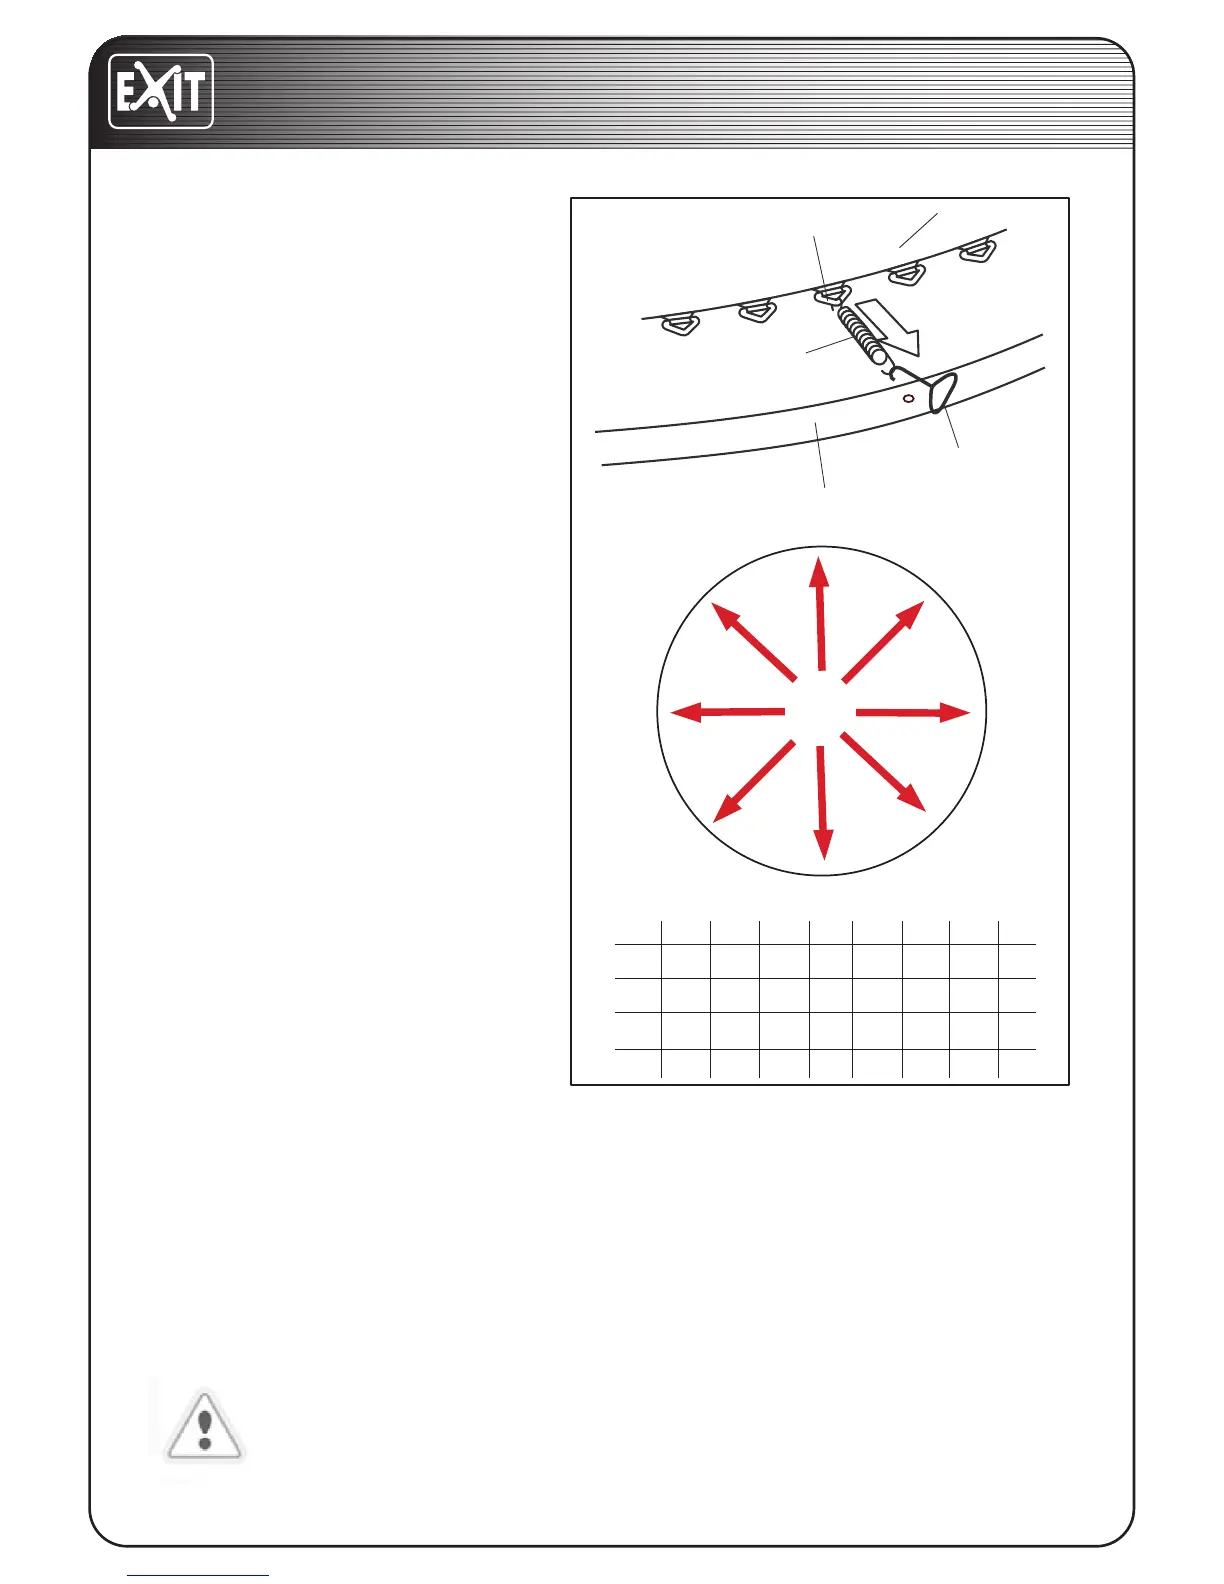
Attach the Springs (7) as follows:
Hook one end of a Spring ( 7 ) into a
V-ring sewn on the Jump mat. Hook
a Spring tool (10) shown as the inset
drawing in next to the free end of
the Spring(7 ). Pull it by the spring
tool(12) unti l it reaches the frame.
Push the end of the Spring into a hole
in the frame. Unhook the Spring tool.
The rst spring will be attached
Follow the diagram to install each
spring in the correct order. after the
rst spring has been attached to both
mat and frame attach the second
spring to the opposite side of the
trampoline , make sure to count the
holes in the frame and V-rings of
the mat in the appropriate position.
Continue following the order until the
rst 8 springs have been attached. Be
sure to match the correct mat ring to
the correct frame hole. After the rst
8 springs have been attached con-
tinue to attach all remaining springs
to the mat and frame in any order.
Note:The spring has a large hook
which attaches to the frame and a
small hook which attaches to the
mat ring.
Safety Notice:
as you attach Springs, care-
fully count the V-rings and frame
holes. If a V-ring or a hole is
skipped, reattach the spring in
the proper position.
5
#1
#3
#2#4
#5
#7
#8
#6
7
V-ring
Frame
12
6
8ft
#1 #2 #3 #4 #5 #6 #7 #8
1 2814 42 7 21 35 49
1 3618 54 9 27 45 63
1 4422 66 11 33 55 77
12ft
1 3216 48 8 24 40 5610ft
14ft