EasyManua.ls Logo

Exposure Lights DIABLO MK9 User Manual

Exposure Lights DIABLO MK9
6 pages
To Next Page IconTo Next Page
Page #1 background imageLoading...
Page #1 background image
CHARGING
USER GUIDE
DIABLO MK9 • AXIS MK5 • JOYSTICK MK12 • SIRIUS MK6
Fully Charge your light before rst use.
Locate the charging port by pulling away the silicone Storm Cap.
IMPORTANT: After charging is complete replace the Storm Cap to prevent ingress of mud and grit.
Axis/Diablo/Joystick: Fully insert either the Smart Charger or USB top up cable and begin charging
from a mains or USB supply respectively.
If you are using the Smart Charger the LED on the charger will go red for the rst 95% and then go
green for the trickle charge.
Sirius: Fully insert the USB top up cable and begin charging from a USB supply.
On the back of the light there is a single LED which will ash green to indicate that it is charging
and then turn solid green when the light is 95% charged, then the remaining 5% is trickle charged
Approximate charge times are:
3 hrs from the mains charger (1500mA)
Up to 7 hours from the USB top up cable using a 500mA source
CHARGE PORT
/SMART PORT
Question and Answer IconNeed help?

Do you have a question about the Exposure Lights DIABLO MK9 and is the answer not in the manual?

Exposure Lights DIABLO MK9 Specifications

General IconGeneral
BrandExposure Lights
ModelDIABLO MK9
CategoryFlashlight
LanguageEnglish

Summary

Charging Your Exposure Lights

Charging Procedure and Indicators

Instructions for connecting the charger, model-specific steps, and LED charge status indications.

Approximate Charge Times

Estimated charging durations from mains and USB power sources.

Post-Charge Maintenance

Important reminder to replace the Storm Cap after charging to prevent dirt ingress.

Light Operation and Battery Status

Turning On/Off and Mode Selection

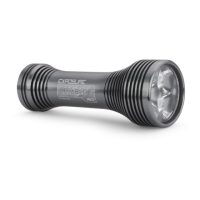
How to switch the light on, off, and cycle through brightness modes using the function button.

Mode and Battery Indicators

LED colors indicating current mode (High, Medium, Low) and battery level.

Low Voltage Warning

How the light warns of low battery (10% or less) and the behavior of the warning flashes.

Flash Mode Operation

Instructions for activating and returning from flash mode, and its relation to SOS.

DayBright Mode (Sirius Only)

Recommendation and activation method for DayBright mode on Sirius models.

Mounting Options

Helmet Mounting Guide

Instructions for helmet mounting, including bolt selection, tool usage, and angle adjustment.

Handlebar Mounting Guide

Details on handlebar mount orientation and a warning about cable interference.

Advanced Features and Settings

Lanyard Fitting and Safety

Instructions for attaching a lanyard for security and a safety warning for handlebar fitting.

Optimised Mode Selector (OMS)

Explanation of OMS for tailoring burn times, how to access and select programs, and data location.

Specialized Functions

Tap Activated Power (TAP)

How to activate TAP for brightness control, adjust sensitivity, and a safety warning for helmet use.

Smart Port Technology+ (SPT+)

Using the charge port as an output for accessories or to charge USB devices.

Intelligent Thermal Management (ITM)

Explanation of automatic temperature regulation for optimizing performance and longevity.

Maintenance and Warranty

Light Maintenance Guidelines

Recommendations for cleaning, avoiding damage, and monthly recharging for storage.

Safety Warnings and Disclaimer

Precautions for operating powerful lights, charging safety, and liability disclaimer.

Warranty and Service Information

Details on the 2-year warranty, contact information for service, and return procedures.