o Motors Enabled – the robot’s motors are not isolated anymore, so the robot can be
driven manually or autonomously (this takes a few seconds to change after checking the
“Auto” box or pressing the green gamepad button).
o Driving – the robot is in motion.
o Gas Detectors On – The gas detectors are powered up (they have individual warm-up
times and only after this time the gas displays will start showing measurement values).
o Manual Control – the robot is being controlled from this control station by a driver.
▪ Hovering over an icon or text will often provide more information.
▪ Drivers can change the robot location on the screen by clicking on the “Site Config” option in
the navigation menu to the top left of the screen. They can report issues to our engineers
using the “Feedback” option in the user menu to the top right of the screen.
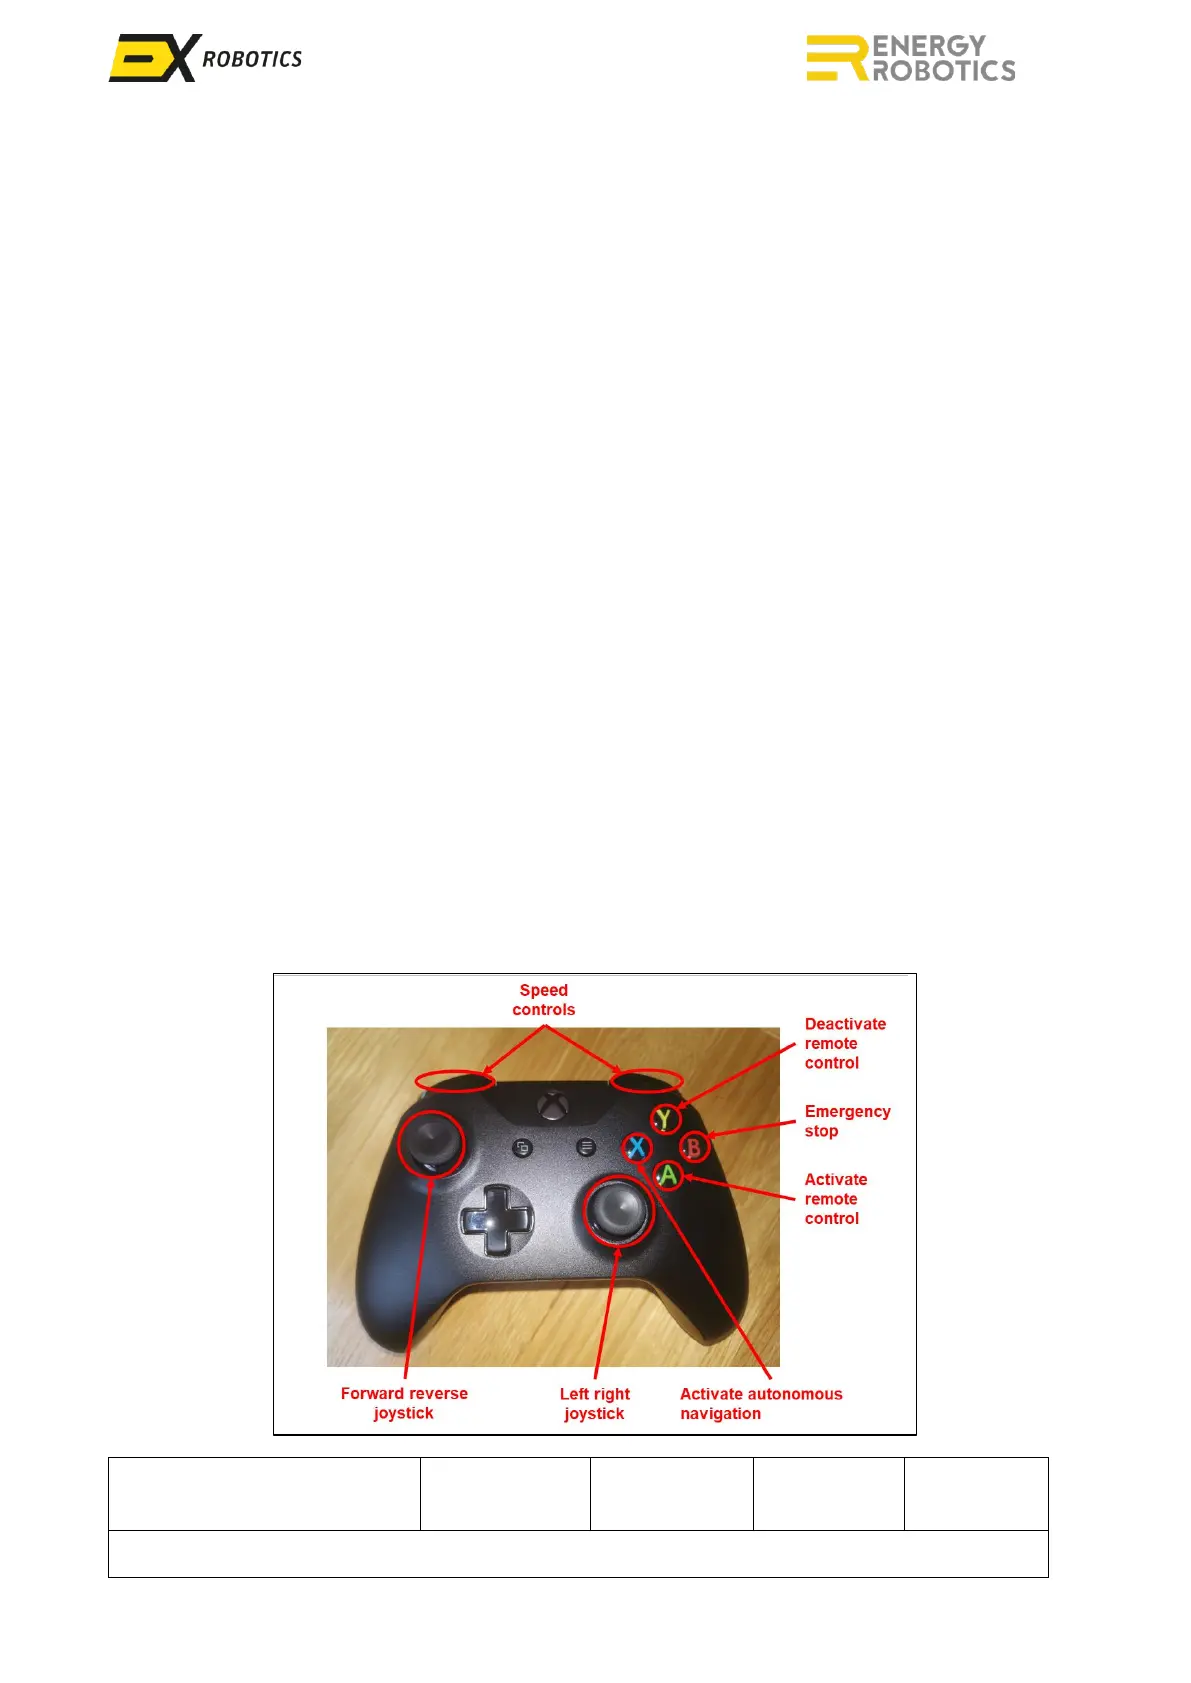
The gamepad controls are illustrated below:
▪ The green button activates remote control by enabling the gamepad and drive motors.
▪ The blue button switches from remote control to autonomous driving.
▪ The yellow button deactivates remote control by disabling the gamepad.
▪ The red button on the gamepad stops the robot and isolates the motors, identical to the
“Stop” icon.
▪ The analogue joysticks are used to drive (left stick) and steer (right stick) the robot.
▪ For ExR-2, the right stick rotates the inspection module panning if the button under the LB
button is held down.
▪ Holding down the LB/RB buttons changes speed mode (slowest - no buttons pressed, fastest -
both buttons pressed).
When in autonomous mode, the robot will stop if the connection to the driver’s control station is
broken for more than 5 seconds. This means that an active control station is required for the robot
to be operational in autonomous mode. The robot will also stop if it loses sight of the orange line.
In this situation an audio/visual alarm will be triggered on the robot control screen.